Useful Strip down photos

Where all the workshop knowledge lives together.
User avatar
darkember
Posts: 2194
Joined: Wed Sep 08, 2010 10:48 pm
Location: South Wales Abergavenny

Useful Strip down photos

Post by darkember »

Decided to strip the bike to check the valve clearances on the rear cylinder, main reason was to cure a slight oil leak on the APE CCT. Here are some photos of the job. Note this is a 2002 F2 model with the 19l tank. You will see there is no tap so I had to be a little adaptive.

Image

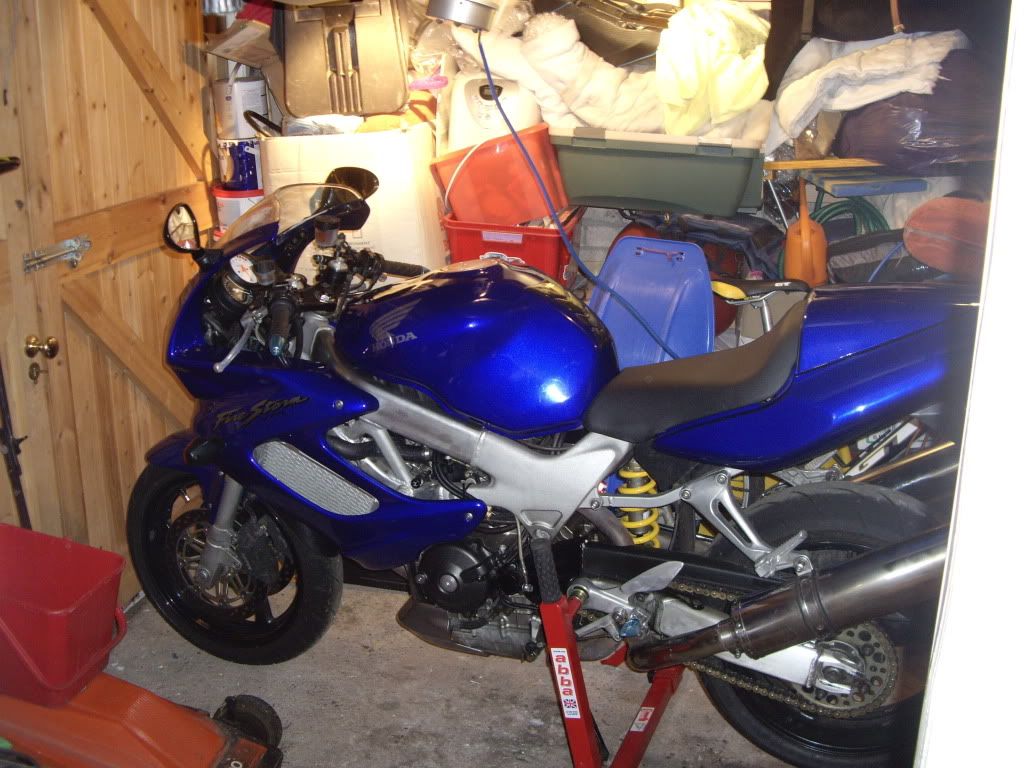
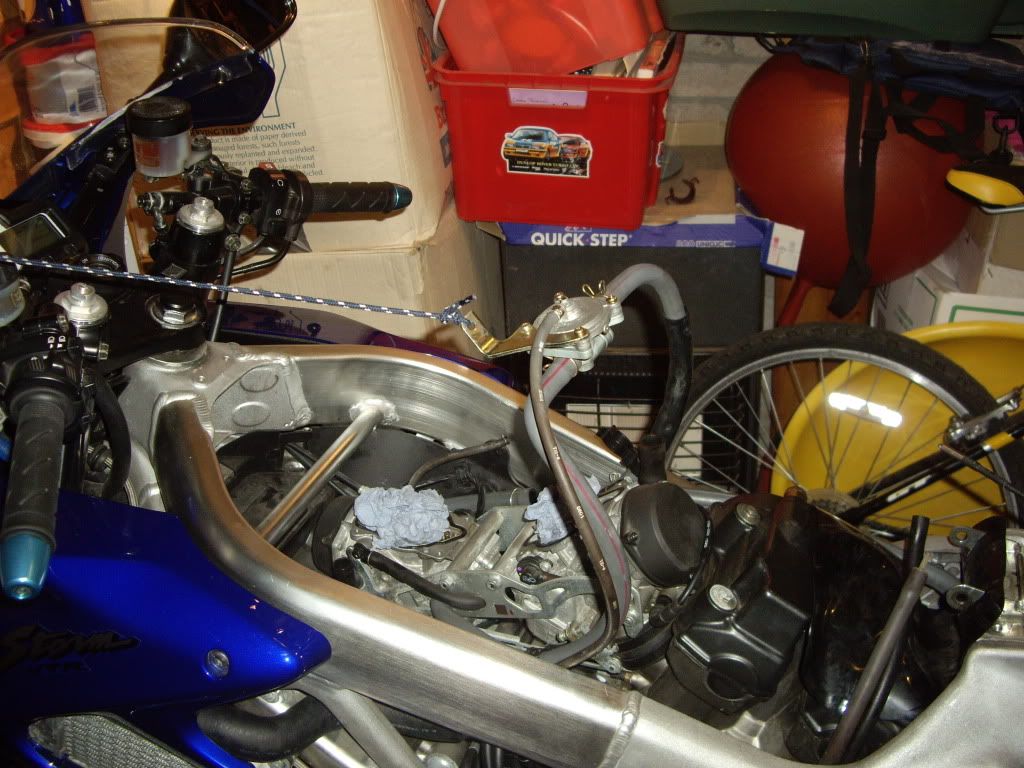
View before work began

Image

Seat removed

Image
Image

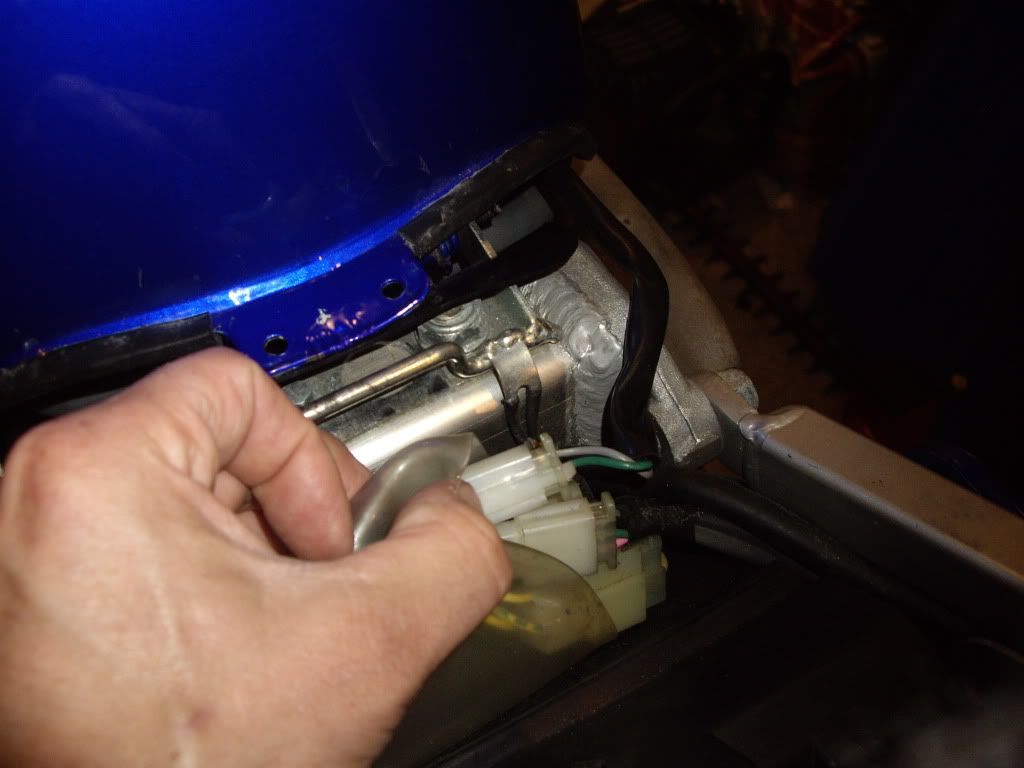
Disconnecting fuel sender unit

Image

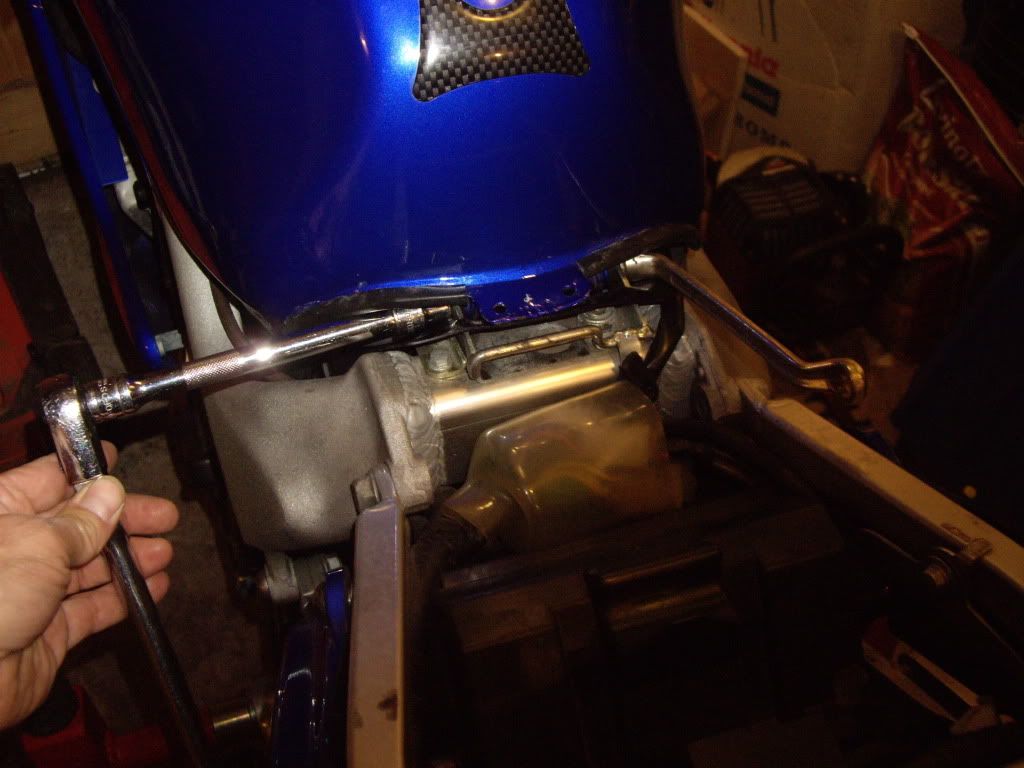
Loosening pivot bolt at the rear of the tank

Image

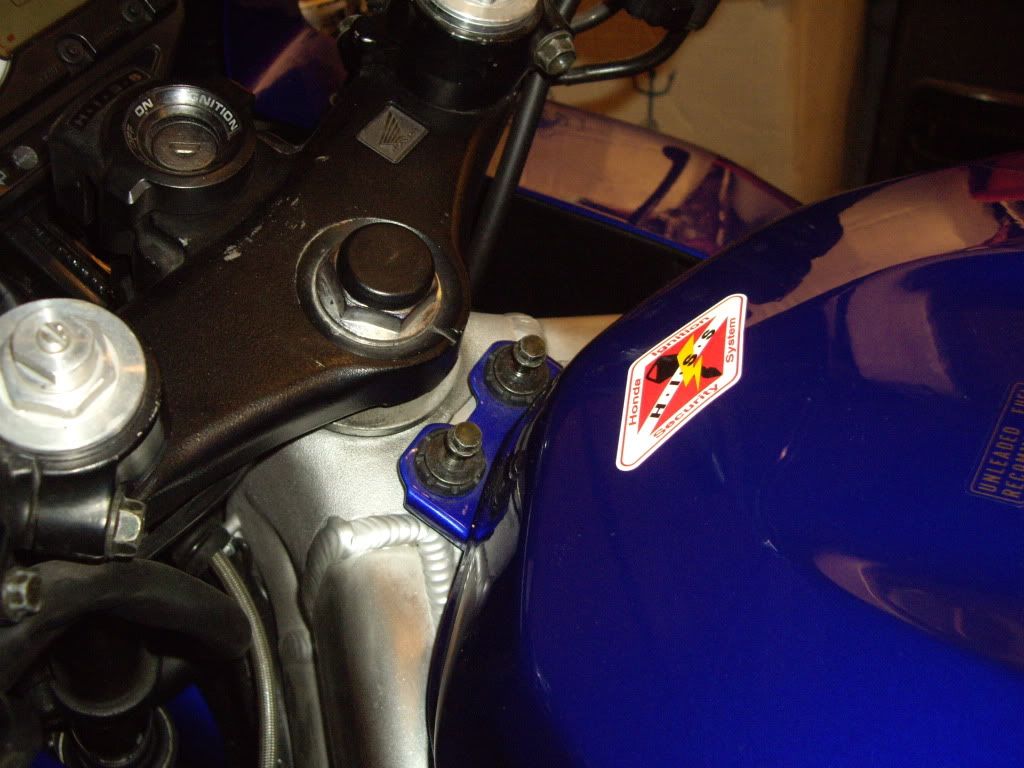
Removing front bolts

Image

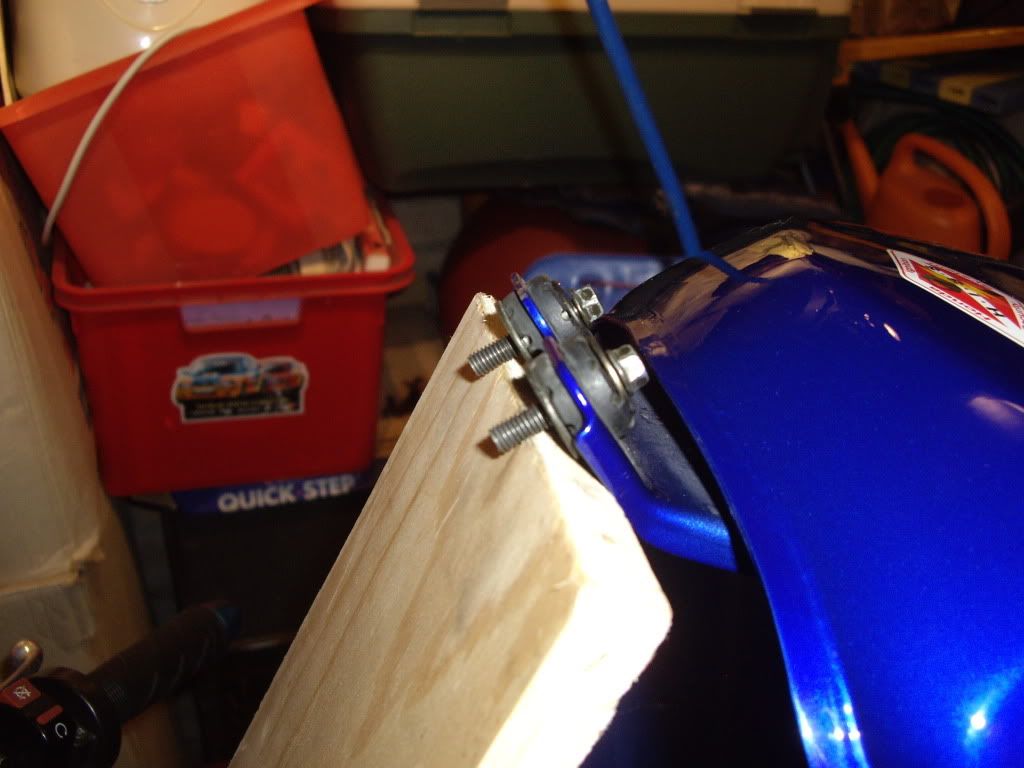
Support the tank using a piece of ply, note I use the tank bolts as added slippage protection

Image

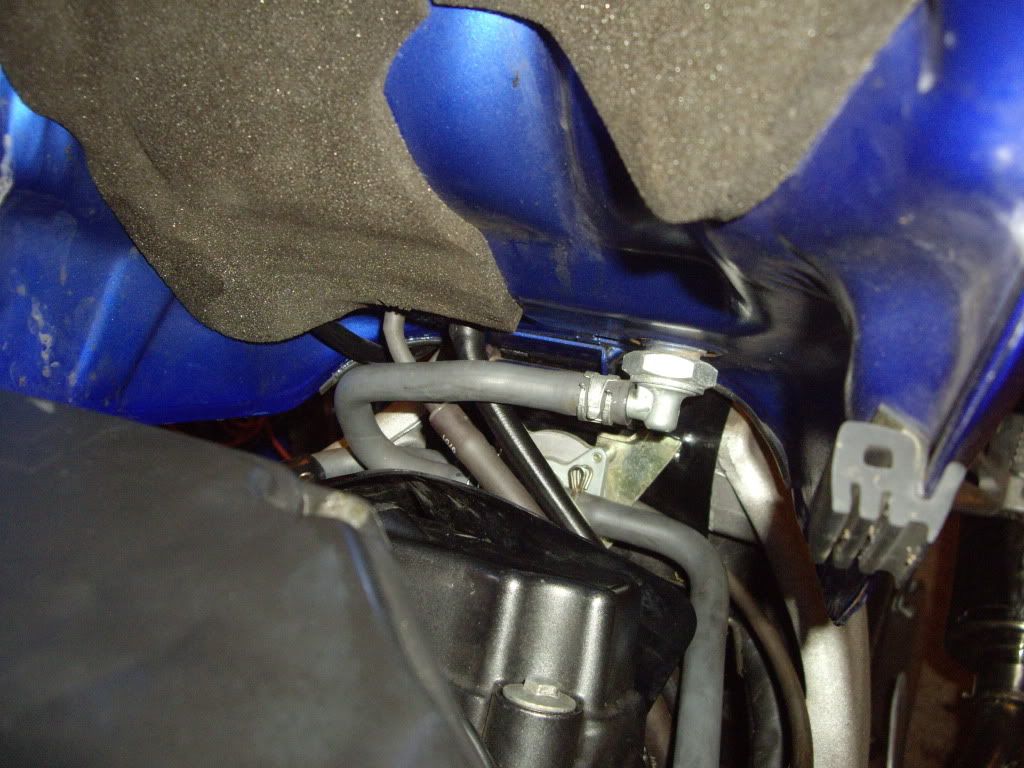
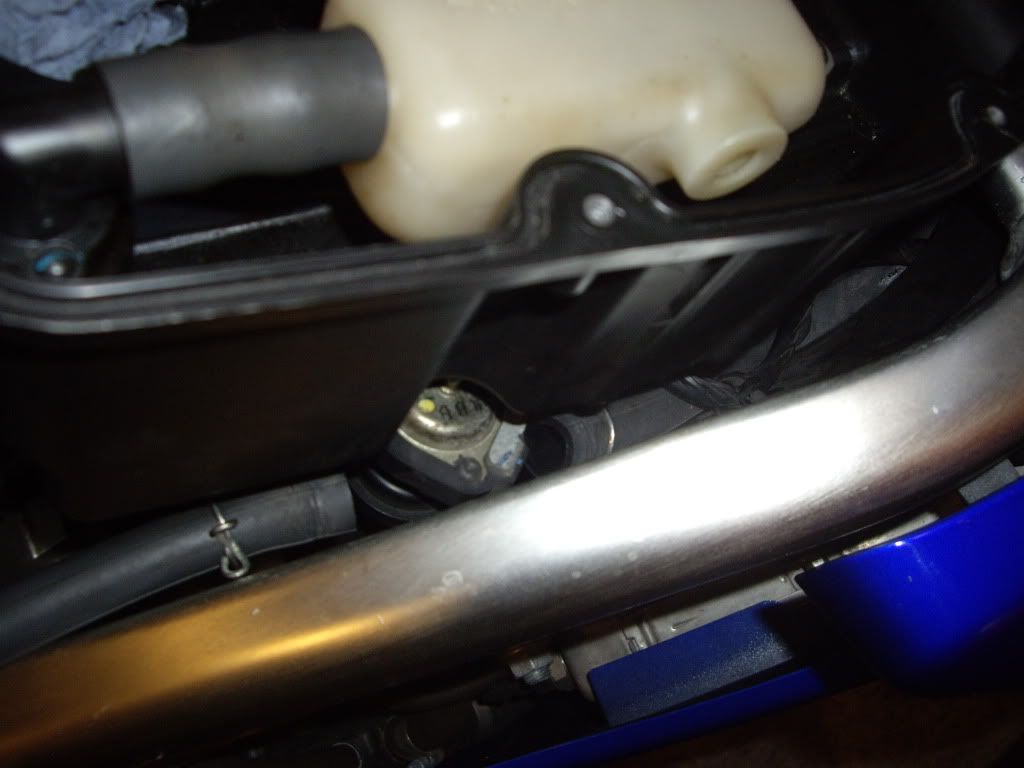
View under the tank note 2002 model and no shutoff valve.

Image

Adapted tool to clamp off the fuel line. Note, have as little fuel as possible in the tank. I had 1 bar on the fuel gauge

Image

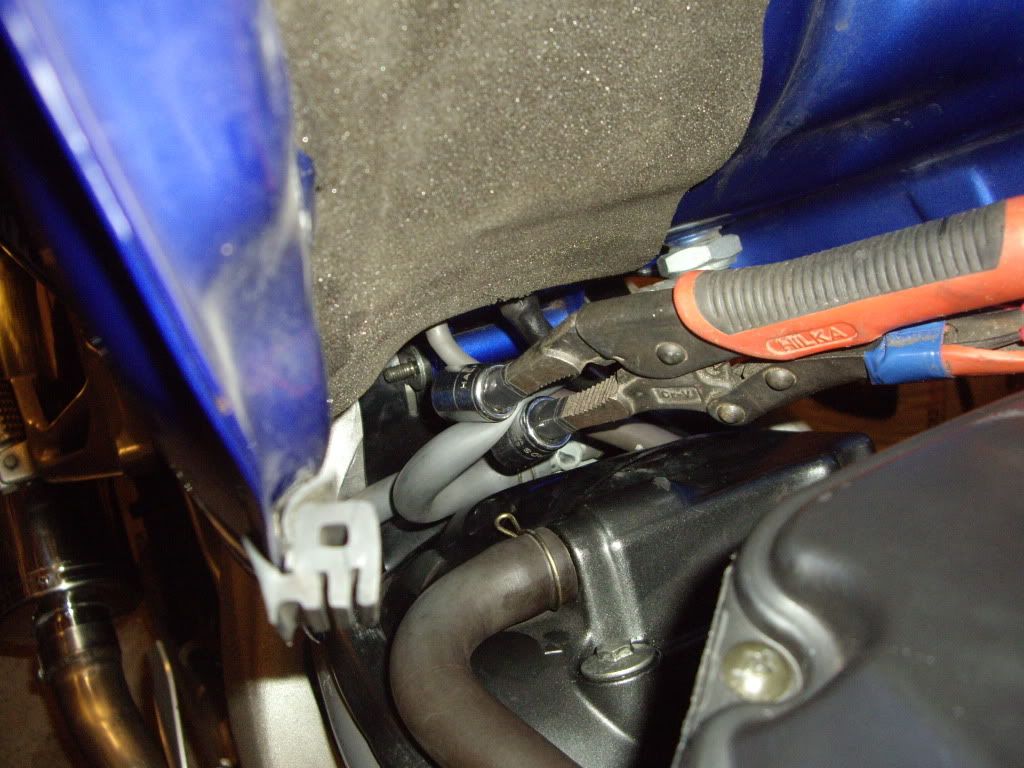
Fuel line clamped off. Note the square rubber tank protector (one on each side) in the foreground of the above photo can fall off, don't loose them.
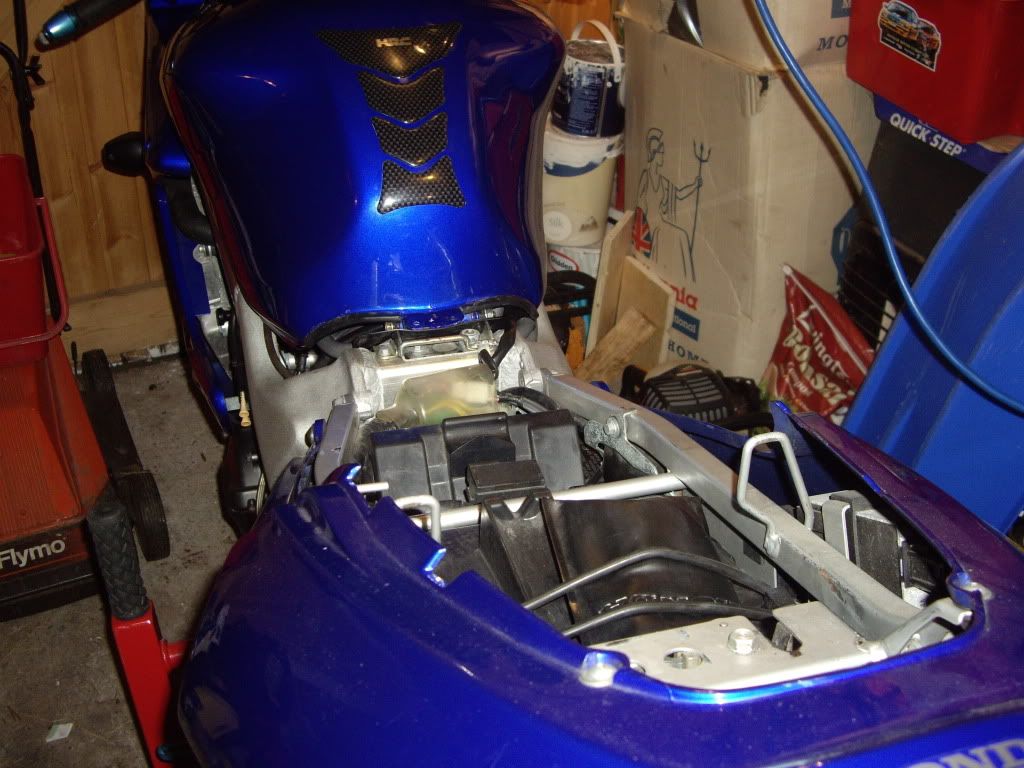
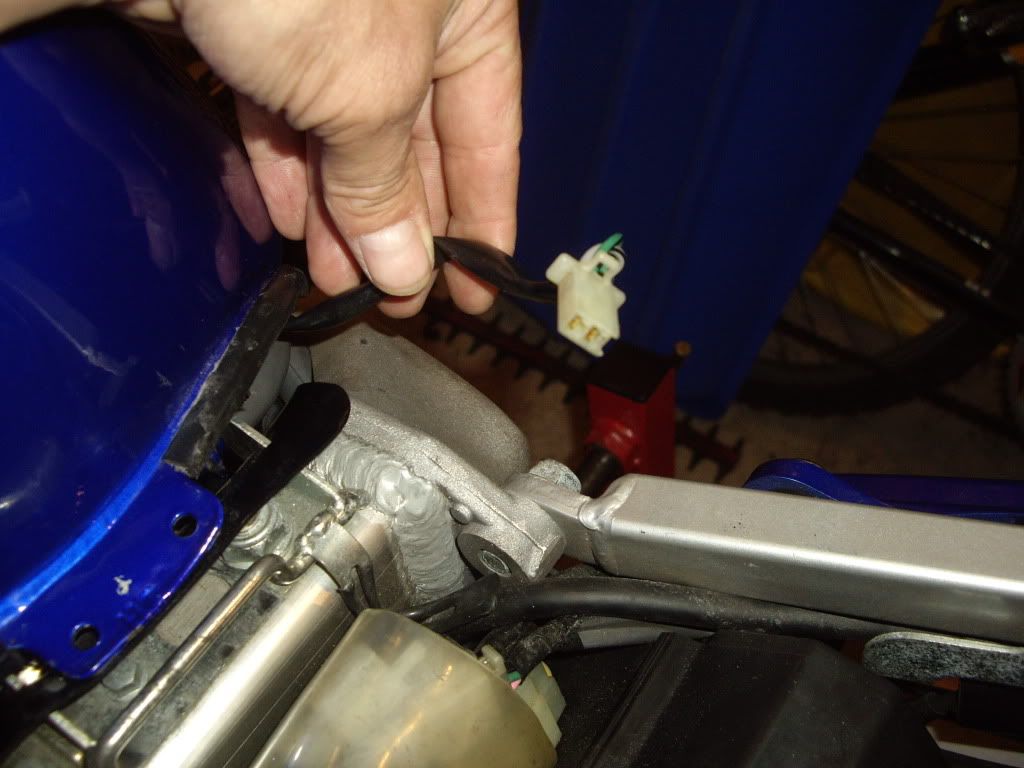
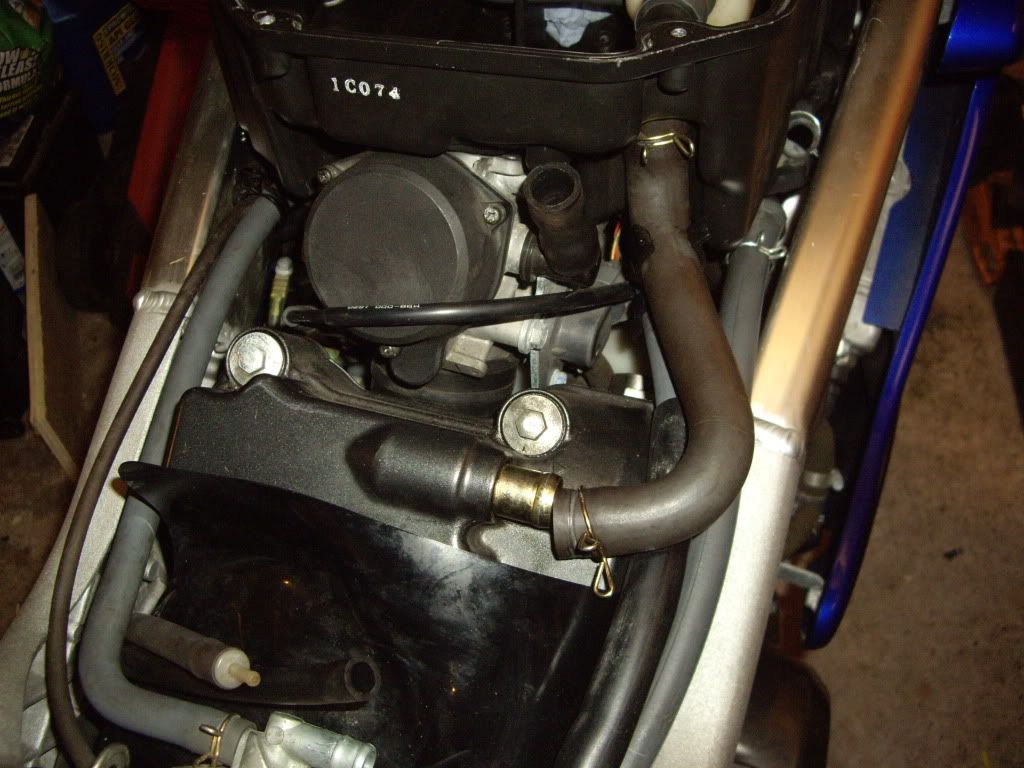
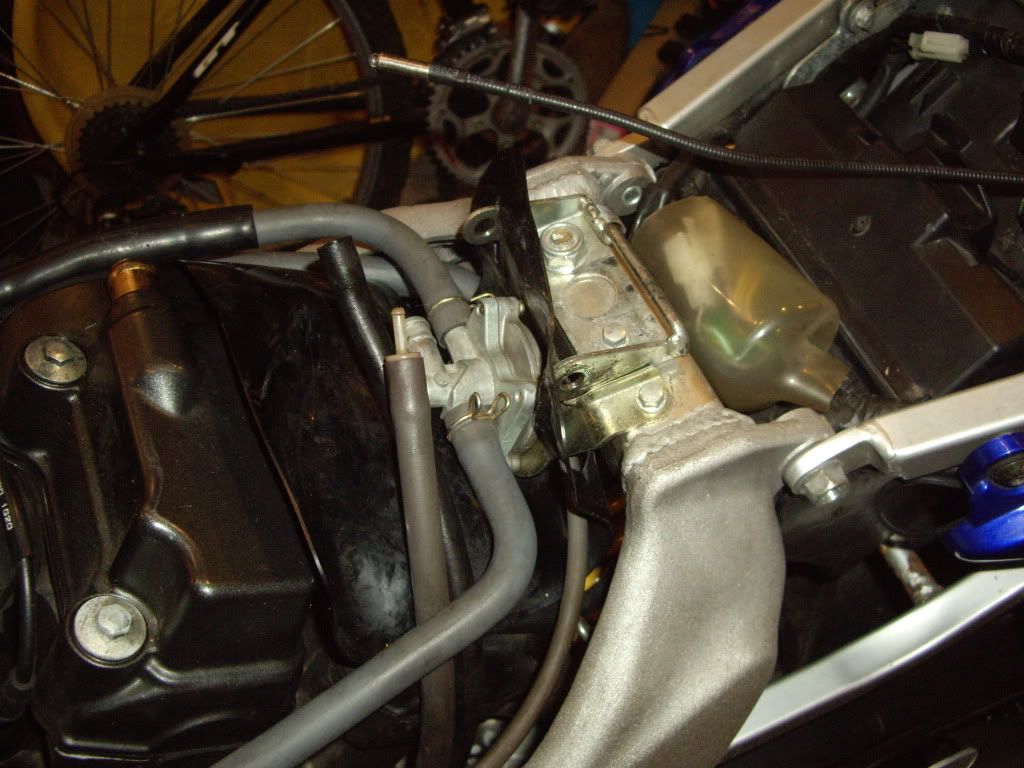
Next follow the main fuel delivery line from the left of the clamping device round to the fuel vacum assembly. Unscrew the fuel line clamp & pull off the fuel hose, there will be a little fuel spillage so have a rag at the ready. Then pull off the vacum & overflow pipes from the bottom of the tank. Those are the 2 pipes still attached to the tank avove the clamping device in the above photo. Note, I have alread removed the nut at the end of the pivot bolt ready for tank removal. Support the tank, remove the pivot bolt , and lift away. Place the tank somewhere safe & I plugged the fuel delivery pipe using a 12mm bolt wrapped with some PTFE tape, this allowed me to remove the clamping device so as not to damage the pipe any further.

Image

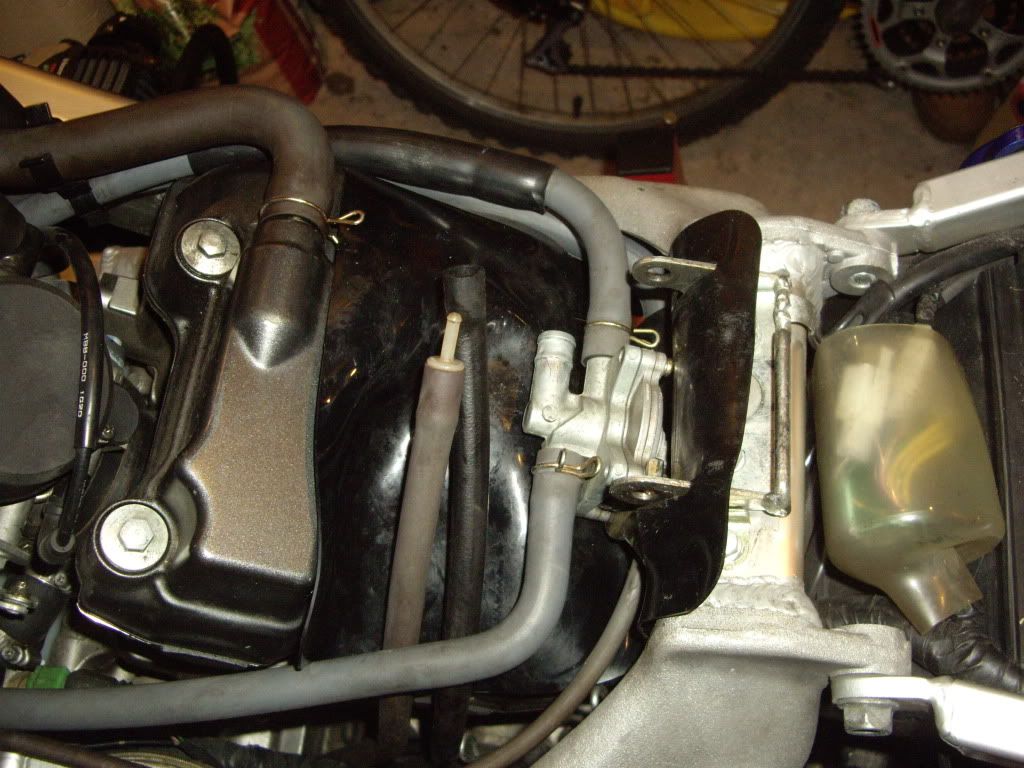
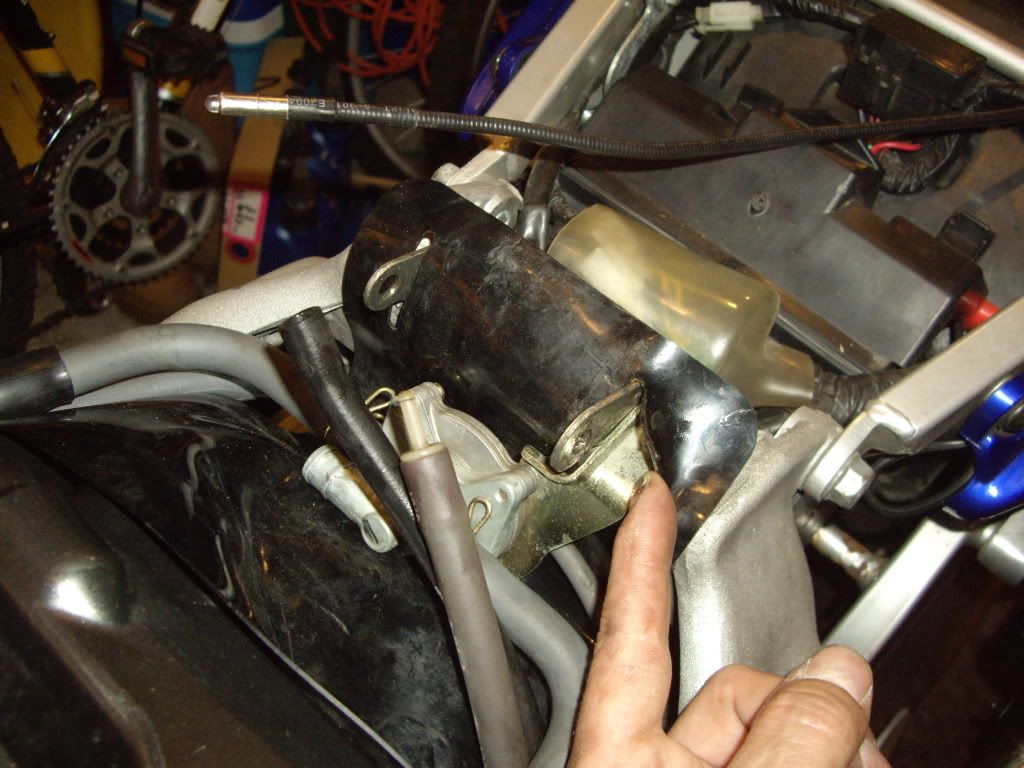
Photo of the tank removed showing the vacum assembly including both main carb fuel feed pipes and the small vacum control pipe.

Image

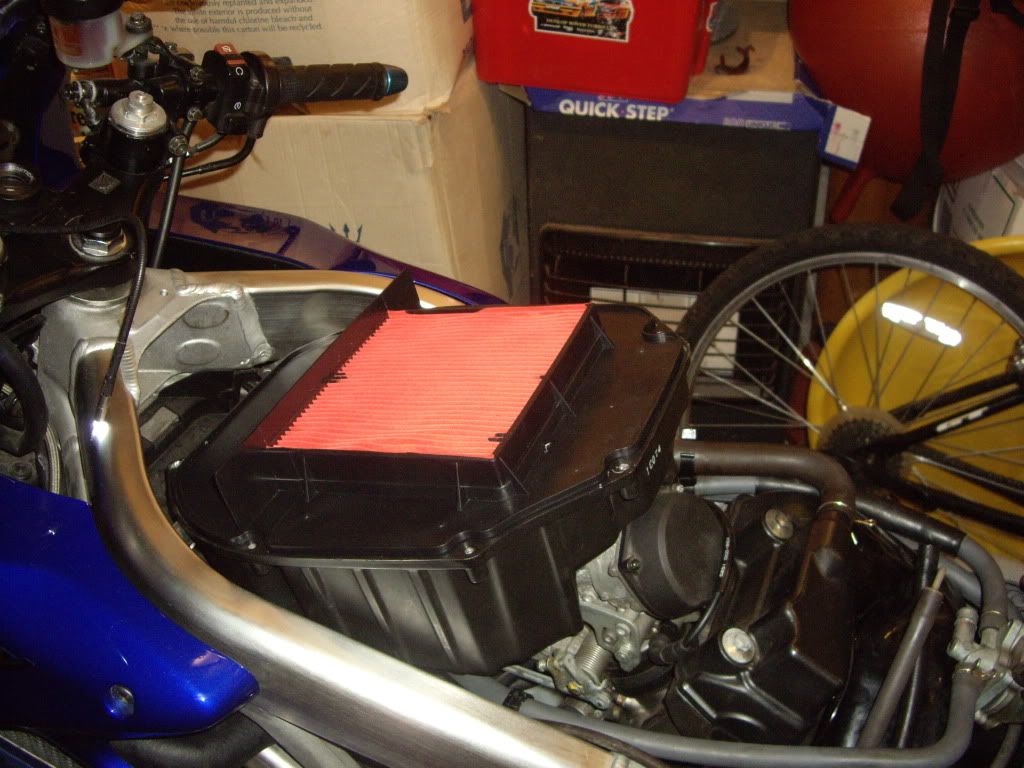
Airbox lid removed showing air filter. Note you can remove this lid & change the air filter without removing the fuel tank by having it pivoted virtically as shown earlier, please have an assistant available to support the tank as you remove the airbox lid just in case.

Image

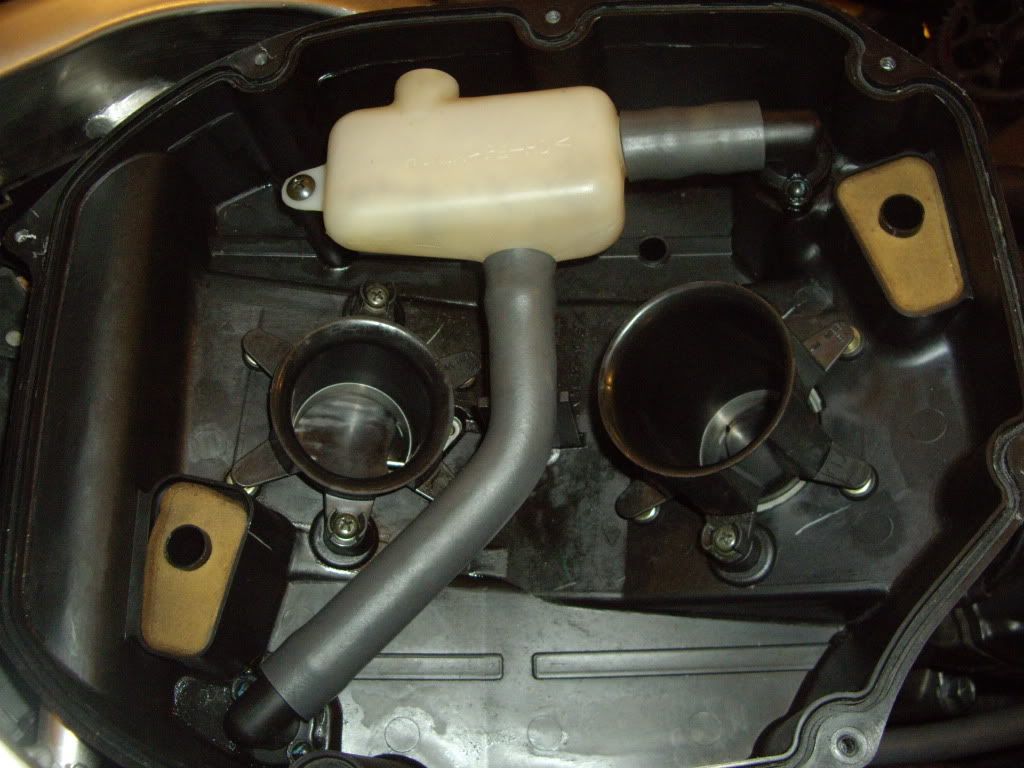
Air filter removed showing trumpets. Note: long trumpet at the rear & small at the front they are arrowed to the airbox housing as to correct orientation.

Image

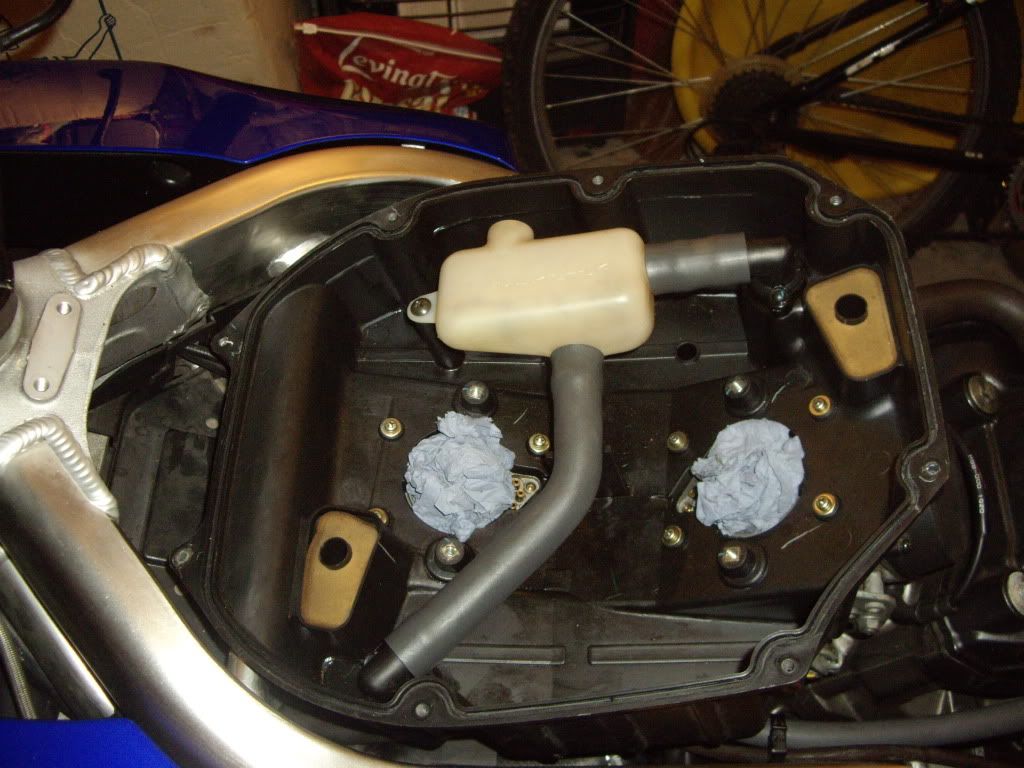
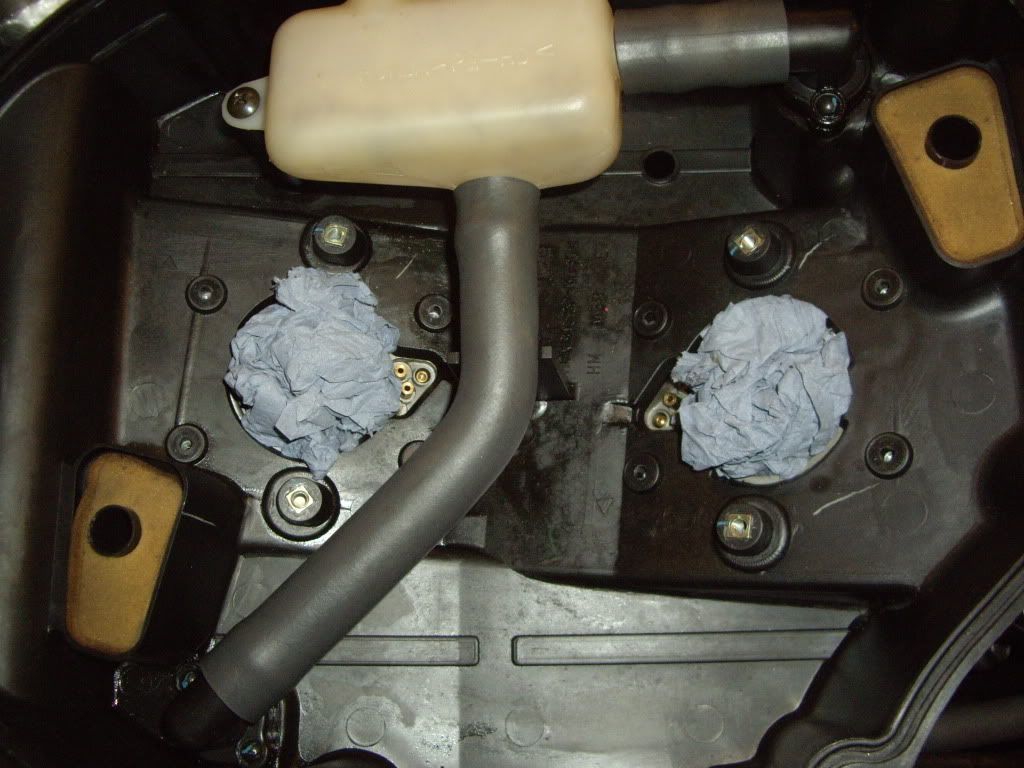
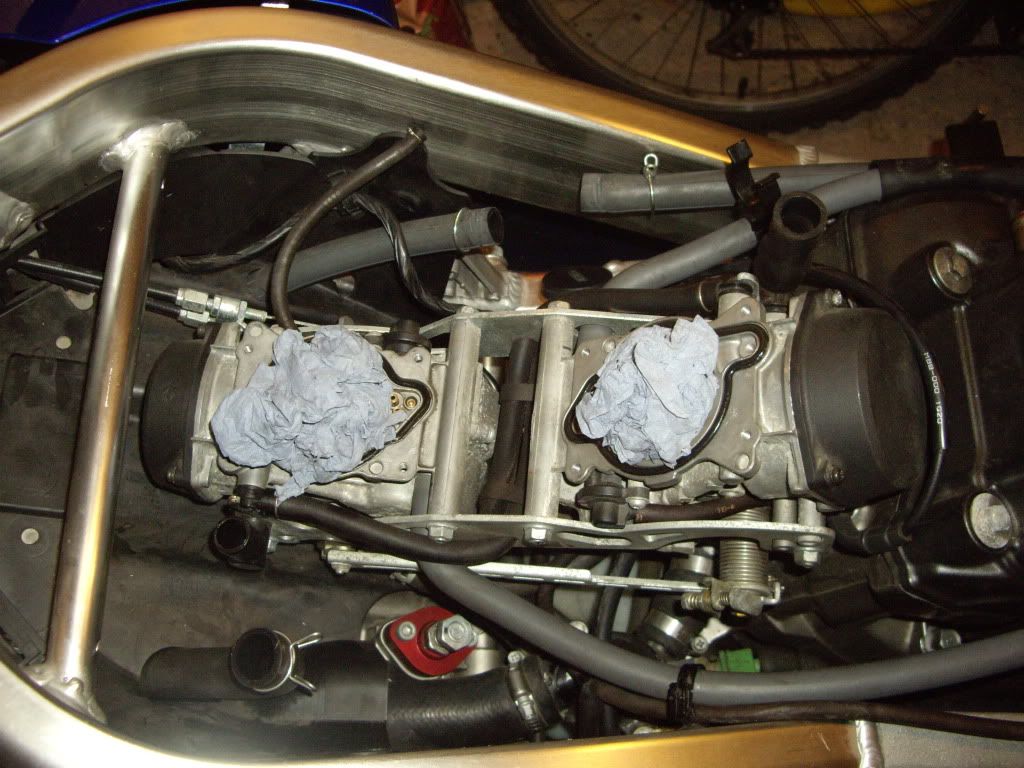
Trumpets removed & carb mouths secured against foreign bodies falling in.

Image

Airbox housing is secured with 8 bolts which are thread locked in. These have now been removed. Now comes the plumping bit. The following are photos of various pipes that need to be removed that can be done in any order. Accessability & small hands are an advantage here.

Image
Image
Image
Image
Image

Finally :D

Image
Image

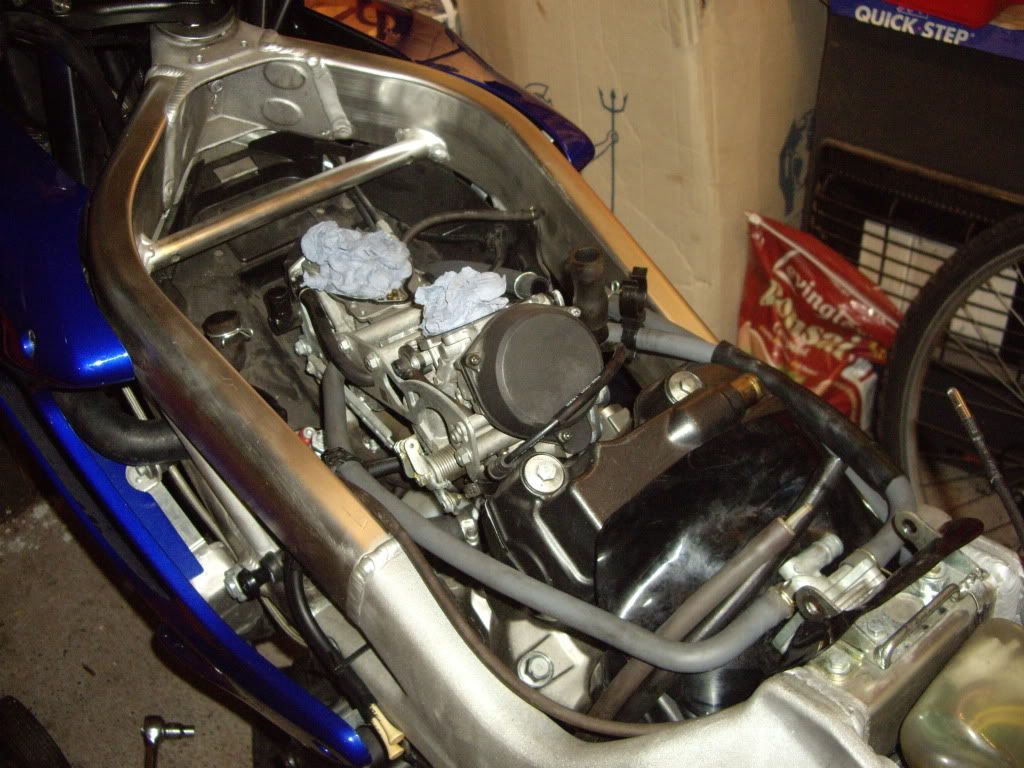
Airbox off. Next up is to remove the fuel vacum assembly

Image
Image

No need to remove all the fuel lines I supported it with a shoe lace attached to the wing mirror

Image

The next sequence of photos is an aid to ensure you remove parts in a particular order so as to repeat in the re-assembly process

Image

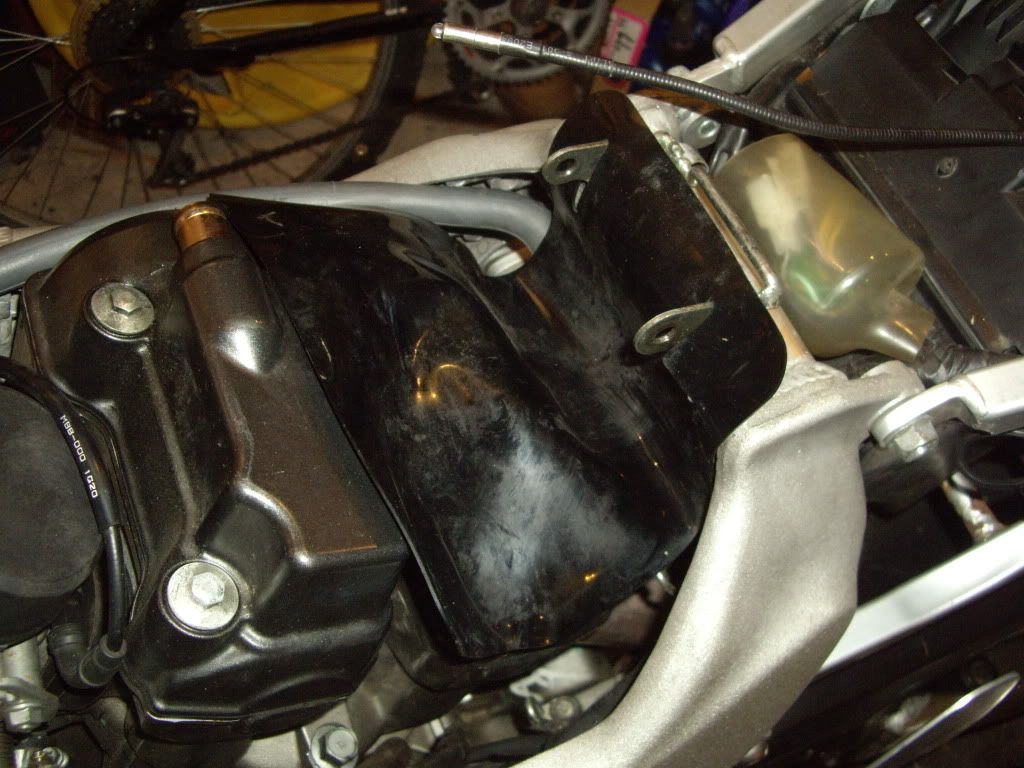
Remove rubber protector

Image
Image

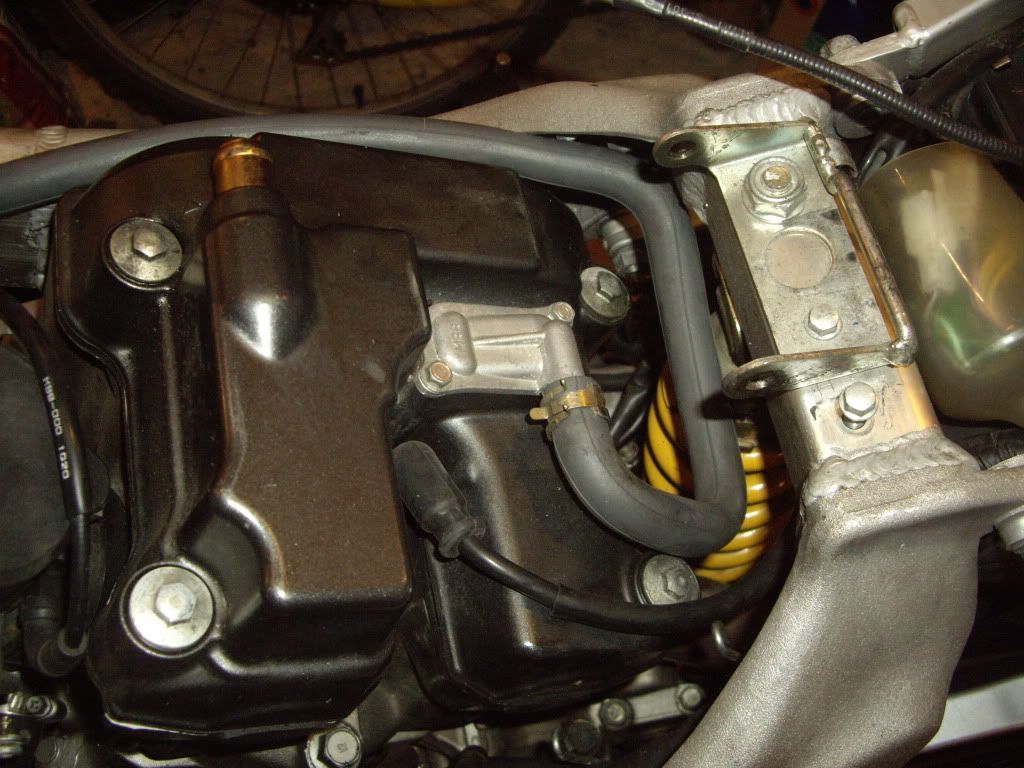
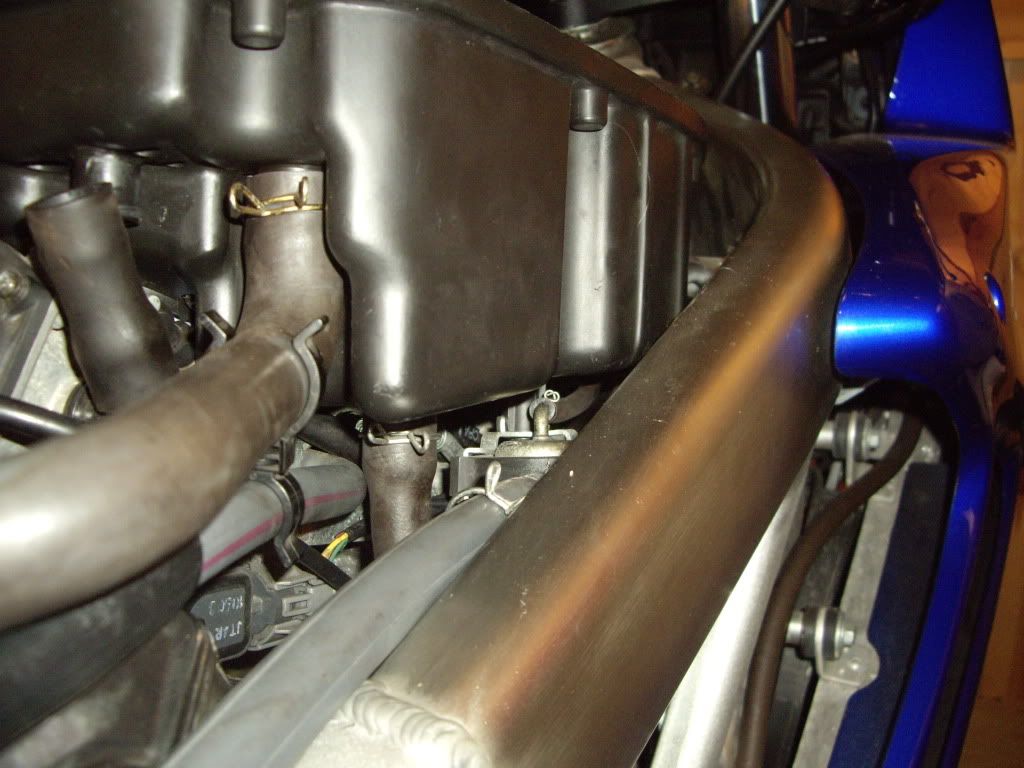
Disconnect & remove rear cylinder pair valve pipe.

Image

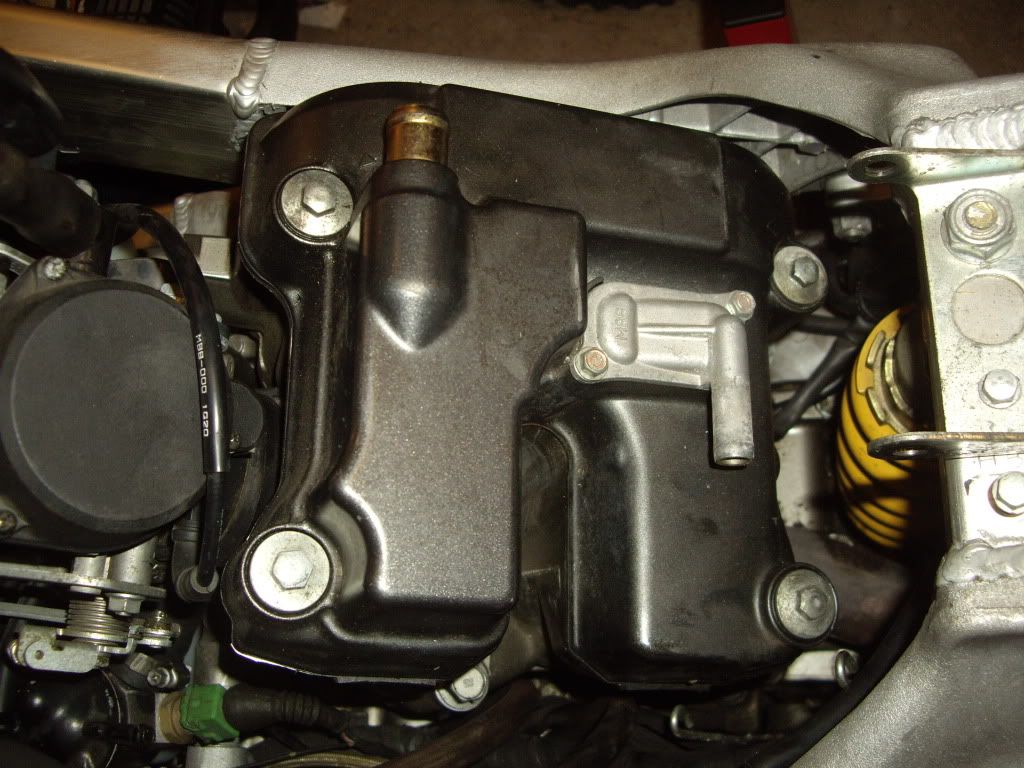
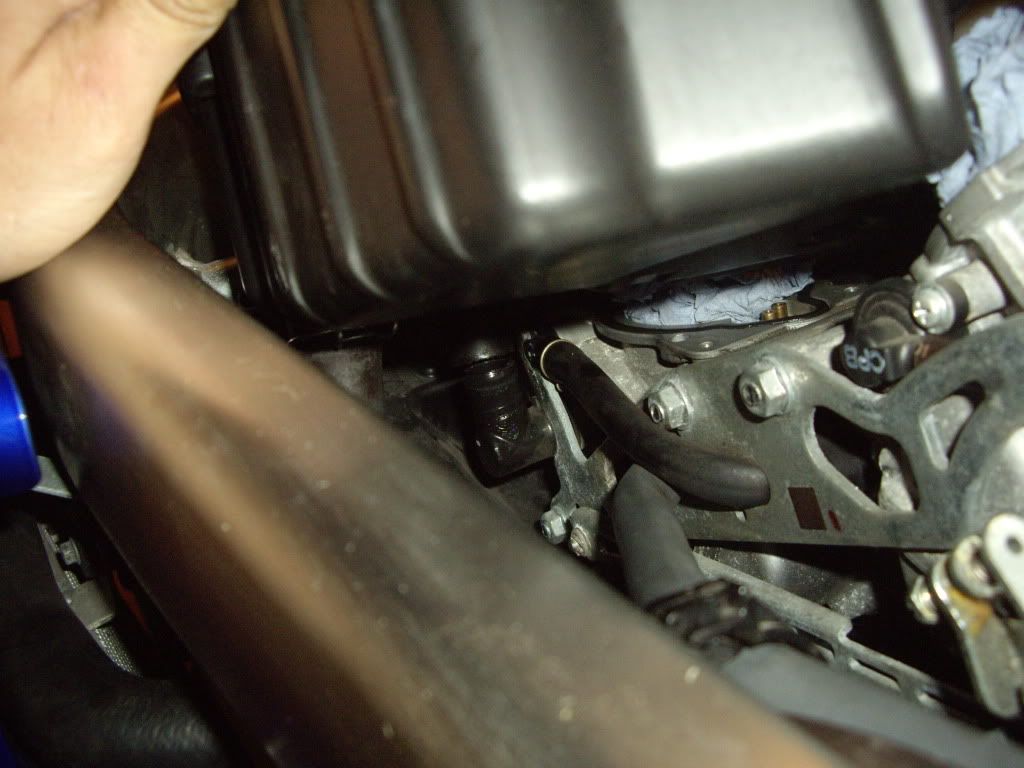
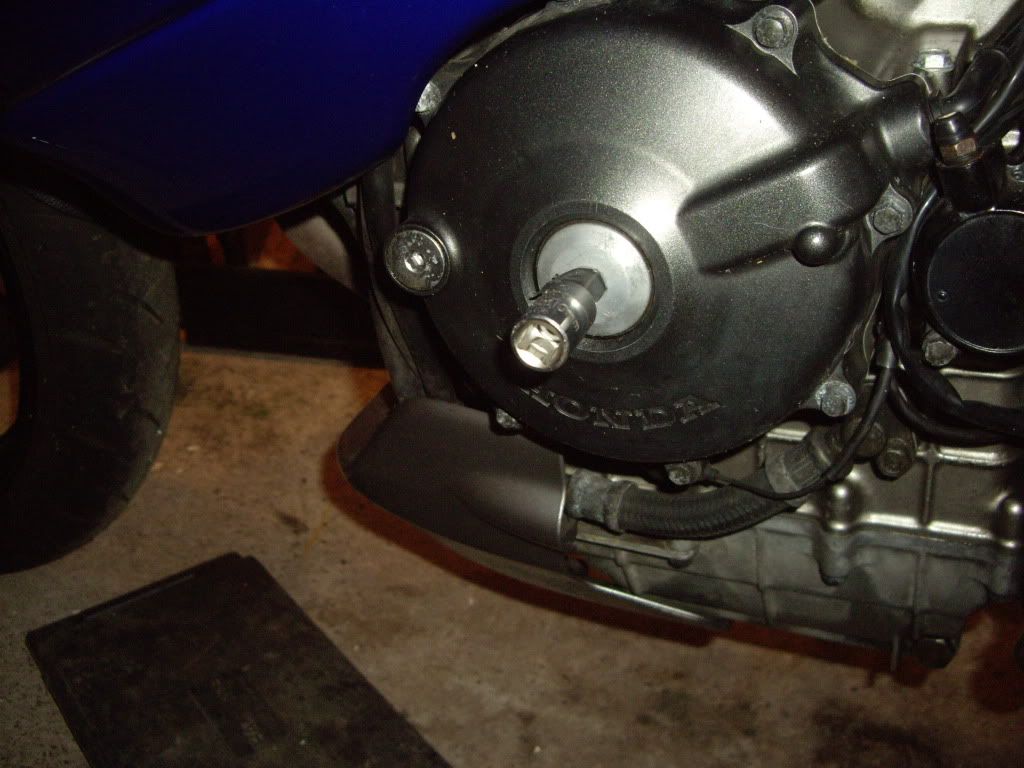
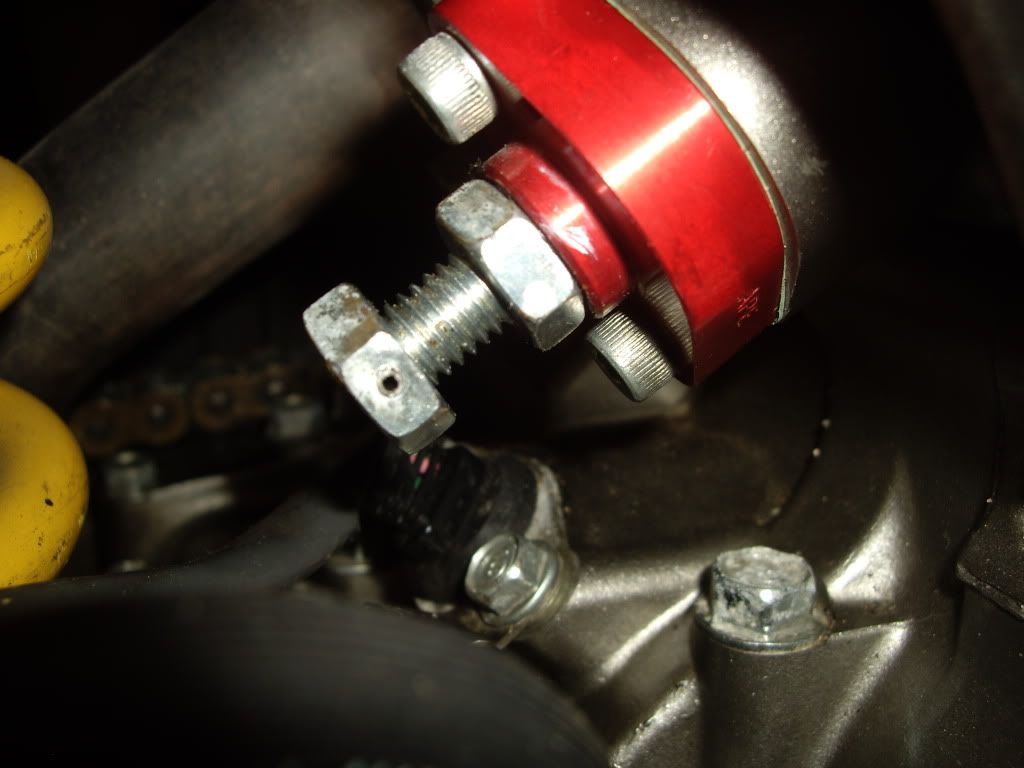
Now you have reached the rear cylinder rocker cover. Before removing first remove the altenator center plug. (AS STATED IN OTHER THREADS THIS IS MADE FROM A VERY SOFT ALLU & CAN BE A SOD :Argue 1: ) I tapped mine back & forth & it eventually gave way. You may want a spare ready just in case you need to b8stard it off. When replacing it use some grease on the threads this will help removal next time round. Then remove the timing access plug to the left of the center plug. NOW REMOVE THE SPARK PLUGS FOR BOTH CYLINDERS & COVER EXPOSED HOLES.

Image

Image

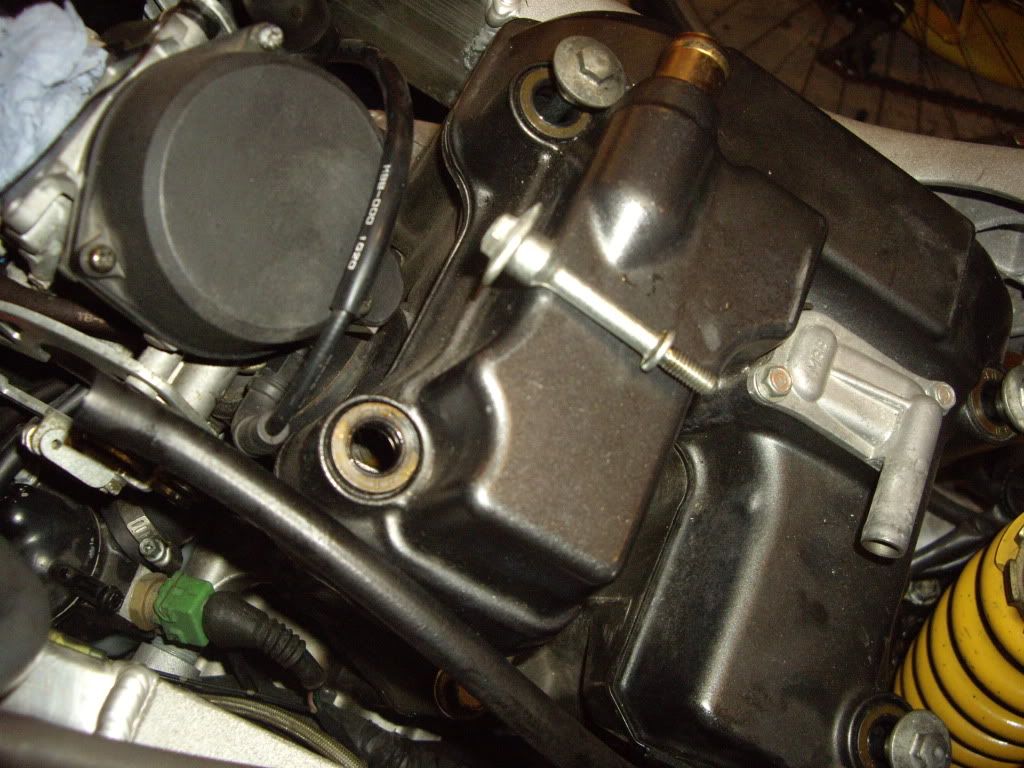
Next remove the 4 rockercover retaining bolts

Image

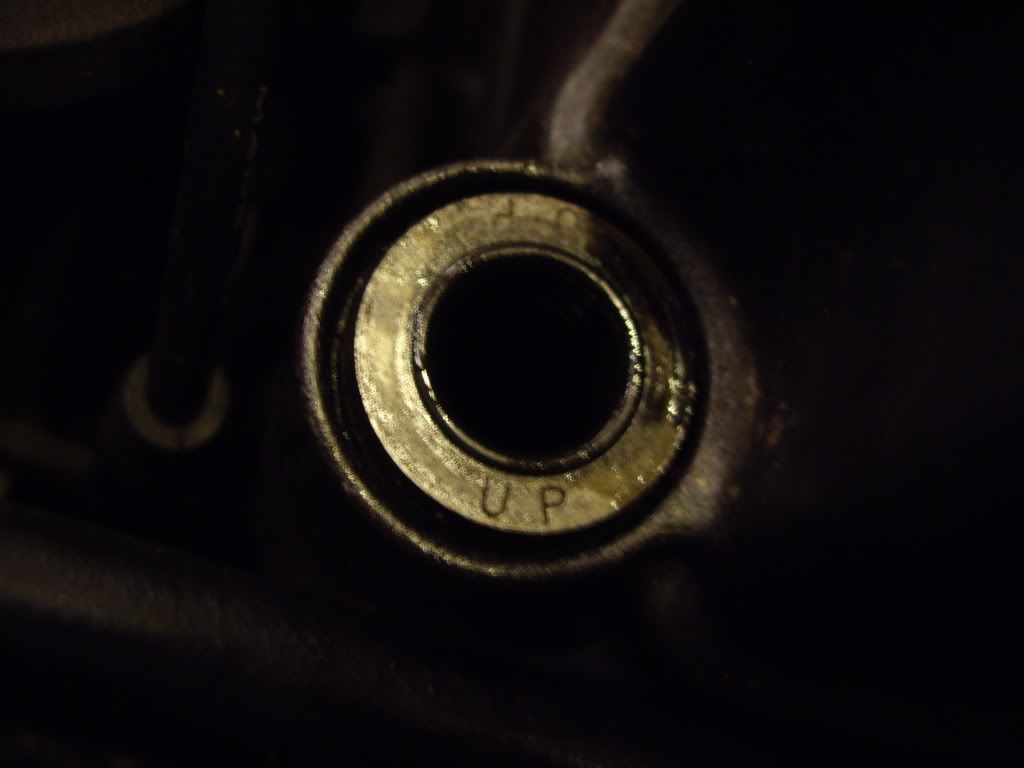
Note: the orientation of the washers the way UP is clearly stated on them. I also smear them with engine oil when replaced.

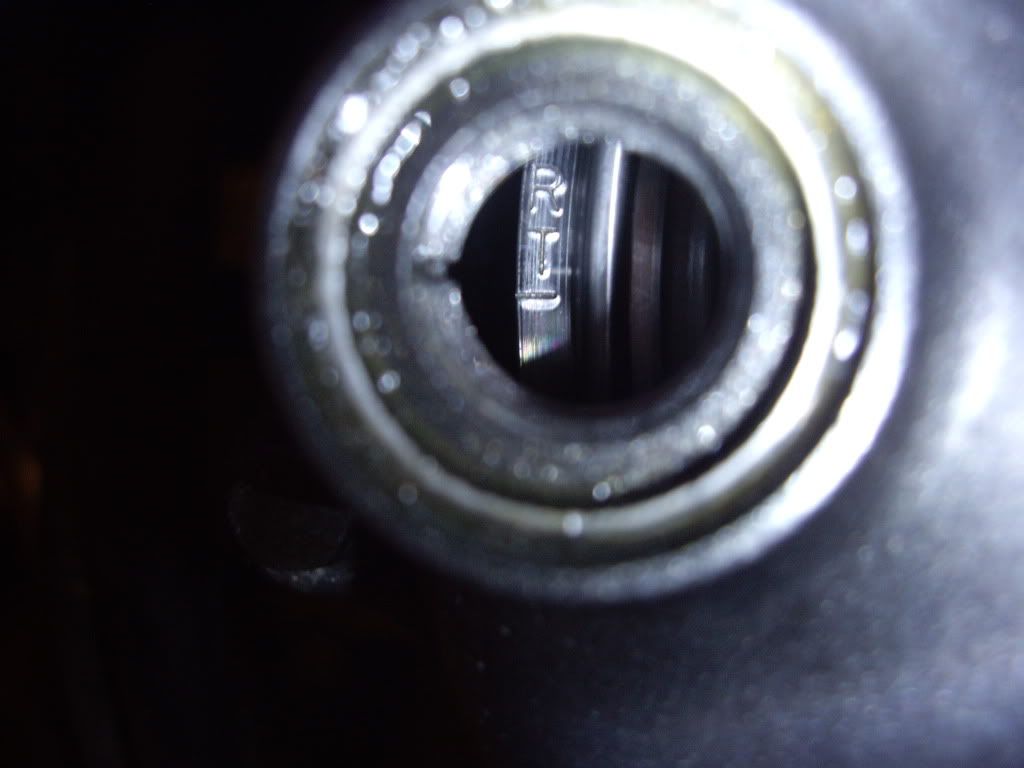
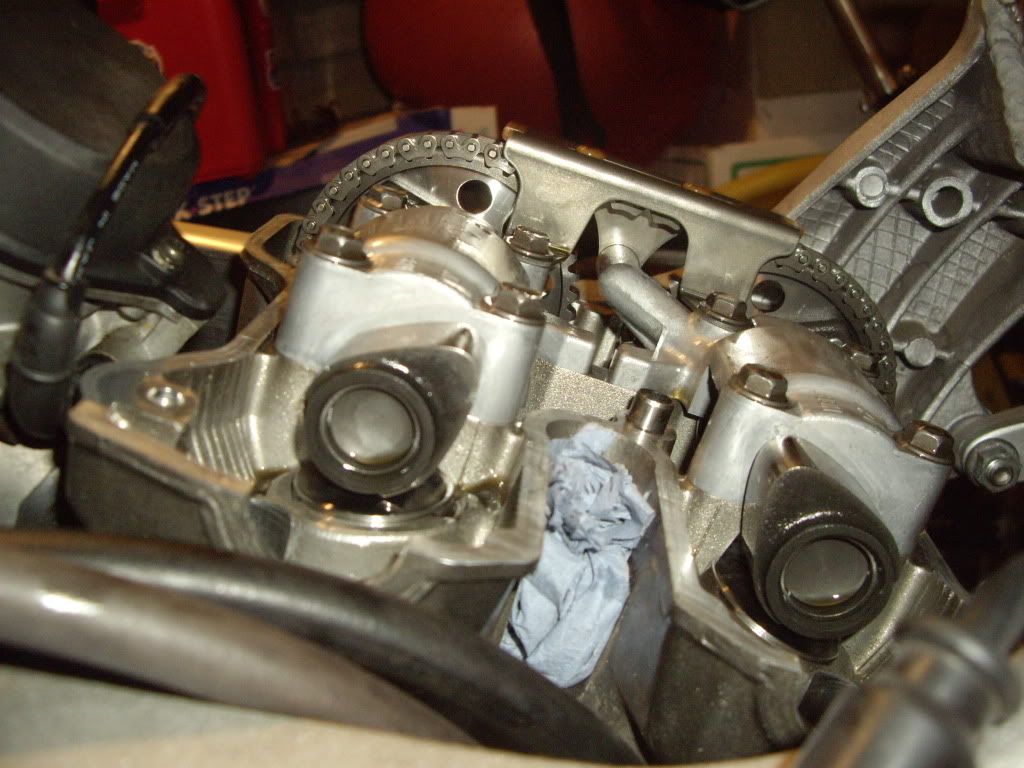
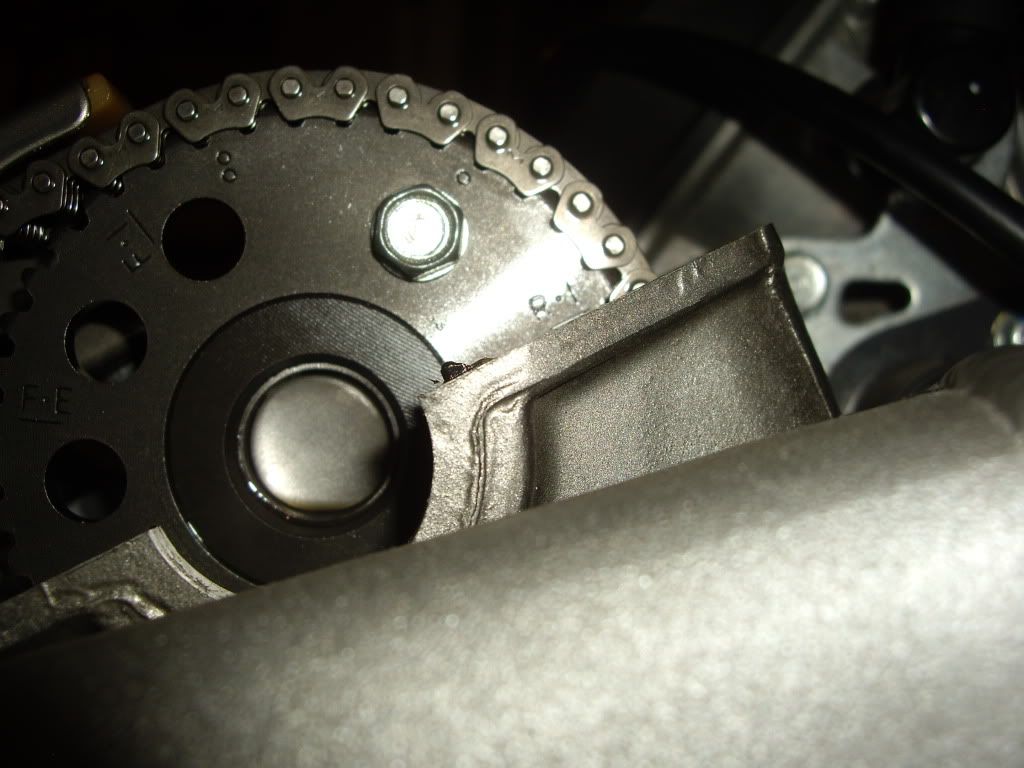
Next you need to find TDC for the REAR cylinder please refer to the CCT thread for this proceedure. Below are photos of what TDC looks like for the REAR cylinder looking at the cam lobes/sprockets & timing window. Note (ALWAYS TURN THE MOTOR COUNTER CLOCKWISE USING A 17MM SOCKET ON THE BOLT IN THE CENTER OF THE ALTENATOR HOUSING).

Image
Image
Image

Reassembly is the reverse of what you have seen. This is as far as I went. My valve clearences are a shade on the tight side but have been reliably informed that they can wait for the the next workshop. I also stopped the leak on my APE CCT.

Image

I hope this will help some of you out there I do like photos as they speak a thousand words. Happy spanners :thumbup:
User avatar
slipper 1
Posts: 123
Joined: Sat Nov 06, 2010 9:02 pm

Re: Useful Strip down photos

Post by slipper 1 »

Good write up ! Pictures are always easier to follow. Thanks for spending the time to do it.
User avatar
turbo_billy
Posts: 1192
Joined: Mon Aug 29, 2011 3:01 pm
Location: Churchdown, Glos

Re: Useful Strip down photos

Post by turbo_billy »

Nice photos especially for a newbie like me. :clap:

Have a look at this ebay item, quick release race line connector. I fitted one to the GS as I had the same problem of not being able to shut off the fuel. Works a treat and available in different bore sizes.

http://www.ebay.co.uk/itm/270605206213? ... 3D1&_rdc=1

Regards

Tim :beer:
User avatar
darkember
Posts: 2194
Joined: Wed Sep 08, 2010 10:48 pm
Location: South Wales Abergavenny

Re: Useful Strip down photos

Post by darkember »

turbo_billy wrote:Nice photos especially for a newbie like me. :clap:

Have a look at this ebay item, quick release race line connector. I fitted one to the GS as I had the same problem of not being able to shut off the fuel. Works a treat and available in different bore sizes.

http://www.ebay.co.uk/itm/270605206213? ... 3D1&_rdc=1

Regards

Tim :beer:
For the VTR it needs to be at least 12mm our fuel lines are enormous hence our great fuel economy :biggrin
User avatar
turbo_billy
Posts: 1192
Joined: Mon Aug 29, 2011 3:01 pm
Location: Churchdown, Glos

Re: Useful Strip down photos

Post by turbo_billy »

Told you I was a newbie to this bike......haven`t got under the tank yet :oops:
User avatar
Flatline
Posts: 3449
Joined: Sat Jul 11, 2009 11:30 am
Location: Leeds

Re: Useful Strip down photos

Post by Flatline »

Impressed :thumbup:
User avatar
Wicky
Posts: 7895
Joined: Sat Feb 11, 2006 2:43 pm
Location: Colchester Essex
Contact:

Re: Useful Strip down photos

Post by Wicky »

Good write up and pics

@ billy: the firestorm fuel hose is 10mm ID, the one you linked to is 8mm. I use 2 suitable sized hose couplers to make it easier to pull the fuel hoses and QR couplers on the drain & vacuum hoses. http://www.vtr1000.org/phpBB3/viewtopic ... se#p150084
It may be that your whole purpose in life is simply to serve as a warning to others.

ImageVTR Firestorm and other bikes t-shirts
User avatar
vtryorks
Posts: 367
Joined: Sun Jul 10, 2011 3:29 am

Re: Useful Strip down photos

Post by vtryorks »

Aww mate, I got all excited at the title of the thread. Imagine my disappointment when up popped a VTR.

Nice, useful photo's, though. Jolly good show.
User avatar
BigVeeGrin
Posts: 2516
Joined: Wed Feb 17, 2010 1:41 pm
Location: Glasgow

Re: Useful Strip down photos

Post by BigVeeGrin »

Mr Darkember - fantastic for a novice spanner like me with loads of enthusiasm for getting stuck in and a deep yearning to love my storm to my deathbed :clap: :D I will plagiarise and laminate and pin to my soon to be state-of-the-art garage (unless the Mrs gets wind of my plans and it remains as an effin' junk room for all her useless stuff!)
User avatar
darkember
Posts: 2194
Joined: Wed Sep 08, 2010 10:48 pm
Location: South Wales Abergavenny

Re: Useful Strip down photos

Post by darkember »

Admin should stick this somewhere easy to find in the knowledge base. :wink:
User avatar
Kev L
Posts: 11210
Joined: Tue Aug 24, 2010 9:57 pm
Location: Hertford, England

Re: Useful Strip down photos

Post by Kev L »

Do you know which market your bike was originally sold for? I have an F3 and that doesn't have the PAIR system fitted. I thought it was only on the US bikes! :think:
Carpe diem, quam minimum credula postero
F3, 954 USD front, K Tech springs, Braced swinger, Penske shock, Six spoke Mockesini wheels, Harris rearsets, QaT, Flywheel diet!, A&L stacks, stick coils, K&N, FP Ti jets, lashings of Ti & CF
User avatar
darkember
Posts: 2194
Joined: Wed Sep 08, 2010 10:48 pm
Location: South Wales Abergavenny

Re: Useful Strip down photos

Post by darkember »

Are you sure you don't have one?? I cannot be sure or somebody has already removed yours. Check the rocker cover for signs of the blancking plate. 6th photo up from the bottom will show you where the blanking plate will be. There will also be signs of blanking plugs into your airbox. My machine is defo not an import & the manuals state it does have the system.
User avatar
Kev L
Posts: 11210
Joined: Tue Aug 24, 2010 9:57 pm
Location: Hertford, England

Re: Useful Strip down photos

Post by Kev L »

No mate, no pair on mine. The heads haven't got blanking caps fitted they just have the outline of the system indented on them.
Carpe diem, quam minimum credula postero
F3, 954 USD front, K Tech springs, Braced swinger, Penske shock, Six spoke Mockesini wheels, Harris rearsets, QaT, Flywheel diet!, A&L stacks, stick coils, K&N, FP Ti jets, lashings of Ti & CF
User avatar
VTRDark
Posts: 20010
Joined: Sun Mar 18, 2012 9:24 pm

Re: Useful Strip down photos

Post by VTRDark »

I thought the pair was for the stricter emissions regulations they have in the states, especially Calafornia which is a slightly different PAIR system. We luckily at this moment in time are not so strict. Strange, I know the later models had some stuff done to emissions here, but I did not realise this included PAIR. :confused That extra hole you have in the bottom of your airbox maybe a clue Kev, it's simple enough to just replace cam covers.

@darkember Nice write up and exceptionally good pics. Nice and clear. :thumbup: Your just missing the one of the valve clearance check :wink:

(:-})
==============================Enter the Darkside
User avatar
sirch345
Site Admin
Posts: 21672
Joined: Mon Aug 25, 2003 10:35 pm
Location: The West Country.

Re: Useful Strip down photos

Post by sirch345 »

Moved from "Workshop" area.

Nice job Darkember :thumbup:

Chris.
Post Reply