(see here... http://vtr1000.org/phpBB3/viewtopic.php?f=9&t=33463 )
my Storm has sat largely untouched due to me injuring my knee and it taking months to heal.
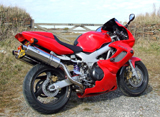
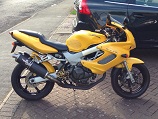
However a plan has been hatched and is now under way. The Storm is going to remain road legal, but become my track day bike, and also be used to do some hill climbs this year.
First order is to sort out to sort out the front end. I've pulled the forks out and stripped them and the damper rods have already been ground as per the specs found here in the sticky 'Standard Fork Service' and the additional oil relief hole is already there. Strangely the fork springs and spacers are stock so I have some K-Tech 85n/mm linears coming, along with some 7.5w oil.. The stanchions look ok with a little rust outside the swept area, so I'll probably just polish them up with a little autosol. I already have new bushes and seals for the forks
If budget allows the fork lowers, yokes, clip-ons, clock subframe and seat subframe are going for satin black powder coat. I'd love to get the frame done too but I'm worried that the adjustable mounts in the frame might be seized so I may have to leave that until I'm feeling brave.
While that's going on I have a set of All Balls steering bearings to go in...(I've never done steering bearings so that should be interesting!!) and I need to give the calipers a clean up and flush through.
As for tyres I think PR4s will be what I end up with.
I'll post up some pics as I go along, and advice greatfully recieved
Kurt
PS I ought to have a look at the rear suspension linkage, the bikes done 10k in 13 years and it's probably never been greased