il have a wee look and see what room that leaves me8541Hawk wrote:Remove the lower bolts from the sub-frame and loosen the uppers, then rotate the sub-frame up and out of the way and you should be good to gofabiostar wrote:your not the only nervous mcct fitter. im gona do me new girl this weekend so hoping mine goes the same as yours
on a side note: no fecking idea how im gona get at the rear one, theres a dirty great alloy ear in the road on mine
Well here goes............fitting new MCCTS this week.
Re: Well here goes............fitting new MCCTS this week.
the older i get,the faster i was 

Re: Well here goes............fitting new MCCTS this week.
Yes she does look good, very good actuallyHondo wrote:Well at 18:30 hrs GMT exactly (I'm a bit OCD with things like this) The tank was on and all connected. I used a little choke and turned the bike over with the kill switch still at off. No nasty noises.

Then, with my youngest son shouting "do it Dad" I fired the beast into life once more and she runs and sounds great. Got the temperature up to 80, still no screeching and no clatter. So far so good.
I did it. Thanks all. What a brilliant members forum.
I must say with the guide here, the job is relatively easy. I normally do my own basic servicing on my bikes but this was the biggest job I have ever attempted. (Well except for replacing a cam bearing in a Z650 33 years ago.)
Thanks go to all who advised and to Ade for the MCCT's. And very nice they are too. No leaking so far.
She's back together in one piece.
Now for a couple of beers.
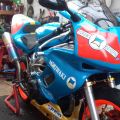
old pic, but she still looks this good.

Glad to hear all went well, well done
Chris.

Re: Well here goes............fitting new MCCTS this week.
Well done your boy
told you not to but oh no you knew better

Re: Well here goes............fitting new MCCTS this week.
You could always crawl into the gapil have a wee look and see what room that leaves me
==============================Enter the Darkside
-
adewhitmarsh
- Posts: 172
- Joined: Fri Feb 21, 2014 10:33 pm
- Location: Gloucester
Re: Well here goes............fitting new MCCTS this week.
[*]good to hear it all went well,it's not that difficult and you can get help from me & members of the form.
Re: Well here goes............fitting new MCCTS this week.
fixedVTRDark wrote:You could always crawl into the gapil have a wee look and see what room that leaves meIt's like being a surgeon
the older i get,the faster i was
Re: Well here goes............fitting new MCCTS this week.
On a more serious note for attaching the rear link to the cylinder is not that bad. From the left side of the bike 10mm bolt is simple...loads of access space. You can even get a ratchet in there if you have a small wobble drive attached. Easier and quicker to use a 10mm spanner though. You should be able to get your fingers in and around the pipe and thread the the 10mm bolt on the the other side from there too. Once on then move to the right hand side of the bike where access is a little more restrictive as the rear tensioner and master cylinder gets in the way a bit as well as the engine Earth strap. Use a 10mm spanner and do do up a bit at a time. You may only be able to do 1/2 turn at a time before having to remove and re-attach the spanner but this is not so bad if you have already threaded the bolt on all the way.
==============================Enter the Darkside
Re: Well here goes............fitting new MCCTS this week.
I think he's talking about access to the rear cct rather than the link pipe, Carl.VTRDark wrote:
On a more serious note for attaching the rear link to the cylinder is not that bad. From the left side of the bike 10mm bolt is simple...loads of access space. You can even get a ratchet in there if you have a small wobble drive attached. Easier and quicker to use a 10mm spanner though. You should be able to get your fingers in and around the pipe and thread the the 10mm bolt on the the other side from there too. Once on then move to the right hand side of the bike where access is a little more restrictive as the rear tensioner and master cylinder gets in the way a bit as well as the engine Earth strap. Use a 10mm spanner and do do up a bit at a time. You may only be able to do 1/2 turn at a time before having to remove and re-attach the spanner but this is not so bad if you have already threaded the bolt on all the way.
But that's another possible solution- remove the rear link pipe and you should be able to access the rear cct from the LH side.
Or just angle-grind off the ear and weld it back on later, if you want a quick and easy method. That's how Moriwaki used to do it on the endurance bikes.
(Mods- please move this to the fake news thread)
It's not falling off, it's an upgrade opportunity.