
As per title, been trying to find the online instructions for replacing the Cam Chain Tensioners but not had any success. Anyone got the link?
Cheers,
Ian.
CCT Replacement - Online Instructions - Anyone Got The Link?
-
tony.wilde1
- Posts: 2230
- Joined: Thu Apr 10, 2003 9:32 pm
- Location: sussex
http://www.gofastvideo.com/gallery/item ... anual.html
click on play video to download full workshop manual !!
and study it and follow instructions with no short cuts!!
one more thing here.take your metal caps off your old ccts and put them on the new ones.they stop the rubber underneath flexing and crumbling away after prolonged use.your engine is at stake if you ignore this advice!!


-
tony.wilde1
- Posts: 2230
- Joined: Thu Apr 10, 2003 9:32 pm
- Location: sussex
-
Pete.L

- Forum Health And Safety Officer
- Posts: 7306
- Joined: Fri Sep 26, 2003 5:09 pm
- Location: Bristol
Here's something I wrote for another member who's cam chain had slipped when doing the job. I haven't checked it in a while (sept 2004) but it should be right.
Hi XXX
Not knowing what position the engine rotation was in when your chain slipped we will have to start from the beginning. Remove the rear valve engine casing cover, both spark plugs, and the two round inspection caps on the crank case (left-hand side) cover. I take it the tank and air box are already off and you’ve managed to get the oil cooler radiator swung out of the way for better access to the front cylinder.
The large crankshaft end cap might be very tight but it will make rotating the engine (anti-clockwise motion only) much easier. If not, it will definitely be a two man job and the engine will have to be rotated by sticking the bike in a high gear and turning the rear wheel.
First you must get the front cylinder to TDC (top dead centre) on the compression stroke. To be able to find out which is the compression stroke we can use the timing marks from the rear cylinder, which hasn’t been disturbed, and then rotate the crank bolt ,17mm, on the end of the alternator (under the larger inspection cap on crankcase side) through 450º (anti-clockwise 1¼ turns) and set up the front.
To start, align the front cylinder camshafts with the pointy end of the lobes pointing outwards and the FI & FE stamped on the sprockets parallel with the top of the cylinder block. Don’t have the chain on the sprockets or the tensioner installed at this point. Either have someone hold the chain up to remove the slack or use a bent coat hanger to keep it out of the way (if the chain goes slack it might bind on the bottom end when rotating the engine). In this position the valves are fully up and the piston can go up and down without hitting them.
Now rotate the engine until the RT mark on the rotor aligns with static timing mark on the crank case cover (small inspection cap). The RI & RE marks on the Rear camshaft sprockets are farthest away from each other and parallel with the cylinder head; the lobes should be pointing inwards. If the lobes are pointing outwards rotate again until the RT on the rotor is showing and the lobes are pointing inwards.
From this position you can now rotate the engine anticlockwise 450º (1¼ turns) until the FT mark on the rotor aligns with the static timing mark on the crank case cover. Recheck the alignment of the front camshafts (FI and FE farthest away from each other, flush with the cylinder head and the lobes pointing outwards).
Place the chain over the sprockets making sure the slack is all on the rear tensioner side.
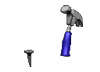
Install the cam tensioner with the plunger fully retracted. There is a little screw head down inside the tensioner body to retract the plunger. A new gasket and washer is recommended for the tensioner. Release the plunger after the two tensioner body bolts have been secured.
Now recheck all the timing marks for both front and rear again by slowly rotating the engine. If they are just one tooth out on the sprockets there is a chance the pistons could meet the valve heads. If the engine goes solid when turning it chances are the timings wrong so don’t force it Start again.
Hope this helps and remember no swearing or farting in the garage.
Have fun
Pete.l

Pete that's excellent matePete.L wrote:Here's something I wrote for another member who's cam chain had slipped when doing the job. I haven't checked it in a while (sept 2004) but it should be right.Hi XXX
Not knowing what position the engine rotation was in when your chain slipped we will have to start from the beginning. Remove the rear valve engine casing cover, both spark plugs, and the two round inspection caps on the crank case (left-hand side) cover. I take it the tank and air box are already off and you’ve managed to get the oil cooler radiator swung out of the way for better access to the front cylinder.
The large crankshaft end cap might be very tight but it will make rotating the engine (anti-clockwise motion only) much easier. If not, it will definitely be a two man job and the engine will have to be rotated by sticking the bike in a high gear and turning the rear wheel.
First you must get the front cylinder to TDC (top dead centre) on the compression stroke. To be able to find out which is the compression stroke we can use the timing marks from the rear cylinder, which hasn’t been disturbed, and then rotate the crank bolt ,17mm, on the end of the alternator (under the larger inspection cap on crankcase side) through 450º (anti-clockwise 1¼ turns) and set up the front.
To start, align the front cylinder camshafts with the pointy end of the lobes pointing outwards and the FI & FE stamped on the sprockets parallel with the top of the cylinder block. Don’t have the chain on the sprockets or the tensioner installed at this point. Either have someone hold the chain up to remove the slack or use a bent coat hanger to keep it out of the way (if the chain goes slack it might bind on the bottom end when rotating the engine). In this position the valves are fully up and the piston can go up and down without hitting them.
Now rotate the engine until the RT mark on the rotor aligns with static timing mark on the crank case cover (small inspection cap). The RI & RE marks on the Rear camshaft sprockets are farthest away from each other and parallel with the cylinder head; the lobes should be pointing inwards. If the lobes are pointing outwards rotate again until the RT on the rotor is showing and the lobes are pointing inwards.
From this position you can now rotate the engine anticlockwise 450º (1¼ turns) until the FT mark on the rotor aligns with the static timing mark on the crank case cover. Recheck the alignment of the front camshafts (FI and FE farthest away from each other, flush with the cylinder head and the lobes pointing outwards).
Place the chain over the sprockets making sure the slack is all on the rear tensioner side.
Install the cam tensioner with the plunger fully retracted. There is a little screw head down inside the tensioner body to retract the plunger. A new gasket and washer is recommended for the tensioner. Release the plunger after the two tensioner body bolts have been secured.
Now recheck all the timing marks for both front and rear again by slowly rotating the engine. If they are just one tooth out on the sprockets there is a chance the pistons could meet the valve heads. If the engine goes solid when turning it chances are the timings wrong so don’t force it Start again.
Hope this helps and remember no swearing or farting in the garage.
Have fun
Pete.l
You beat me to it, I had been thinking there must be a set number of turns (either part of, full or both) from the rear cylinder being in the correct position for removing the CCT in relation too setting up the front
cylinder, I just hadn't got around to working it out, so now you've saved me the job thanks Pete
Chris.