Airbox, CCT Stopper and Valve clearances

Need advice on which oil to use or which tyre best suits you? Share your topic and get help here.
User avatar
VTRDark
Posts: 20010
Joined: Sun Mar 18, 2012 9:24 pm

Re: How Do I Remove the Airbox Lid

Post by VTRDark »

Anything 2 thou or more or less over or under, I would consider changing. + or - 1 thou is still within spec. I personally prefer to work in mm as it's a finer range of measurement and makes calculations easier. Not only that but one can confirm the clearance by stepping up and down one size feeler to verify with more accuracy. It's all down to feel!!! :lol: If 0.17 slides in loose and 0.16 slides in without any deflection in the blade but you can feel it dragging across the surfaces, and 0.15 deflects the blade as you slide it in, then you know 0.16 is right. This is simple with the Exhaust clearances but Inlets, which are more important to have both valves the same, can be tricky. Using thousands of an inch is OK for a quick rough check but not as accurate. Beware...cheaper Feeler gauges with both sets of measurements on them (mm and inches) will be wrong for one or the other. It's two different scales of measurements so different feelers are needed.

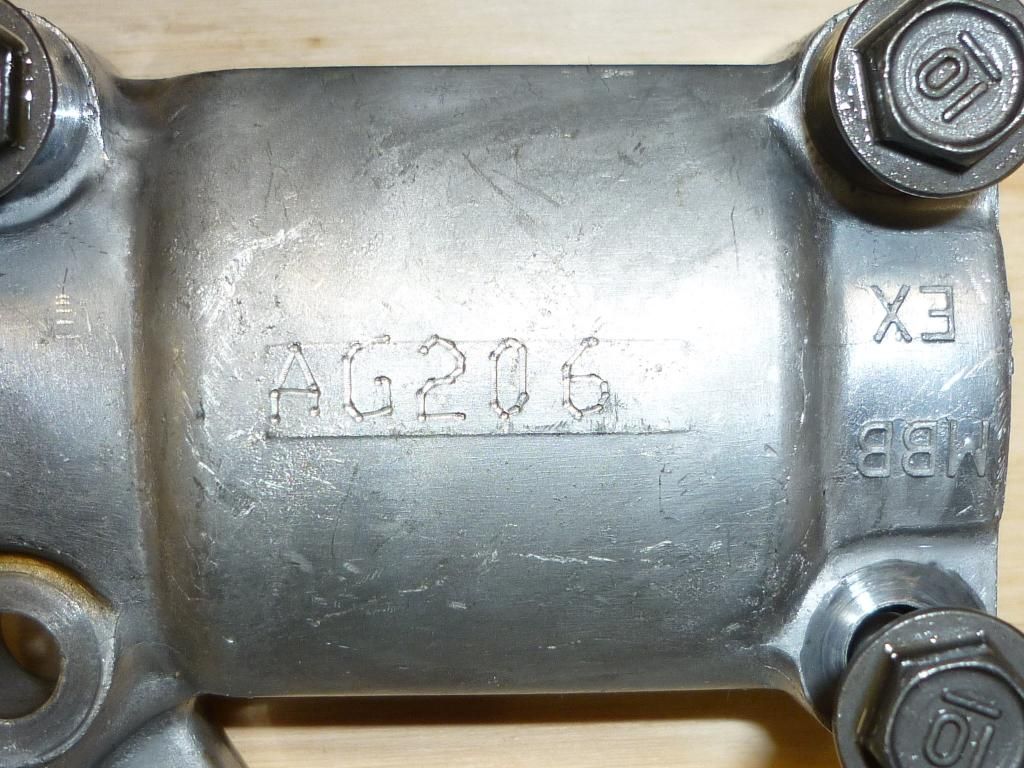
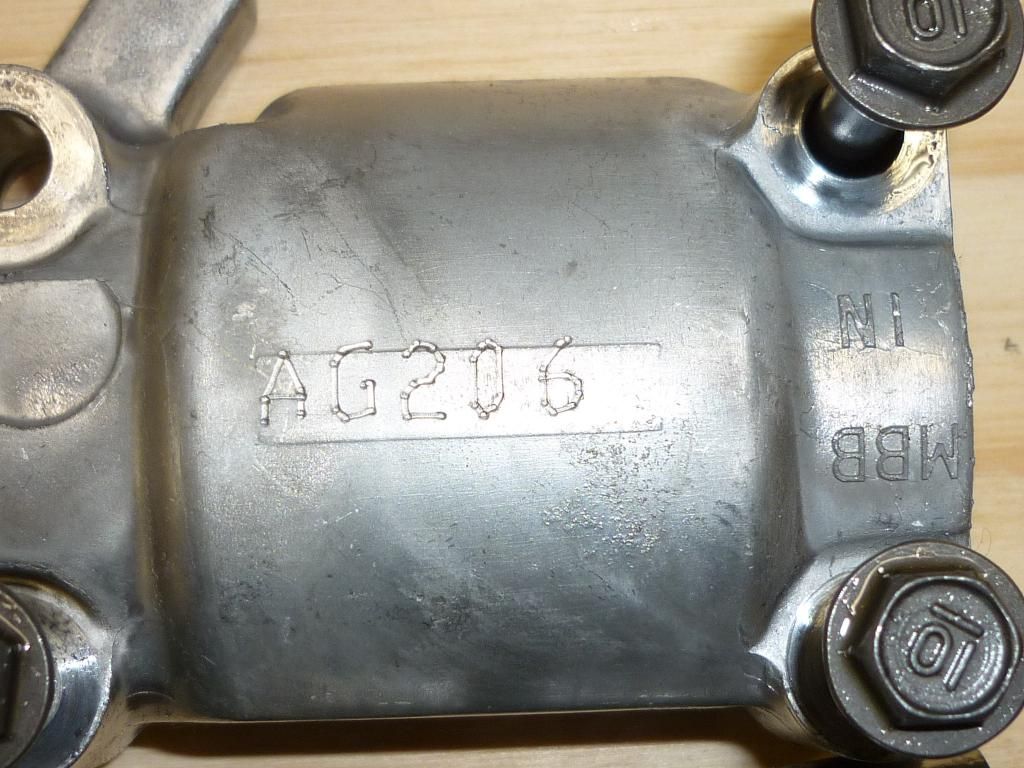
Pain in the butt doing valve clearances!!! especially if you don't have a shim kit to hand (9.48mm shims on these bikes) as it means removing the cams, measuring the shim, doing your sums and ordering the right size replacement shim either from Honda who I think have a finer range of measurements or 3rd party like hotcam which are in steps of .5mm and some other kits in steps of .25mm increments.

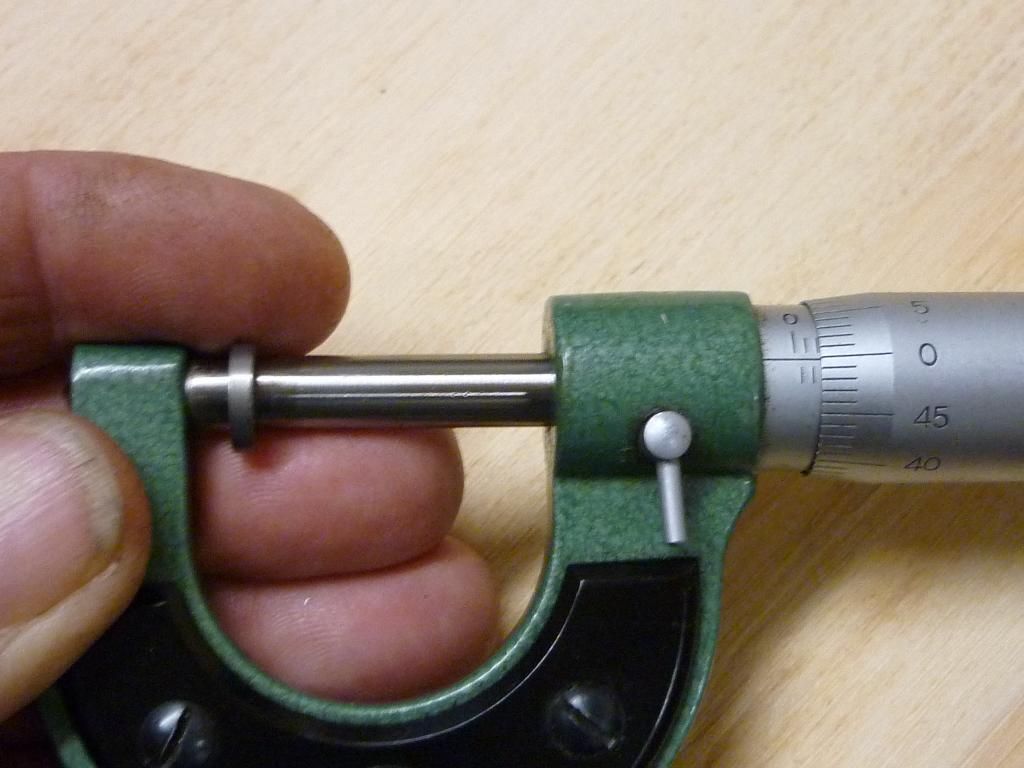
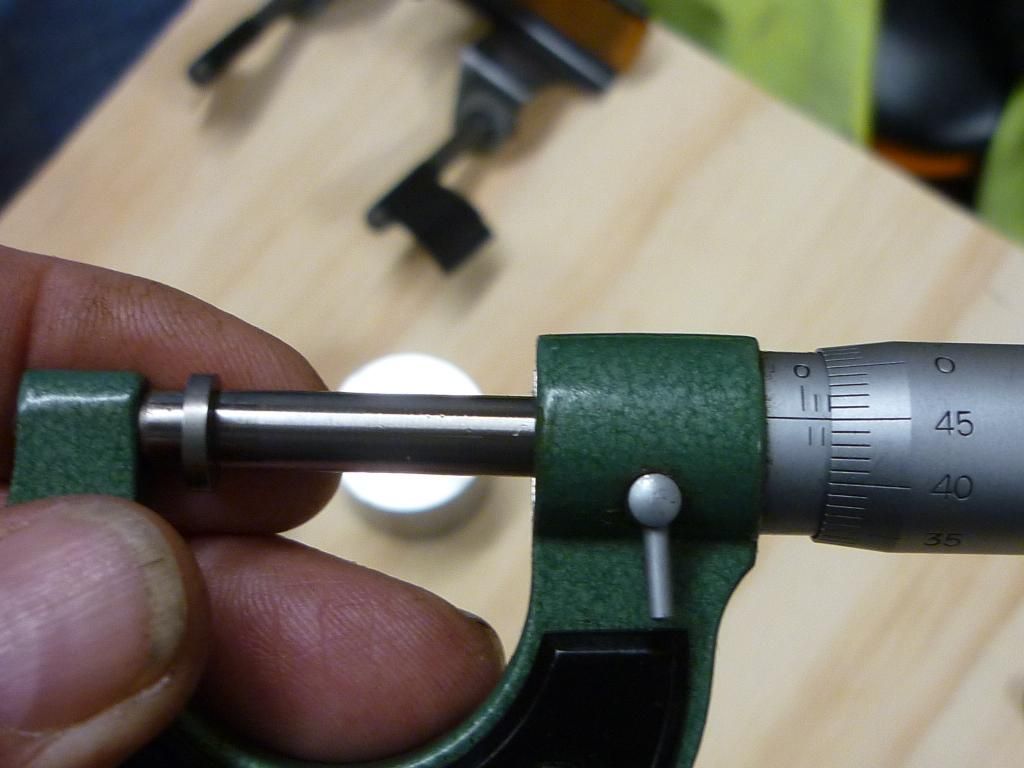
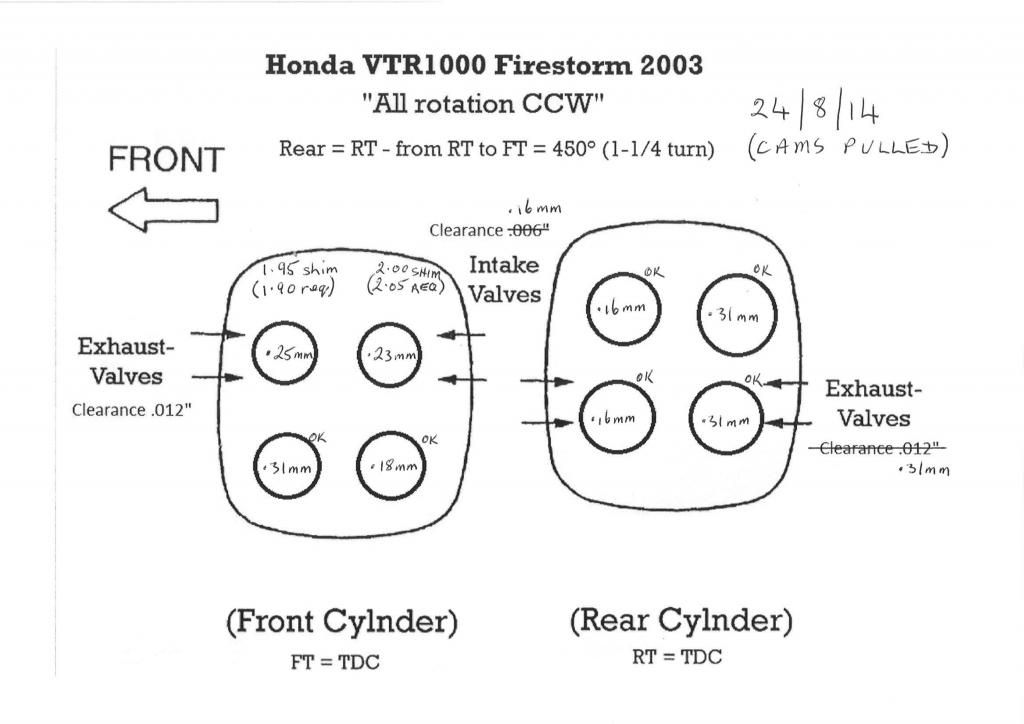
Calculations are as follows: Measure the clearance (lash), and minus the specified clearance. Then measure the shim thickness (do not trust and markings on them as they can wear) you will need a micrometer, preferably in .25 increments for measurements. Then add the shim thickness to your clearance minus specified clearance calculation. Inlet 0.16mm and Exhaust 0.31mm + or - 0.03mm.

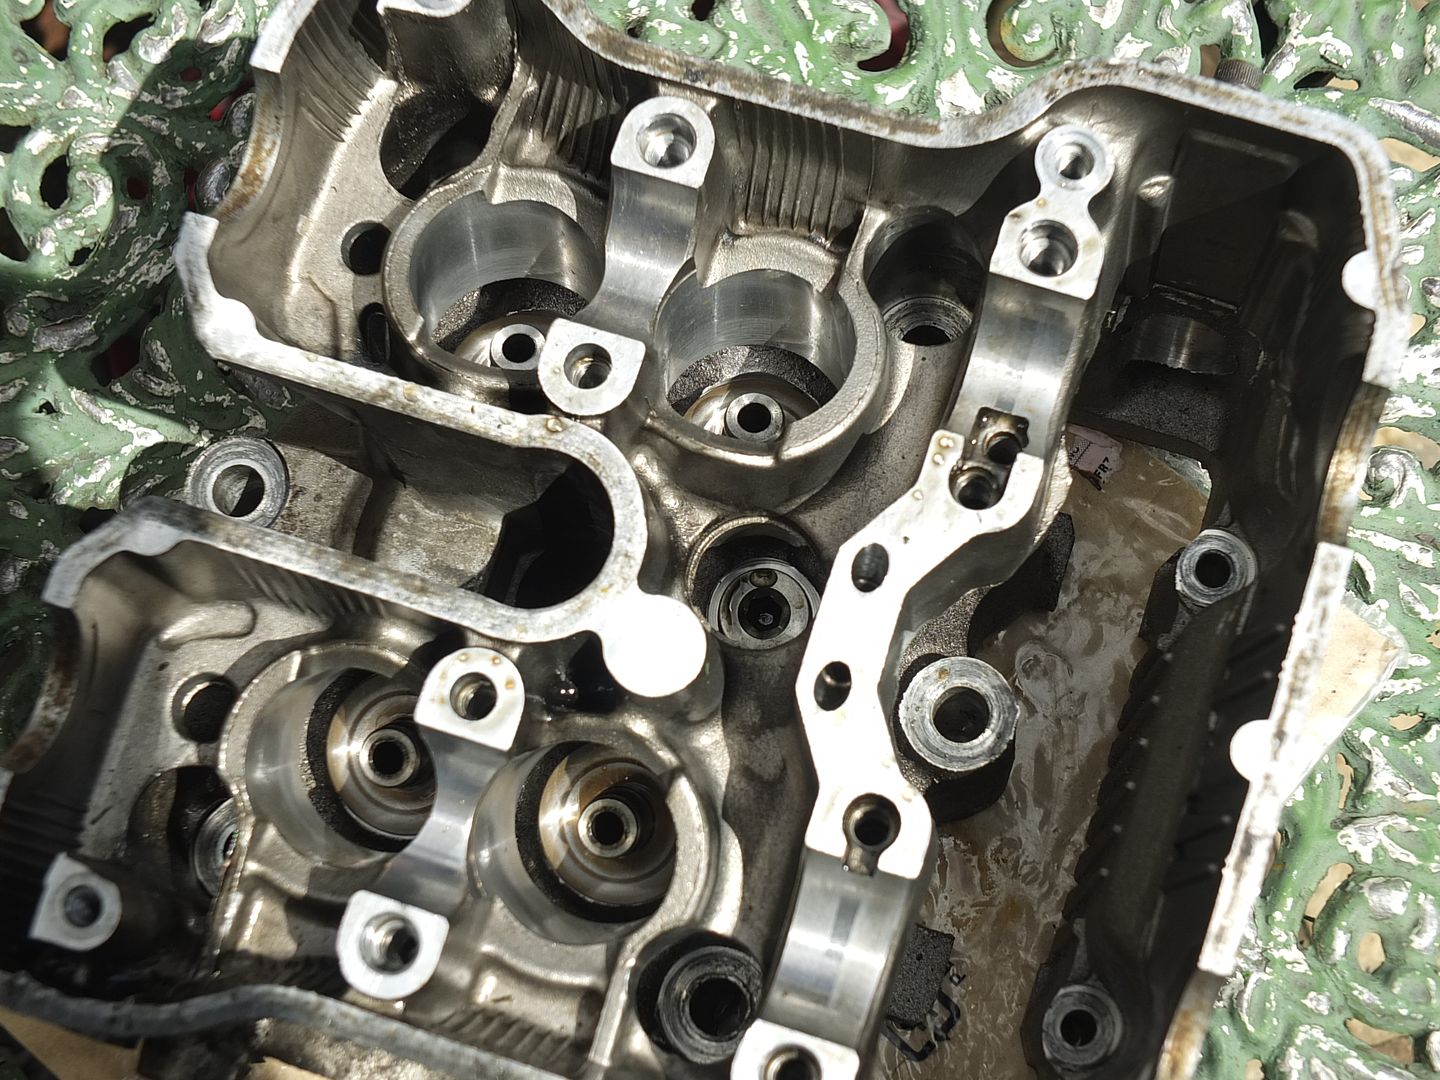
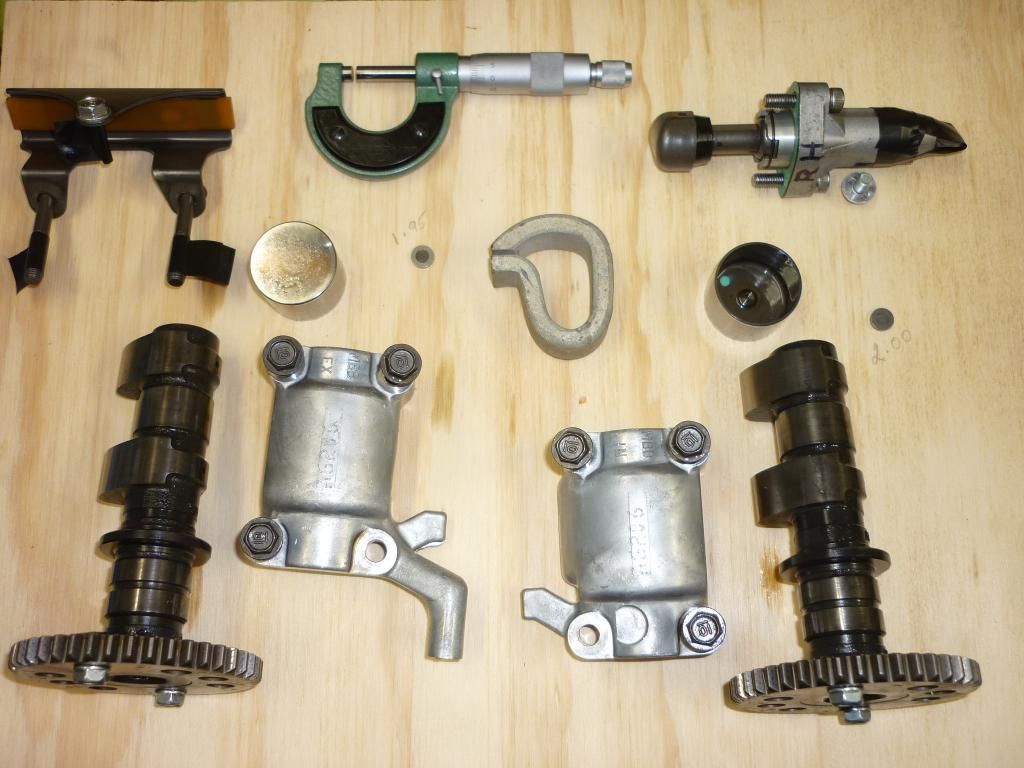
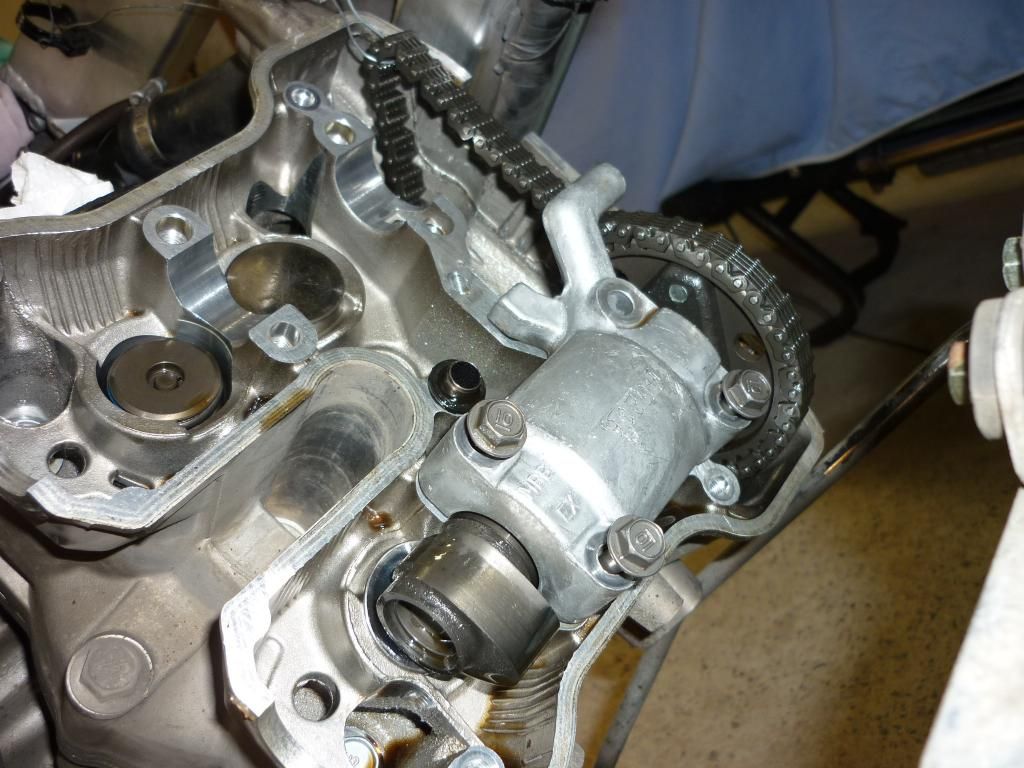
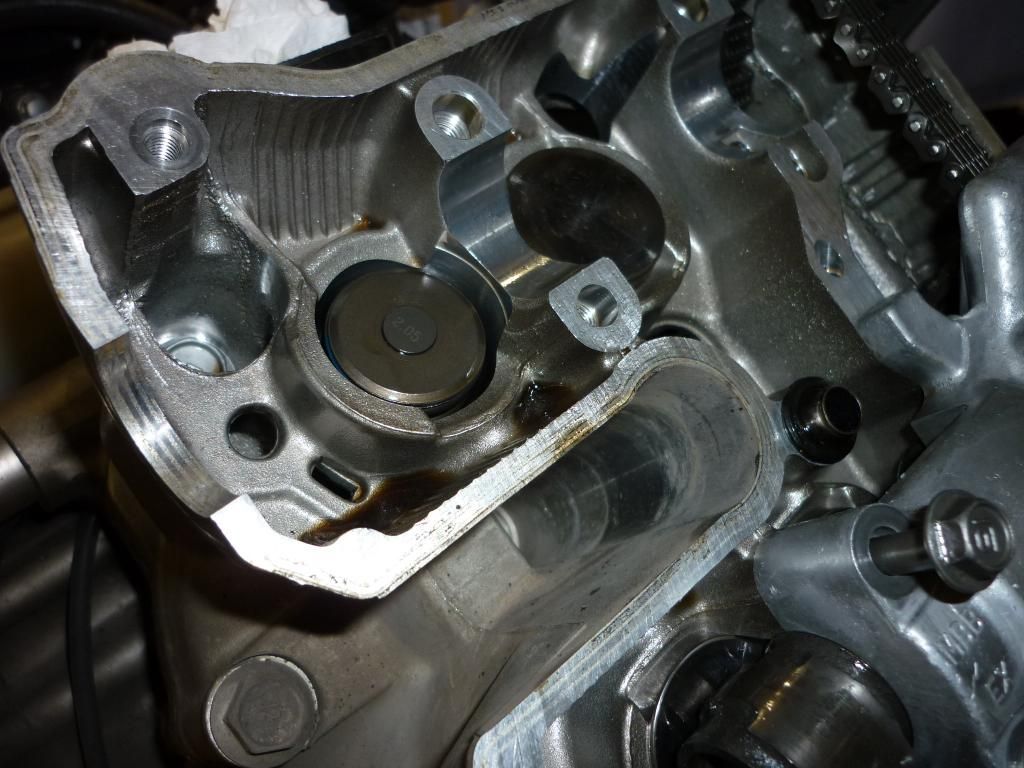
You will need a magnet on a stick, flexible magnet or something to lift the buckets off along with the shim stuck to the magnet on the inside of the bucket. Be very careful not to drop any shims inside the engine. Use rags to block passages if needed.

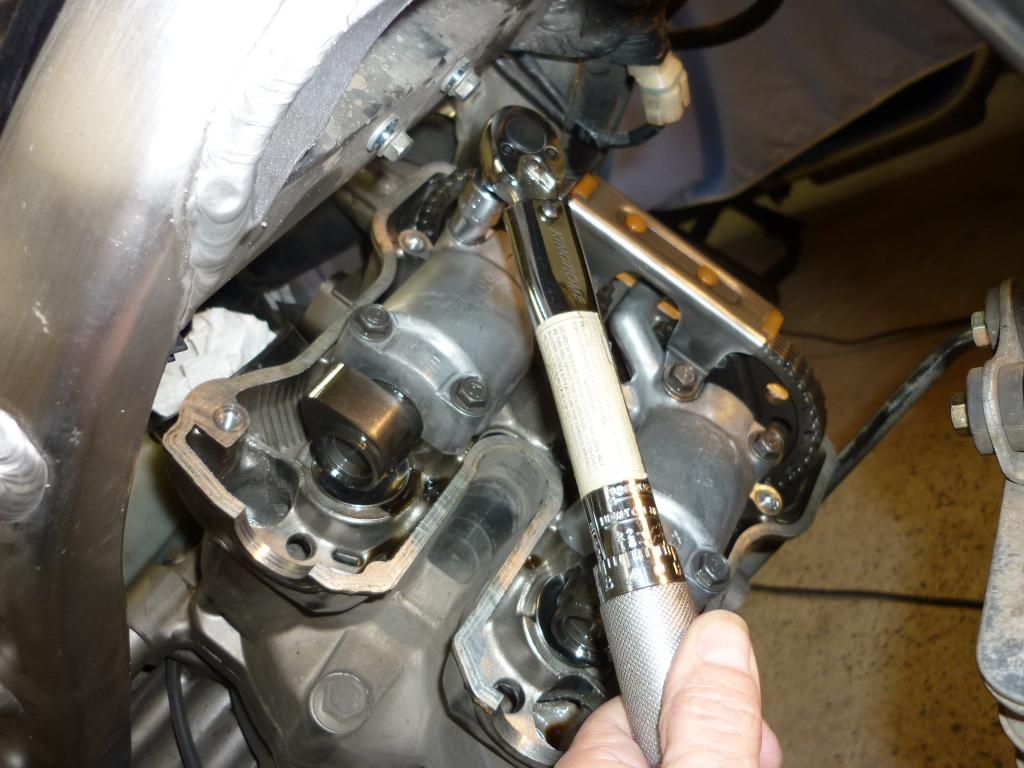
Note for accurate clearance measurements, it should be done with everything tightened down including the CCT as the pressure that the CCT puts on the cam chain can make a slight difference to clearance on the chain side of the cams. Also the torque on the 4 cam cap bolts for each cam makes a big difference. In fact if you was to tighten the cam cap bolt, say 1/2 a turn, above the rear inlet that measured in at 0.07 thou, it could easily end up being 0.06 thou clearance. Be very careful with these bolts as they can snap in the cylinder head if overtightened. Remember what I was saying about torque wrenches and stretched bolts. In fact unless your using new bolts I would recommend not doing these up to the specified torque in the manual and keep them just under to be on the safe side.

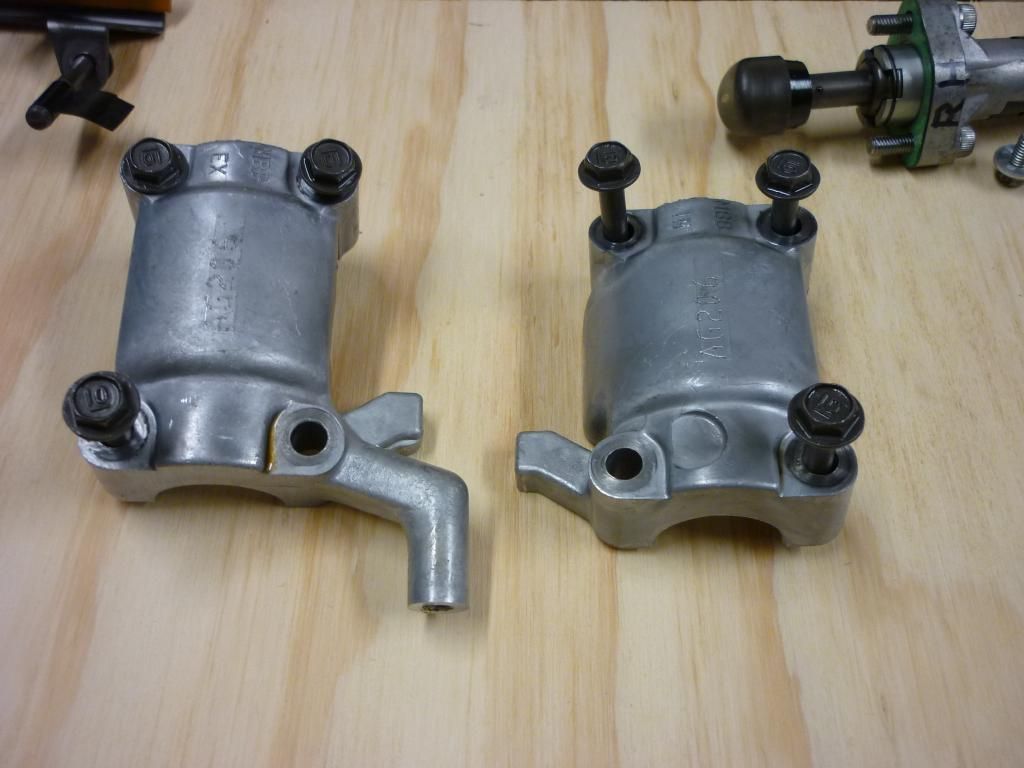
Try to keep things consistent. Go slow, take your time and check things and then double check things. Don't mix up any cams, cam caps, buckets, shims etc and keep everything as is because parts wear in together. Even after replacing shims and checking the clearances again you may find one or two slightly off because of cam cap tension. This is where the shim kits come in handy as it's easy to swap one out for the next size up or down.

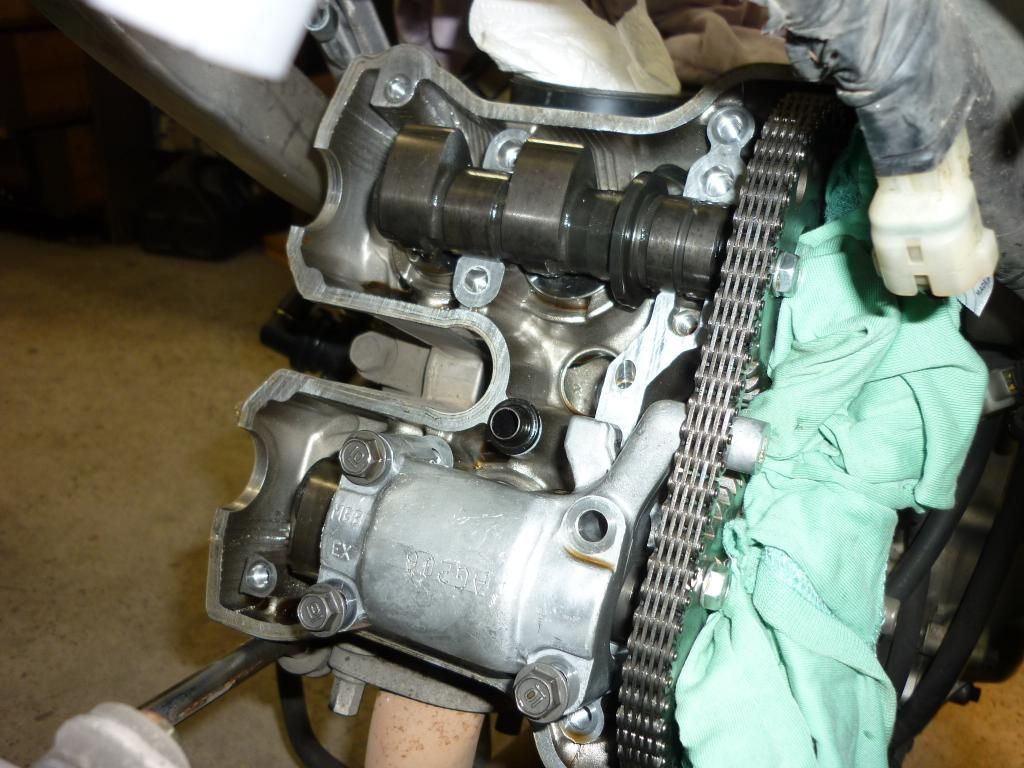
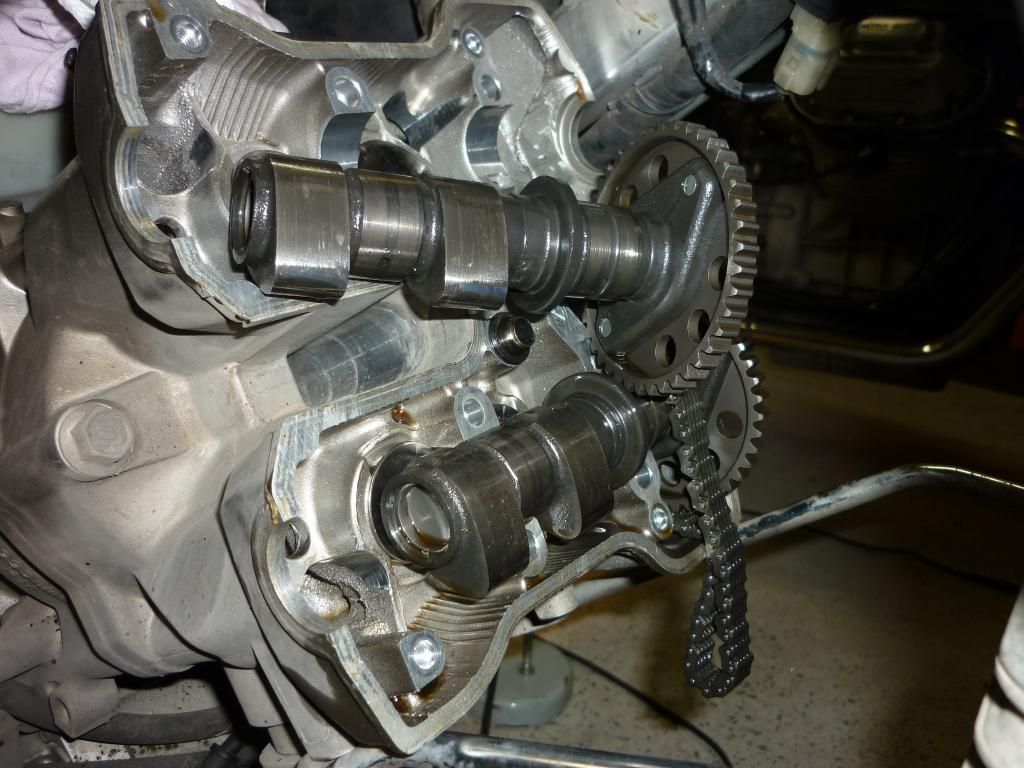
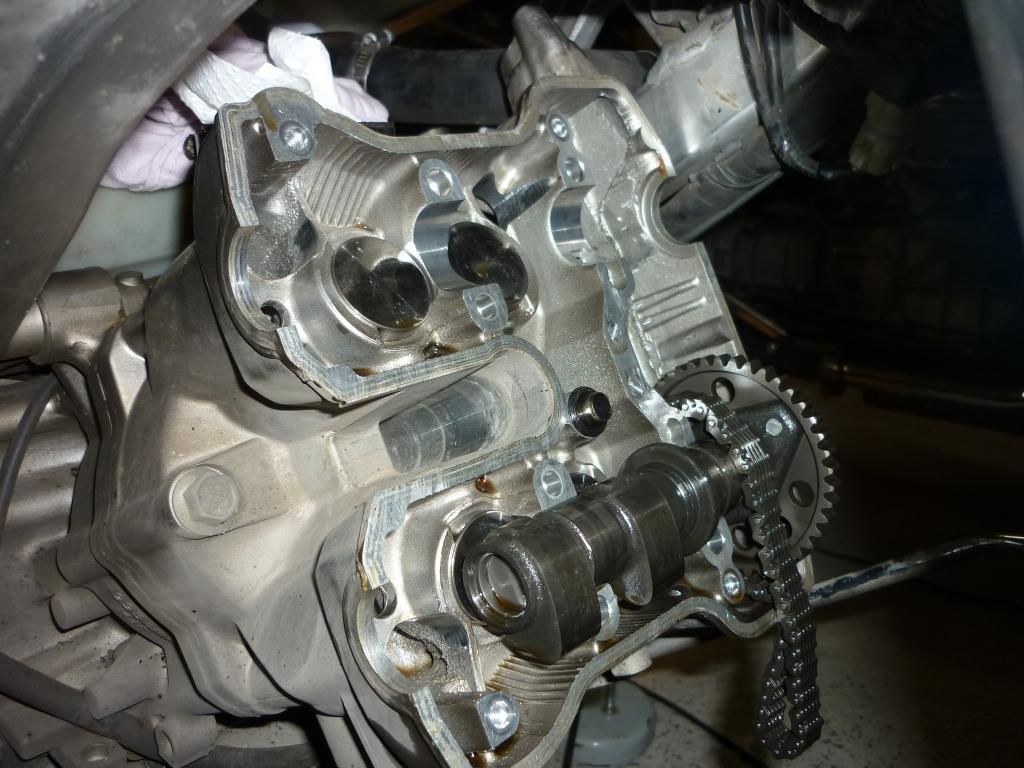
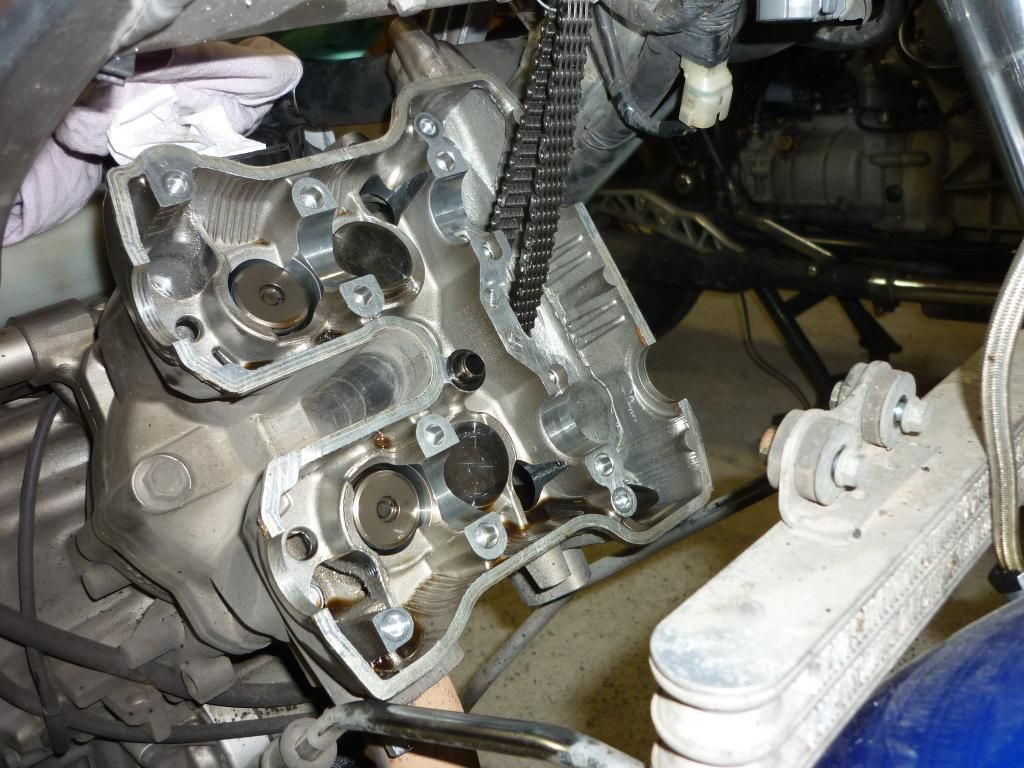
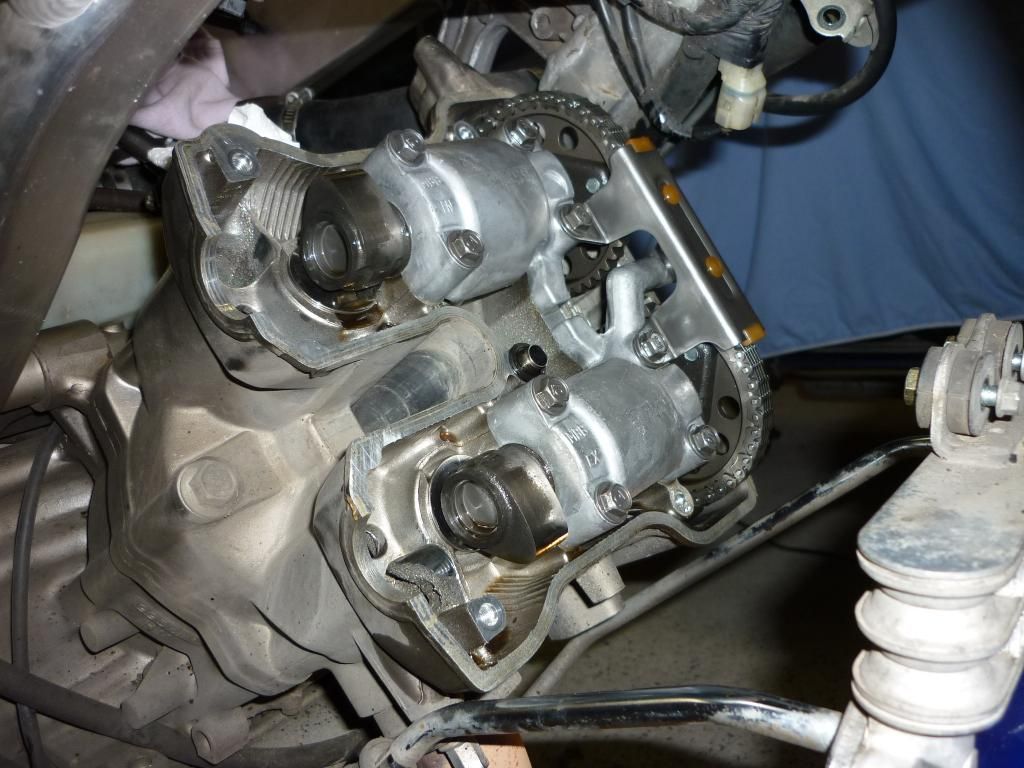
When putting the cam chain back over the sprockets, pull it taught on the opposite side to the tensioner and sit that cam in place with the timing mark lined up before moving onto the other cam and sliding the chain over.

Give all parts a good coating of oil on re-assembly, I also pour a little over the camshafts and turn the engine over by hand a few times before firing it up. :thumbup:

It might be worth changing the thread title to something more relevant now. Maybe Airbox, CCT Stopper and Valve clearances :lol:

(:-})
==============================Enter the Darkside
User avatar
VTRDark
Posts: 20010
Joined: Sun Mar 18, 2012 9:24 pm

Re: Airbox, CCT Stopper and Valve clearances

Post by VTRDark »

FYI here's a pic that shows where there is no PAIR oilway in an early head.

Image

I just noticed the thread title :thumbup:

(:-})
==============================Enter the Darkside
User avatar
thunderbolt
Posts: 302
Joined: Wed Apr 02, 2014 9:12 am
Location: Sydney, Australia

Re: Airbox, CCT Stopper and Valve clearances

Post by thunderbolt »

Thanks Carl,

I shall have to do some reading of the manual before I attempt to pull the camshafts. What position the motor needs to be in - timing marks, etc. And I know from experience that some cams can be taken out without removing the cam sprocket while others cannot. Must I remove the sprocket first, even though the CCT will be removed to get all the chain slack possible.

Thanks for the pic and ongoing advice.
Last edited by thunderbolt on Sat Aug 23, 2014 7:54 am, edited 1 time in total.
Cheers
Don
____________________________________________

Bikes:
1977 Suzuki GS550/700 - modified significantly
1981 Moto Guzzi 850 T4
1990 Suzuki VX800
2003 Honda Firestorm VTR1000
User avatar
VTRDark
Posts: 20010
Joined: Sun Mar 18, 2012 9:24 pm

Re: Airbox, CCT Stopper and Valve clearances

Post by VTRDark »

You take the measurement from the the base circle (larger circumference) end of the cam lobe. Basically set the timing the same as when doing CCT's on the compression stroke so both valves are closed. Valve lash (clearances) are basically needed to smooth out the transition from the base circle, as the cam rolls off the centreline (dead centre middle, 6 O' clock position) and onto the ramp (lift area).

No need to touch the cam sprockets. Once the 4 bolts are removed and the cam cap removed the cam lifts out as a whole with the sprocket. :thumbup:

(:-})
==============================Enter the Darkside
User avatar
thunderbolt
Posts: 302
Joined: Wed Apr 02, 2014 9:12 am
Location: Sydney, Australia

Re: Airbox, CCT Stopper and Valve clearances

Post by thunderbolt »

cybercarl wrote:You take the measurement from the the base circle (larger circumference) end of the cam lobe. Basically set the timing the same as when doing CCT's on the compression stroke so both valves are closed. Valve lash (clearances) are basically needed to smooth out the transition from the base circle, as the cam rolls off the centreline (dead centre middle, 6 O' clock position) and onto the ramp (lift area).

No need to touch the cam sprockets. Once the 4 bolts are removed and the cam cap removed the cam lifts out as a whole with the sprocket. :thumbup:

(:-})
Will the chain be slack enough to allow the sprocket to pull through it?
Last edited by thunderbolt on Sat Aug 23, 2014 7:56 am, edited 1 time in total.
Cheers
Don
____________________________________________

Bikes:
1977 Suzuki GS550/700 - modified significantly
1981 Moto Guzzi 850 T4
1990 Suzuki VX800
2003 Honda Firestorm VTR1000
User avatar
VTRDark
Posts: 20010
Joined: Sun Mar 18, 2012 9:24 pm

Re: Airbox, CCT Stopper and Valve clearances

Post by VTRDark »

Oh yeh... there's plenty of slack once them cam caps are loose. Obviously the tension needs to be released from the CCT first. If you remove both cams, don't loose the chain down the cam tunnel which is easier on the rear than front. For the front cylinder the chain hangs nicely forward and over the edge, but with the rear it can drop right down inside. It can be retrieved but best not let it drop anyway. A bit of metal coat hanger or something works well to hold it up. Otherwise work on one cam at a time and keep the chain looped over one sprocket.

(:-})
==============================Enter the Darkside
User avatar
thunderbolt
Posts: 302
Joined: Wed Apr 02, 2014 9:12 am
Location: Sydney, Australia

Re: Airbox, CCT Stopper and Valve clearances

Post by thunderbolt »

Thanks.

Riding with the Ducati Club today on my Guzzi. Cams are a job for another day.
Cheers
Don
____________________________________________

Bikes:
1977 Suzuki GS550/700 - modified significantly
1981 Moto Guzzi 850 T4
1990 Suzuki VX800
2003 Honda Firestorm VTR1000
User avatar
VTRDark
Posts: 20010
Joined: Sun Mar 18, 2012 9:24 pm

Re: Airbox, CCT Stopper and Valve clearances

Post by VTRDark »

It's always good to have another bike to ride while ones off the road. It certainly makes working on things a little more pleasant as there's no rush. :thumbup:

Have safe ride out :Bike:

(:-})
==============================Enter the Darkside
User avatar
thunderbolt
Posts: 302
Joined: Wed Apr 02, 2014 9:12 am
Location: Sydney, Australia

Re: Airbox, CCT Stopper and Valve clearances

Post by thunderbolt »

Well up to the stage of pulling the camshafts out. First set the timing to TDC on compression stroke for the front cylinder. Removed the CCT and the top chain guide. Then loosened the bolts holding the camshaft holders in place. I was surprised how much effort was required to release these bolts considering their size (6mm).

Image

Cam holders off.

Image

Camshafts removed. Camshaft sprockets slipped out of chain and the cams could both be removed without the need to removed the cam sprockets from the cams as stated in the Honda workshop manual. Thanks CARL for that piece of advice.

Image

Image

Cams out of head with buckets still in place.

The two following pics show the cam holders/caps; call them what you like. They both appear to have a number engraved on the caps after first being centre punched. Does anyone know what they are for or what they represent? They can't be part numbers as the same number is on both cam caps. Maybe for security reasons in case the bike is stolen. What do you think?

Image

Image

Removal of the valve lifter/bucket using a magnet.

Image

Valve lifters removed. Shim still on left spring retainer but not on the right one. It came out with the lifter.

Image

Shims being measured as there were no visible markings on them. The RH inlet shim measured at 2.00 mm and the RH exhaust shim measured at 1.95 mm.

Image

Image

The chart below is what I used to record the valve clearances, the existing shim size and the required shim size to get the clearance within tolerance.

Image

Parts removed from the cylinder head including the shims.

Image

One last picture of the head with all the valve operating gear removed from it.

Image

The exhaust shim that I required needed to be one size smaller as that valve was tight - .25mm instead of .31mm. So needed to go from 1.95mm to 1.90mm to be able to obtain the required clearance.

The inlet shim that I required needed to be one size larger as that valve was loose - .23mm instead of .16mm. So needed to go from 2.00mm to 2.05mm to be able to obtain the required clearance.

I swapped my two shims for the two new ones today at my local Honda dealer. So just need to reassemble it ALL now.

I am still waiting on the important "O" rings that go between the cylinder head and Valve cover (to seal PAIR system).

.
Last edited by thunderbolt on Mon Aug 25, 2014 10:44 am, edited 2 times in total.
Cheers
Don
____________________________________________

Bikes:
1977 Suzuki GS550/700 - modified significantly
1981 Moto Guzzi 850 T4
1990 Suzuki VX800
2003 Honda Firestorm VTR1000
User avatar
lloydie
Posts: 20923
Joined: Mon Jan 17, 2011 11:16 pm
Location: In the garage somewhere in Coventry

Re: Airbox, CCT Stopper and Valve clearances

Post by lloydie »

The marking on the cam caps are there to Id them . If you look in the head you will see the matching two letters as they are match to that one head .
User avatar
thunderbolt
Posts: 302
Joined: Wed Apr 02, 2014 9:12 am
Location: Sydney, Australia

Re: Airbox, CCT Stopper and Valve clearances

Post by thunderbolt »

lloydie wrote:The marking on the cam caps are there to Id them . If you look in the head you will see the matching two letters as they are match to that one head .
OK. I see. I guess they are bolted onto the head and line bored to suit the journals of the camshaft.

Thanks
Last edited by thunderbolt on Tue Aug 26, 2014 10:55 am, edited 1 time in total.
Cheers
Don
____________________________________________

Bikes:
1977 Suzuki GS550/700 - modified significantly
1981 Moto Guzzi 850 T4
1990 Suzuki VX800
2003 Honda Firestorm VTR1000
User avatar
VTRDark
Posts: 20010
Joined: Sun Mar 18, 2012 9:24 pm

Re: Airbox, CCT Stopper and Valve clearances

Post by VTRDark »

That's my thoughts exactly. Production marks so they don't end up mixed with another engines head.

Fantastic photo's and I'm loving the diagram :clap: :clap: It's posts like that which bring value to a thread for others. :thumbup:

Stick a dab of oil inside the lifters (buckets) when putting them back on. I also place a smear across the tops of them too before putting the cams back in. Basically give everything a coat of oil so it's not dry on initial start up or turning of the crank. Don't forget what I was saying about the cam holder bolts and do them up a bit at a time in a criss cross pattern. You may even find that you can get the timing even more accurate than it was before. Look straight on directly at you TDC marker on the flywheel, get it spot on the line, then get your cams in.

It's tricky to see the FI and FE marks on the front when putting them in, as the rad and frame get in the way a bit. Top tip for you!!!! If you look at the timing marks on the sprocket before you put the cams in place, note the opposite mark which happens to line up in the centre/middle between the two sprockets. Does that makes sense :think: For example take the inlet cam and look where the FI mark is at the 3 o clock position when lined up flush with the top of the cylinder head. Now look at the marking completely opposite it at 9 o clock. Do the same for the exhaust cam and use the middle/centre marks as your guide. It's a lot easier to get eye level with these to check the timing.

(:-})
==============================Enter the Darkside
User avatar
thunderbolt
Posts: 302
Joined: Wed Apr 02, 2014 9:12 am
Location: Sydney, Australia

Re: Airbox, CCT Stopper and Valve clearances

Post by thunderbolt »

Thanks Carl for the compliments and especially your tips. I used one of your other tips to line the cams timing marks up when doing the stopper mod. I have a substantial engineers rule which I laid along the top surface of the head and I could easily see if both cams were in the correct position. Took it from your thread on manual CCT installation.

I was going to install the shims tonight, but it's still the tail end of our winter out here and it's thunderstorms and wintery temperatures outside and cold in my shed so it can wait for another night.

I will not be removing the cams from the rear head as all valve clearances are within spec. Even though the two LH valves on the front head are spot on I thought I would remove the lifters/buckets to just be able to record the size on the shims in these positions.

Thanks
Cheers
Don
____________________________________________

Bikes:
1977 Suzuki GS550/700 - modified significantly
1981 Moto Guzzi 850 T4
1990 Suzuki VX800
2003 Honda Firestorm VTR1000
User avatar
thunderbolt
Posts: 302
Joined: Wed Apr 02, 2014 9:12 am
Location: Sydney, Australia

Re: Airbox, CCT Stopper and Valve clearances

Post by thunderbolt »

I installed the shims tonight, as well as the buckets, camshafts and camshaft caps.

Spot the obvious mistake in the next picture;

Image

New intake shim in place prior to bucket being replaced.

Image

The 7mm cam cap bolts being torqued to spec (a bit less actually 18 n-m).

Image

All back together.

Image

Now for the BAD NEWS;

I measured the valve clearances on the front head after rotating the crank anti clockwise about half a dozen times and then back to TDC on the compression stroke for the front cylinder.

The LH exhaust and inlet measurements were spot on - .31mm and .18mm respectively.

On the two valves where I changed the shims the RH inlet was ok at .16mm instead of the previous .23mm which was too loose.

The RH exhaust valve is the problem though. It measure at .23mm with the feeler gauges. Which is actually tighter than it was originally even though I put a shim in there that was .05mm thinner than the one it replaced. That was a 1.90mm in place of the 1.95mm shim.

I turned the motor over a few more revolutions and measured again. NO success.

I guess all I can do is pull the camshafts again and get the next thinner shim which would be a 1.85mm one.

BTW in case anyone was wondering I did replace the top cam guide, torqued the cam cap bolts and refitted the CCT and released the tension on the chain - remembering the cam cap bolts were torqued to 18 n-m instead of the 21 n-m in the book.

Any suggestions as to what went wrong?
Cheers
Don
____________________________________________

Bikes:
1977 Suzuki GS550/700 - modified significantly
1981 Moto Guzzi 850 T4
1990 Suzuki VX800
2003 Honda Firestorm VTR1000
User avatar
VTRDark
Posts: 20010
Joined: Sun Mar 18, 2012 9:24 pm

Re: Airbox, CCT Stopper and Valve clearances

Post by VTRDark »

Spot the obvious mistake in the next picture;
Chain running the wrong side of the cam cap. You will have to remove the cap to get the chain the other side of the sticky out bit.
The RH exhaust valve is the problem though. It measure at .23mm with the feeler gauges. Which is actually tighter than it was originally even though I put a shim in there that was .05mm thinner than the one it replaced. That was a 1.90mm in place of the 1.95mm shim.

I turned the motor over a few more revolutions and measured again. NO success.

I guess all I can do is pull the camshafts again and get the next thinner shim which would be a 1.85mm one.
You could try loosening the cam cap bolt a tad above this valve, say a 1/8th to a 1/4 turn max. You have to use your own judgement here. Then check the clearance once again. Otherwise, yes go to the next shim size down.

I'm not sure why it's not spot on but that could be any number of things. Miss-calculation, inaccuracy with measuring the clearance or shim. It could even be down to a different tension on parts/bolts.

(:-})
==============================Enter the Darkside
Post Reply