

half the yellow one is looking good

i could have sworn this was smooth!!

it's a slow process with the weather cos every time it's sunny i go out for a ride!
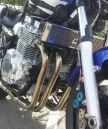
Chris do you know what the pitch is? i can find 1mm and 1.25mm ones on ebay (1.25 is most likely?)sirch345 wrote:Yes I agree with Watty for the left side bracket, you'll need a fine pitch bolt that screws into the back of the side stand bolt thread as shown below
Chris.


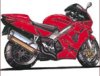
Black and yellow is always a nice combo for a bike.markbo wrote:
It certainly looks better than when you got it off me matemarkbo wrote:Not been on here for a while but i got the one belly pan "finished" and fitted - couldn't get a yellow to match so i just went with black from halfords nice and easy to apply too!
I've seen templ8's bellypan post, what a great job!
I haven't fitted heat foil inside but think i should probably do that?
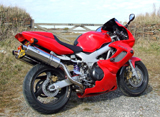
Where the fin touched the pipe i cut it short and shaped it with a small grinder so no part of the bellypan touches anything hot now as far as i can tell (haven't got around to painting the edge yet!)
Very pleased with the end result - it's not perfect by any means but it's my first attempt and i'm happy with it.
I was going to put some stickers on too but i'm not sure they're neccessary.
Thank you Mr. Bourne. It's good to be back...although, I think other people may think different, but...MEH! And yup, twials and twibulations abound. All we can do is "keep on keepin on!"markbo wrote: nice to see you back on here after your trials and tribulations - keep on keeping on!
Thanks for that, as the reshaping on the belly pan went well i might try to do something similar on the fairing lowers to get them away from the heat.kev64 wrote:I got the exact same yellow lowers as you, with the exact same break !!
Thanks for the tips on that, (I also need to make some brackets)
Nice job so far


Yes I agree those two colours work very well together.TheGingerBeardMan wrote:
Black and yellow is always a nice combo for a bike.
Yep, just ask a wasp...sirch345 wrote:Yes I agree those two colours work very well together.TheGingerBeardMan wrote:
Black and yellow is always a nice combo for a bike.
Good job Mark
Chris.