I was asking about US-version ICU on the US forum and also here, so I think better to post few pics of my project.
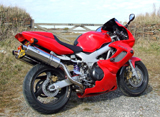
My bike is 2002 Firestorm which I bought from an insurance company last spring. Because of my work I'm not much at home so this project is being postponed until now...
The bike had minor damages; the fairings were missing as well as the seat, blinkers, etc. The Ignition switch was smashed and there was no hiss antenna.
On the good side there was quite modest mileage: 46 000 km (approx 29 000 miles), and the bike was not fallen over, mirrors were non-scrached as well as the engine sides. I wasn't able to start the engine so I took a small change with the condition of the engine...
First I tought it is easy to get this running; just purchase new HISS -antenna and since I got the original keys, it would be good to go...but as nothing goes like movies, there was more to come...
Here is the bike in the insurance company:

Link to the pict:
http://aijaa.com/nx4O6H
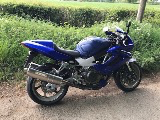
I took the bike home and stripped it in the shop...

Link: http://aijaa.com/8qIsFF
Will continue once test the photos show...