Argh man I know exactly how you feel mate. My bike is my only form of transport too and today I stripped it down to a pile of parts ready for painting frame and stuff.
I have this stuff arriving tomorrow.
http://www.rust.co.uk/products/category ... sis-paint/
Any tips you can give me as I've not used a two pack like this one beofore. I'm brushing it on.
(:-})
Here we go again....
Re: Here we go again....
==============================Enter the Darkside
Re: Here we go again....
Tbh Carl I have only brushed 2k a handful of times. Across the various makes of 2k paint the products vary quite a lot, some thicker than others, some dry quicker than others etc etc Think maybe doing a little test panel first would be the way to go.
Only one thing I know for sure... don't know what this product you have bought is like... but if you getting any problem with brush marks (i'm thinking of any areas that may be seen) then I would put a decent coat on and leave to dry then nib it down and put another thinner coat on top.
Don't know if you know this but there are quite a few companies that do 2k in an aerosol can nowdays. Makes single pack a thing of the past.
Re: Here we go again....
I was already thinking that.I would put a decent coat on and leave to dry then nib it down and put another thinner coat on top.
I didn't realise that the paint in the cans was the same. I thought epoxy resin was a different product from 2K stuff like you use on fairings etc, the epoxy being more plasticky if that makes sense and a higher build. Yeh I know there are 2K cans out there but it works out expensive with most of it getting wasted into the atmosphere. I have an hour open time with this stuff I'm going to use.
I found some epoxy resin on eBay the other day that is designed for painting pipelines and can be used underwater.
(:-})
==============================Enter the Darkside
Re: Here we go again....
2k/2 pack..... just means 2 parts.. colour and hardener. As for price of cans.. never used the stuff premixed so wouldn't have a clue but I wouldn't doubt it being more costly than buying it and mixing yourself.
Re: Here we go again....
Things are a little behind.. between the nasty petrol tank and belly pan a bit more work than expected. Few pics to show progress. Everything should be in primer tomorrow and all being well in colour Wednesday, Thursday at latest.
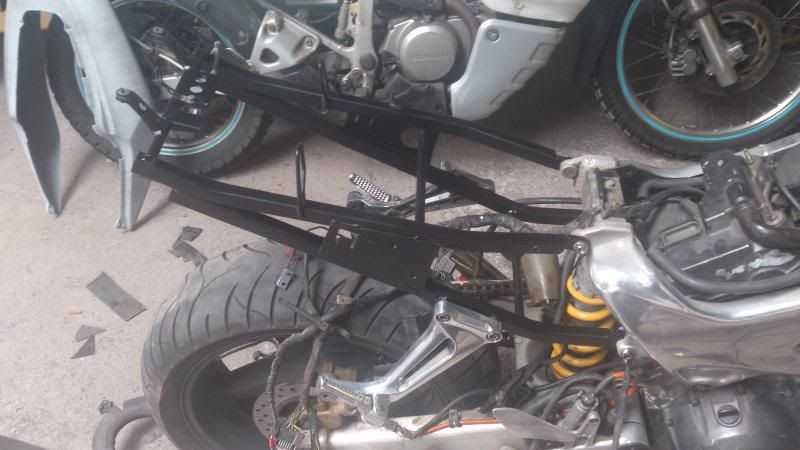
Front and rear subframes primed up and going black..
Scabby belly pan (although for the money i'm not complaining) had about 6inches missing off the rear on the stand side plus a fair share of cracks and scuffs/chips... thats been fashioned up to look the part making sure the replaced end is out the way of the stand and corresponding boot that uses said stand.
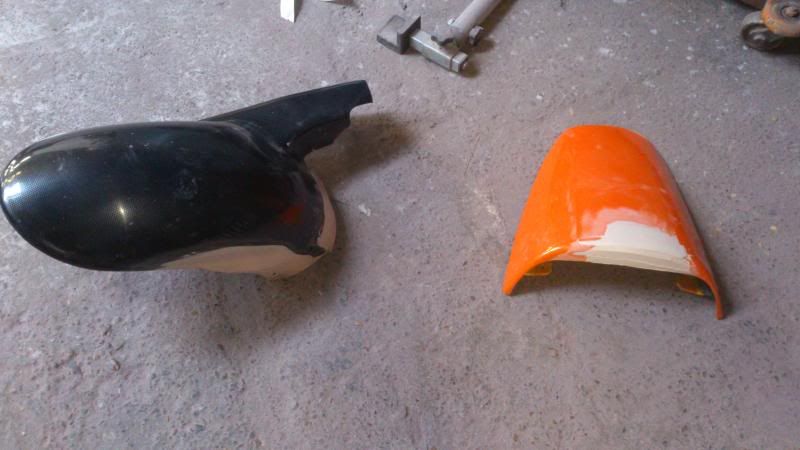
Hugger fixed up... baring in mind that was just a 20 quid job I picked up last year.
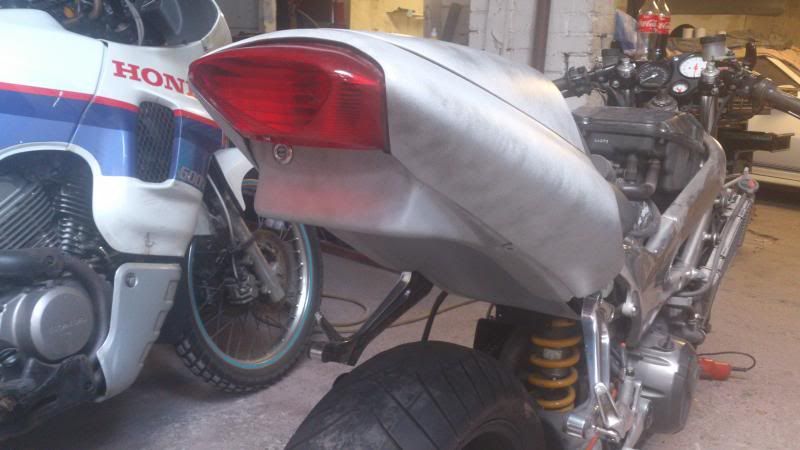
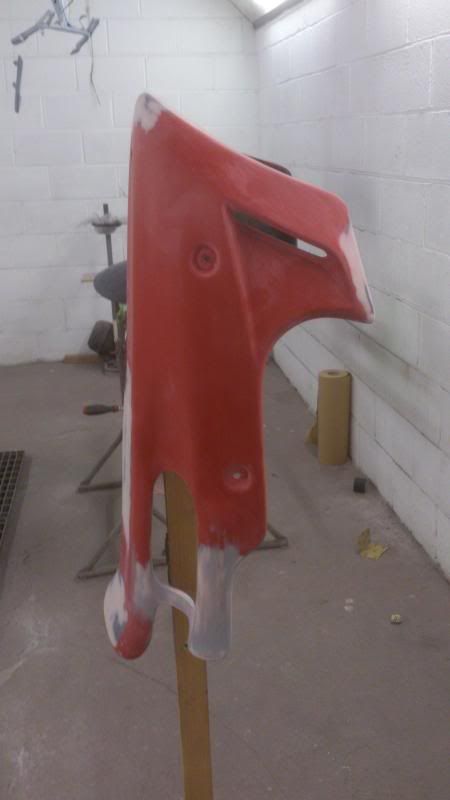
Fixed up seat cowl that i managed to sit on a crack last year, actually went off a speed hump a bit fast, ass off the seat and landed/squashed the cowl lol
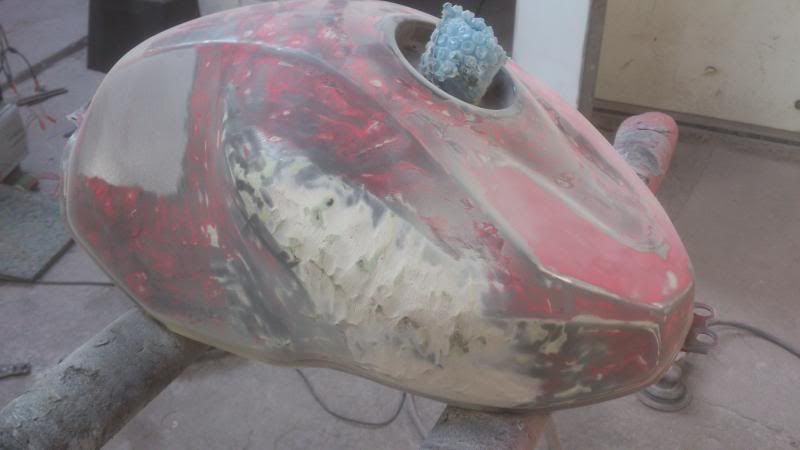
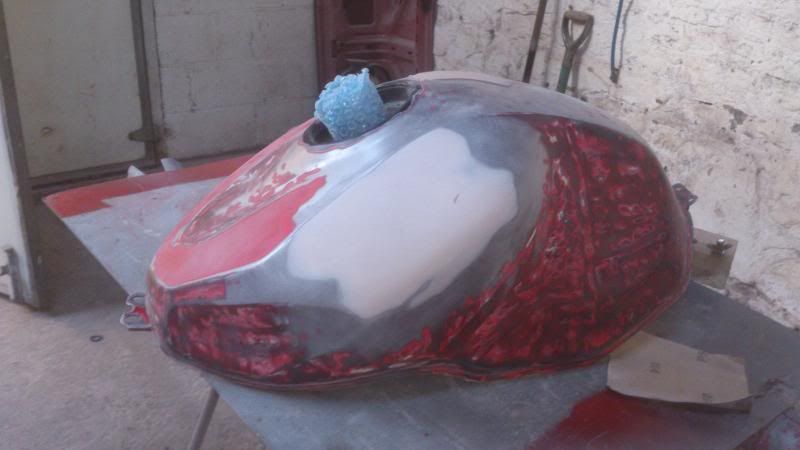
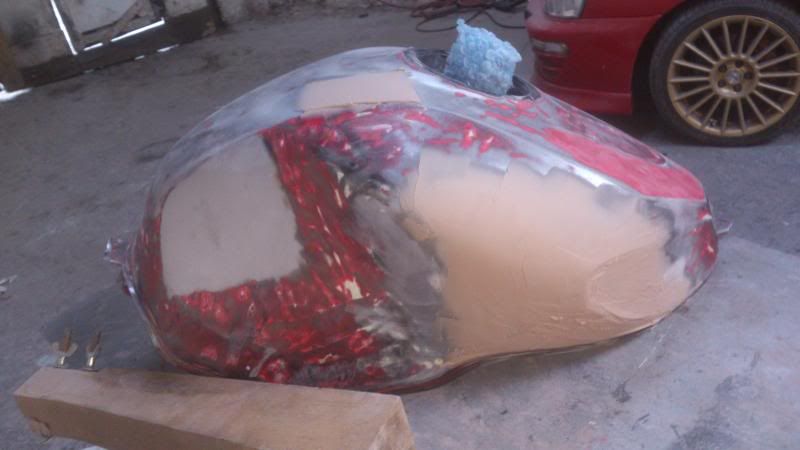
Tank.... what a mess... It had to be stripped because of paint blistering plus it needed re-repairing on the right side (sat on bike) Noticed a bad repair had been done in past and it had been bugging me so wanted it back near to shape like it was supposed to be. Once stripped uncovered big wedge of filler in both sides.... on the bright side looks worse than is, the dents are not as deep as I was expecting them to be.
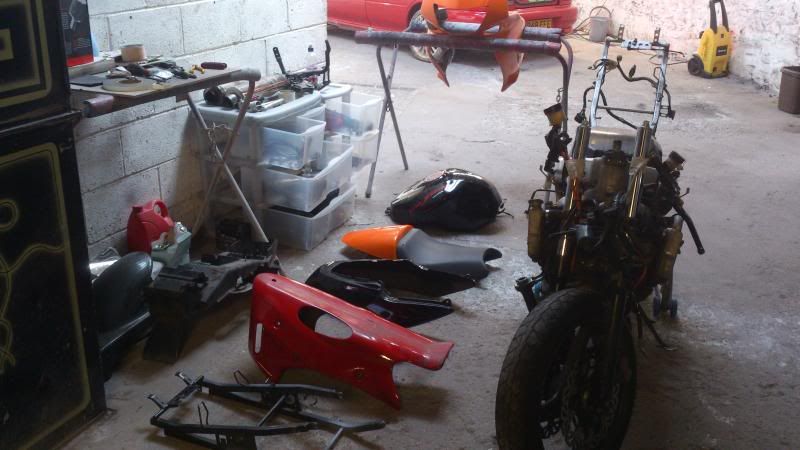

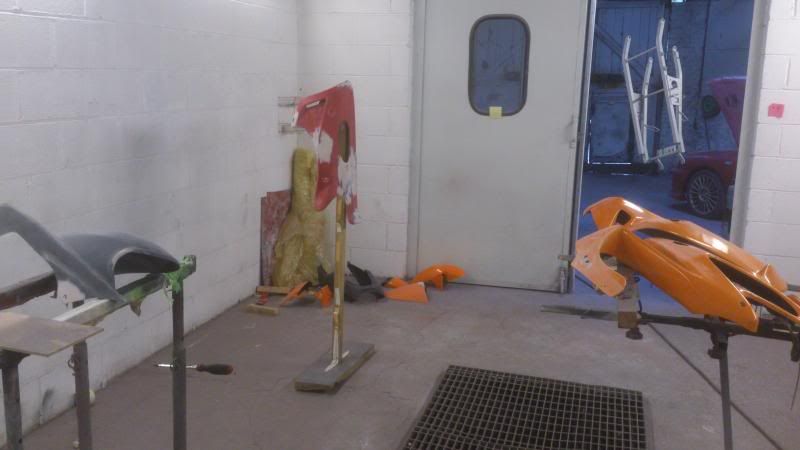
It's going to be fun setting this lot up in one go... all the above plus tank, 2 wheels, undertray and yoke
Front and rear subframes primed up and going black..
Scabby belly pan (although for the money i'm not complaining) had about 6inches missing off the rear on the stand side plus a fair share of cracks and scuffs/chips... thats been fashioned up to look the part making sure the replaced end is out the way of the stand and corresponding boot that uses said stand.
Hugger fixed up... baring in mind that was just a 20 quid job I picked up last year.
Fixed up seat cowl that i managed to sit on a crack last year, actually went off a speed hump a bit fast, ass off the seat and landed/squashed the cowl lol
Tank.... what a mess... It had to be stripped because of paint blistering plus it needed re-repairing on the right side (sat on bike) Noticed a bad repair had been done in past and it had been bugging me so wanted it back near to shape like it was supposed to be. Once stripped uncovered big wedge of filler in both sides.... on the bright side looks worse than is, the dents are not as deep as I was expecting them to be.


It's going to be fun setting this lot up in one go... all the above plus tank, 2 wheels, undertray and yoke
Re: Here we go again....
Now your talking my language.....a little bit of filler and rubbing down. I have to wear a mask these days as I've breathed to much in over the years that it now irritates me. 
That looks like a 19L tank to me. So what colour is this lot going. Orange again or are go ng for one of the more bizzare colours like Kermit Green
(:-})
That looks like a 19L tank to me.
(:-})
==============================Enter the Darkside
Re: Here we go again....
Yep, thats a 19lt tank 
Colour, black & orange. Going with a straight black tinter all over. Blazing orange as used before, on head lamp panel, adding number boards at the rear sides and orange wheels. Then going to put the blazing orange mid coat (the pearly effect coat) over the whole lot. No idea what end result will be, just fingers crossed it works out ok.
Colour, black & orange. Going with a straight black tinter all over. Blazing orange as used before, on head lamp panel, adding number boards at the rear sides and orange wheels. Then going to put the blazing orange mid coat (the pearly effect coat) over the whole lot. No idea what end result will be, just fingers crossed it works out ok.
Re: Here we go again....
Really looking forward to seeing it 
Re: Here we go again....
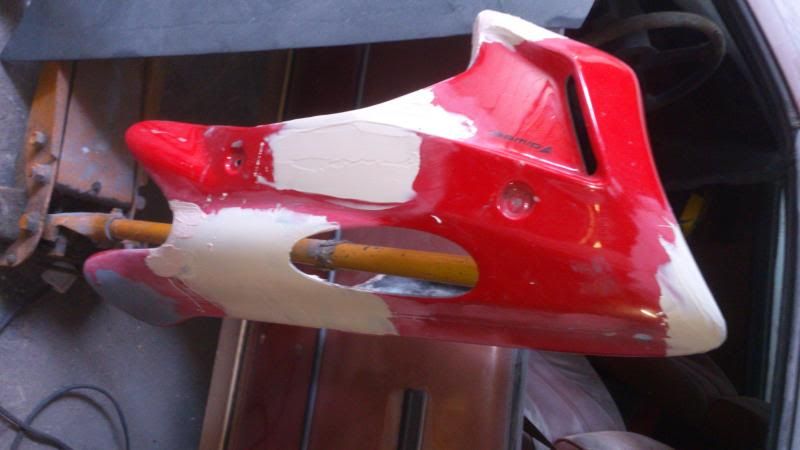
Pay particular attention to this bit. Note the angle and how it flows into the the other crease in the tank. It's tricky to get right that and the the other angle opposite coming down to where they both meet at the rounded part along with the sloping depth in the recess.
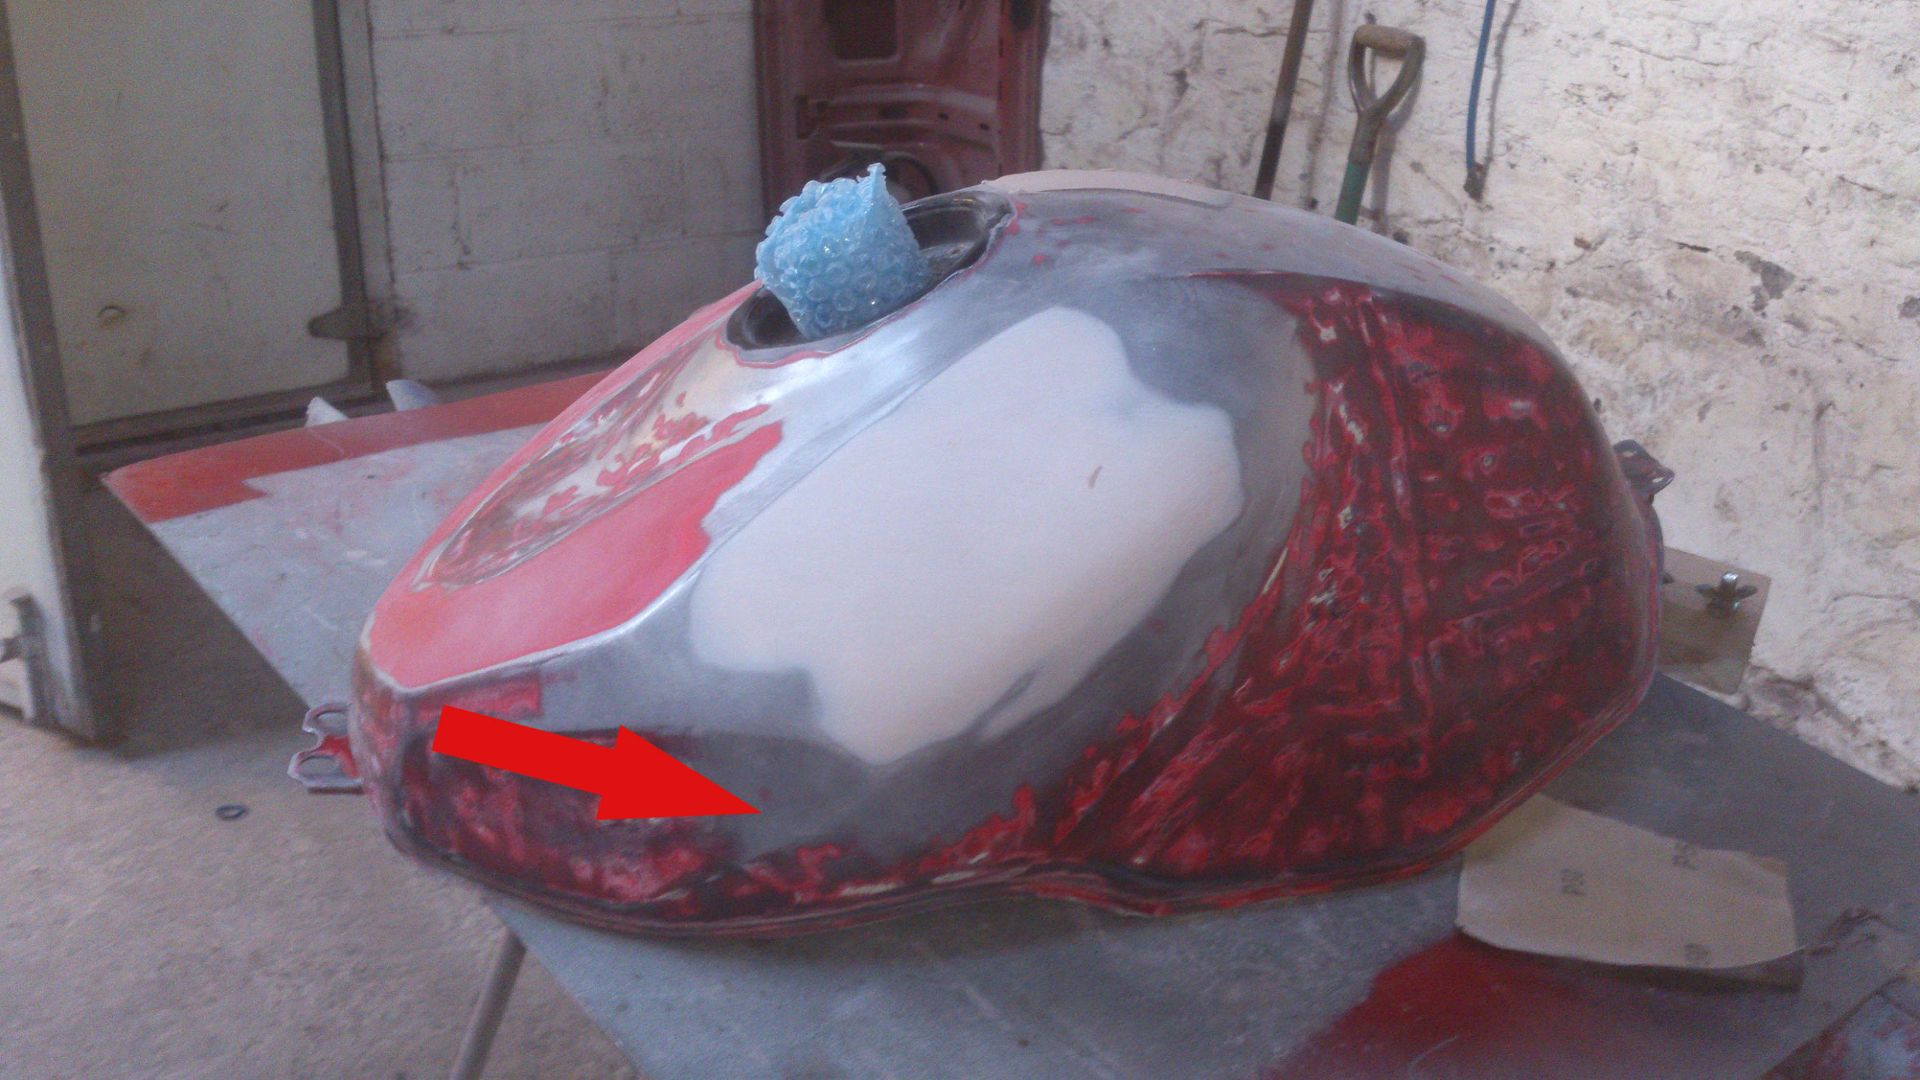
I am a wolly, you've done it already and it primed.
(:-})
I am a wolly, you've done it already and it primed.
(:-})
==============================Enter the Darkside
Re: Here we go again....
cybercarl wrote:Pay particular attention to this bit. Note the angle and how it flows into the the other crease in the tank. It's tricky to get right that and the the other angle opposite coming down to where they both meet at the rounded part along with the sloping depth in the recess.
I am a wolly, you've done it already and it primed.
(:-})
It was in a rough coat of primer just to see the shape. You are bang on though Carl, its a horrible shape to get right. Did a 19lt tank a couple months ago, damage on one side but same area where all creases meet... looked great. My tank, it will look ok but wont be perfect. The side shown with yr arrow, that side will be fine but the other.... It will look better than the previous repair
Re: Here we go again....
I've been there done that one side good and the other side a small dent, and a mis-coat of primer helps so you can see what needs more filler, rubbing down or re-shaping. To get that angle where my arrow is I ended up measuring the distance on the good side from the bottom off the tank to where the angled line starts and measuring the other end from the bottom of the tank to where it meets the curve. I then put a line of masking tape along as a guide.
Here's my workshop LOL
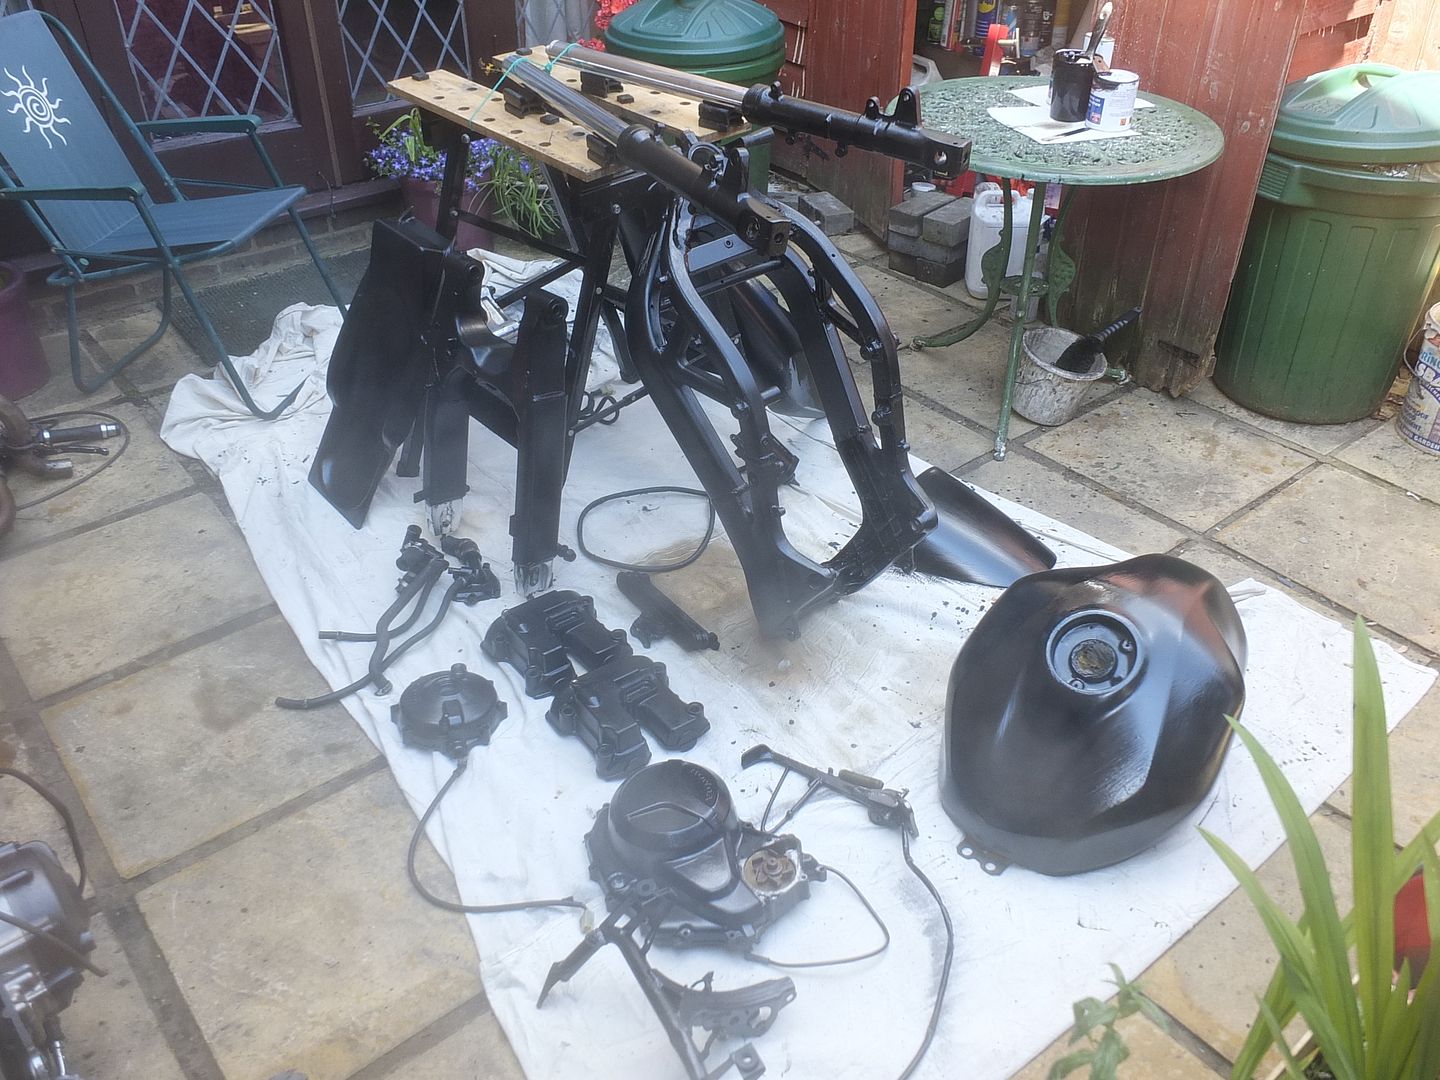 `
`
I'm impressed with that rustbuster epoxy chassis paint I used. I'm not impressed that it's ruined 3 brushes. If I had more xylene thinners I would have left a brush soaking in that, but they only supplied 500ml with the paint. I tried leaving a brush in water overnight but it hardened up. The next day I tried wrapping it in a carrier bag and it hardened up. I don't like throwing away brushes as it means I have to buy cheap crap one where I end up forever picking bristles out the paint. I would rather use better quality brushes and clean them out. At least the bristles don't fall out and I get a better finish when I lay off.
Fairings and tanks will be the next thing, but that can wait until next year now. I don't think I shall spray them myself though. I'm going to do all the prep work and prime them up, then take them to a paintshop to give them the once over with a gloss black and lacquer them up. Maybe a little Gold fleck in the paint would be nice, not sure yet. As for my wheels I fancy going with a fluorescent Greeny/Yellow and decals with a pinstripe line (stroke) around them in Gold so they stand out slightly. I don;t know if I can trust the paintshop to put the decals on accurately so May have to do them myself once they put the first coat of lacquer on.
(:-})
Here's my workshop LOL
`I'm impressed with that rustbuster epoxy chassis paint I used. I'm not impressed that it's ruined 3 brushes. If I had more xylene thinners I would have left a brush soaking in that, but they only supplied 500ml with the paint. I tried leaving a brush in water overnight but it hardened up. The next day I tried wrapping it in a carrier bag and it hardened up.
Fairings and tanks will be the next thing, but that can wait until next year now. I don't think I shall spray them myself though. I'm going to do all the prep work and prime them up, then take them to a paintshop to give them the once over with a gloss black and lacquer them up. Maybe a little Gold fleck in the paint would be nice, not sure yet. As for my wheels I fancy going with a fluorescent Greeny/Yellow and decals with a pinstripe line (stroke) around them in Gold so they stand out slightly. I don;t know if I can trust the paintshop to put the decals on accurately so May have to do them myself once they put the first coat of lacquer on.
(:-})
==============================Enter the Darkside
Re: Here we go again....
you did a bloody great job of it too, will need to go shopping for a fuel tap and get the bugger fittedShauned71 wrote:cybercarl wrote:Pay particular attention to this bit. Note the angle and how it flows into the the other crease in the tank. It's tricky to get right that and the the other angle opposite coming down to where they both meet at the rounded part along with the sloping depth in the recess.
I am a wolly, you've done it already and it primed.
(:-})
It was in a rough coat of primer just to see the shape. You are bang on though Carl, its a horrible shape to get right. Did a 19lt tank a couple months ago, damage on one side but same area where all creases meet... looked great. My tank, it will look ok but wont be perfect. The side shown with yr arrow, that side will be fine but the other.... It will look better than the previous repair
Re: Here we go again....
Thank youplayerone wrote: you did a bloody great job of it too, will need to go shopping for a fuel tap and get the bugger fitted

Re: Here we go again....
One time when I didn't have use of my garage... figured that if no one else was going to use my kitchen then I would... painted forks, rear swing arm and wheels in there toocybercarl wrote:I've been there done that
Here's my workshop LOL
I'm impressed with that rustbuster epoxy chassis paint I used. I'm not impressed that it's ruined 3 brushes. If I had more xylene thinners I would have left a brush soaking in that, but they only supplied 500ml with the paint. I tried leaving a brush in water overnight but it hardened up. The next day I tried wrapping it in a carrier bag and it hardened up.
Fairings and tanks will be the next thing, but that can wait until next year now. I don't think I shall spray them myself though. I'm going to do all the prep work and prime them up, then take them to a paintshop to give them the once over with a gloss black and lacquer them up. Maybe a little Gold fleck in the paint would be nice, not sure yet. As for my wheels I fancy going with a fluorescent Greeny/Yellow and decals with a pinstripe line (stroke) around them in Gold so they stand out slightly. I don;t know if I can trust the paintshop to put the decals on accurately so May have to do them myself once they put the first coat of lacquer on.
(:-})

I often use a light coat of either primer or satin black to help check or get shapes right. Used to use tape or pencil in lines years ago but mostly do everything by eye now... years of doing stuff like below helps


Like your plans for your bike.... endless things you can do to give it a bit extra something over or in the black... be it adding something or even using a mid coat to give a different look.
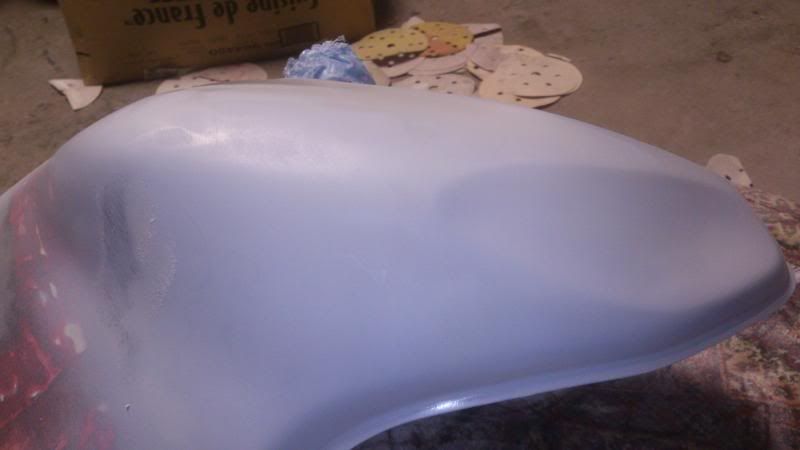
As for mine... quite pleased with progress today... now feel like i'm getting somewhere. Everything in primer and h/bars painted. Tank don't look bad... it's not 100% but should look fine once paint/decal on. Not worth being too fussy with it, it's an all weather bike after all and i'm constantly chucking my tank bag on so no point trying to make a minter... as long as she looks nice that will do.
My bargain basement bellypan now looks respectable too. Tomorrows plans... paint up both subframes and all being well will start prepping everything up with a view to putting colour on on Wednesday.. Also got to spend a bit of time tomorrow trying to work out how in hell i'm going to set so many bits up at one time, was hoping to paint all in one hit but think the booth gonna be pretty full so gonna be tricky to navigate around everything..... gotta make sure i'm not going to be bumping into stuff with my fat ass.... although it wouldn't be the first time


Re: Here we go again....
Both front and rear subframes painted and fitted plus a test fit of the rear panels... Paint day tomorrow woo hoo!  well at least some of it will be painted... not worth the hassle of trying to set them all up in the booth in one hit so will do it in 2 goes.. prob be the main fairing, tank, rear panel, undertray and seat cowl tomorrow then mudguard, hugger, bellypan and wheels the next day. That way I can paint in morn and do my running around in afternoon... then next day it be paint in morn again and then start fitting the main panels in afternoon. All being well all panels will be on for friday and then it's forks and swingarm off to make pretty.