CBR1000 Firestorm
-
StormyRob
- Posts: 1565
- Joined: Sat Nov 07, 2015 7:33 am
- Location: Northern Ireland. The place of legend
Re: CBR1000 Firestorm
Wow this is quite nice. Lots of effort. I have never seen one like that before.
If you don't try you never know if you can do it.
Re: CBR1000 Firestorm
Code: Select all
Re: CBR1000 Firestorm
The electro plating guide would be interesting mate. I've done it a few times on recent resto's I've done, GT250 and TS50x with varying degrees of success. Be good to see how someone else does it and any tips I can glean.

Carpe diem, quam minimum credula postero
F3, 954 USD front, K Tech springs, Braced swinger, Ohlins shock, Six spoke Mockesini wheels, Harris rearsets, QaT, Flywheel diet!, A&L stacks, stick coils, K&N, FP Ti jets, Mori pipe's [colour]
F3, 954 USD front, K Tech springs, Braced swinger, Ohlins shock, Six spoke Mockesini wheels, Harris rearsets, QaT, Flywheel diet!, A&L stacks, stick coils, K&N, FP Ti jets, Mori pipe's [colour]

Re: CBR1000 Firestorm
That sounds greatmoto1818 wrote:I am in the middle of electroplating and will be posting a mini guide of how I do it and before and after type things if anyone is interested it may be of some use.Code: Select all
Chris.
-
vtwin goody
- Posts: 359
- Joined: Sun Feb 14, 2010 11:19 pm
- Location: northwich cheshire
Re: CBR1000 Firestorm
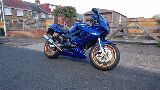
any updates mate, theres a storm on ebay at the mo with similar mods looks a nice bit of kit
Re: CBR1000 Firestorm
Not really, awaiting stuff back from all the various vendors. I've been electroplating and waiting! If your referring to the Firestorm with the SP1 kit on it? With the greatest respect I'd be massively disappointed if mine had the finish of that, good idea but badly finished in my view. I'll be updating in the next couple of weeks with the start of the rebuild to a finish.
Re: CBR1000 Firestorm
OK, so as promised my mini guide of how I electroplate all my grotty bolts and bits.
I start off by thoroughly degreasing everything.

Then ultrasonically cleaning.


After cleaning I grit blast with ultra fine media. Next is to buff up as best I can on the wire wheel.
Next up is 30 mins back in the ultrasonic cleaner. Now I am ready for the plating process. At this point no grease or any contaminants are allowed. I like to draw comparison's with the wife and her orders. Do NOT deviate from what is said and all will be well, meaning follow all steps precisely and don't think for yourself because if you do you will be sorry!
I have done this for a few years now and as soon as you try and save time it costs you time but when it comes together its a great feeling.
I don clean gloves and remove the items that are next up for plating and wrap copper wire around them somewhere to secure them to where they will hang for when I dip them in my electrolyte.

This is my set up, the bar going across is what I hang my parts off.
I dip my parts in a cleaning acid. This also acts as a promoter for the plating process. I leave sat in the acid for approximately 40 seconds.

After this I clean thoroughly in super clean water.
Then I hang all parts on my bar that goes across the container, next is to set a current through the system. I will try to explain as best I can but an expert may choke on his kit kat so sorry to any experts!

This is a picture of my plating factory in full swing. Notice the bar across the container has wires hanging off them. On the end of each wire is a part that is being plated. The idea is that you pass a controlled current (I use a battery charger with a crude resistor of coiled wire) through a wire that is wrapped around the circumference of the top of the container. Off this wire is a some anodes or lumps of metal, in this case zinc anodes. The anodes are sat in my electrolyte (the liquid in the container) I connect my earth lead from my battery charger to bar across the top of the container. Once the controlled current is energised approx 0.5 volts after my resistor it passes through my wire around the top of the container, through the anodes and liberates some of the metal (zinc) which then travels through the electrolyte to my metal parts, through the bar across the top of the container and lastly through my earth wire making a circuit. I do not know the mechanism at play that passes metal to my parts but I like it.
Finally after the plating has transferred across a lovely shiny part will be pulled out of the electrolyte. I thoroughly wash in clean water then passivate the part. Passivation serves two purposes, it gives excellent rust prevention and colours the part. I have a few colours but for this project I have chosen a silvery colour that looks like it has an oil sheen on it!
This is a minimal overview of electroplating but its so easy and worthwhile to do. I would be more than happy if anyone wanted any further info.
Some pictures.
Before.

After.

These bolts where rusty as anything, you can see the pits but a nice finish for an old bolt?


I have all my parts back from the vendors. My swingarm has been braced.


Just jigging up so that I could weld the modified bracket for the fireblade brake mount.

A piccy of my mates lovely hybrid LC, just refreshed the engine for him. Its a Mick Abbey tuned bike, its quick. I made a copy of the tune for future reference

I start off by thoroughly degreasing everything.

Then ultrasonically cleaning.

After cleaning I grit blast with ultra fine media. Next is to buff up as best I can on the wire wheel.
Next up is 30 mins back in the ultrasonic cleaner. Now I am ready for the plating process. At this point no grease or any contaminants are allowed. I like to draw comparison's with the wife and her orders. Do NOT deviate from what is said and all will be well, meaning follow all steps precisely and don't think for yourself because if you do you will be sorry!
I have done this for a few years now and as soon as you try and save time it costs you time but when it comes together its a great feeling.
I don clean gloves and remove the items that are next up for plating and wrap copper wire around them somewhere to secure them to where they will hang for when I dip them in my electrolyte.

This is my set up, the bar going across is what I hang my parts off.
I dip my parts in a cleaning acid. This also acts as a promoter for the plating process. I leave sat in the acid for approximately 40 seconds.

After this I clean thoroughly in super clean water.
Then I hang all parts on my bar that goes across the container, next is to set a current through the system. I will try to explain as best I can but an expert may choke on his kit kat so sorry to any experts!

This is a picture of my plating factory in full swing. Notice the bar across the container has wires hanging off them. On the end of each wire is a part that is being plated. The idea is that you pass a controlled current (I use a battery charger with a crude resistor of coiled wire) through a wire that is wrapped around the circumference of the top of the container. Off this wire is a some anodes or lumps of metal, in this case zinc anodes. The anodes are sat in my electrolyte (the liquid in the container) I connect my earth lead from my battery charger to bar across the top of the container. Once the controlled current is energised approx 0.5 volts after my resistor it passes through my wire around the top of the container, through the anodes and liberates some of the metal (zinc) which then travels through the electrolyte to my metal parts, through the bar across the top of the container and lastly through my earth wire making a circuit. I do not know the mechanism at play that passes metal to my parts but I like it.
Finally after the plating has transferred across a lovely shiny part will be pulled out of the electrolyte. I thoroughly wash in clean water then passivate the part. Passivation serves two purposes, it gives excellent rust prevention and colours the part. I have a few colours but for this project I have chosen a silvery colour that looks like it has an oil sheen on it!
This is a minimal overview of electroplating but its so easy and worthwhile to do. I would be more than happy if anyone wanted any further info.
Some pictures.
Before.

After.

These bolts where rusty as anything, you can see the pits but a nice finish for an old bolt?


I have all my parts back from the vendors. My swingarm has been braced.


Just jigging up so that I could weld the modified bracket for the fireblade brake mount.

A piccy of my mates lovely hybrid LC, just refreshed the engine for him. Its a Mick Abbey tuned bike, its quick. I made a copy of the tune for future reference

Last edited by moto1818 on Wed Feb 15, 2017 12:28 am, edited 6 times in total.
-
StormyRob
- Posts: 1565
- Joined: Sat Nov 07, 2015 7:33 am
- Location: Northern Ireland. The place of legend
Re: CBR1000 Firestorm
Interested to see the results of this. Unfortunately I have none of the cleaning items you mention so I just replaced all my crappy bolts!
If you don't try you never know if you can do it.
Re: CBR1000 Firestorm
A few bits all ready to go.


A few more bits plated.


A few more bits plated.

-
Pete.L
- Forum Health And Safety Officer
- Posts: 7299
- Joined: Fri Sep 26, 2003 5:09 pm
- Location: Bristol
Re: CBR1000 Firestorm
Looks really good. I wish I had access to such a set up.
One question. Where do you attach the spoon? Or have you got a spoondon frame like Fabios?
Sent from my iPhone using Tapatalk
One question. Where do you attach the spoon? Or have you got a spoondon frame like Fabios?
Sent from my iPhone using Tapatalk
My new ride is a bit of a Howler and I love to make her Squeal
Re: CBR1000 Firestorm
Pete.L wrote:Looks really good. I wish I had access to such a set up.
One question. Where do you attach the spoon? Or have you got a spoondon frame like Fabios?
The spoon is part of the auto snack feed system. Being a porker I like to keep topped up while on a long ride!
Sent from my iPhone using Tapatalk
Re: CBR1000 Firestorm
Few more pictures. I have completed the carb rebuild, set the valve clearances on the motor and started bolting bits to it. I like to assemble as much as possible before I lay the chassis over the engine. I then lift the lot up and build from there.


Chassis being put together.

I intend to press on and get the thing build now so I'll post pictures as I go.


Chassis being put together.

I intend to press on and get the thing build now so I'll post pictures as I go.
Re: CBR1000 Firestorm
watch out not to scratch your nice and shiny rear cam cover when you lower the frame over it.... there is feck all clearance and you need to wiggle it a bit to fit over.
either fit an old cover that is scratched anyway, or cover the new cover in tape to protect it
either fit an old cover that is scratched anyway, or cover the new cover in tape to protect it
AMcQ
-
StormyRob
- Posts: 1565
- Joined: Sat Nov 07, 2015 7:33 am
- Location: Northern Ireland. The place of legend
Re: CBR1000 Firestorm
Seeing that engine looking absolutely beautiful is just pushing me more and more towards dropping mine out!
Need to resist that
Need to resist that
If you don't try you never know if you can do it.
Re: CBR1000 Firestorm
Subframe assembled and fitted.

Fairing mount spun up on my lathe.

And fitted.

My finished piece that hopefully will tidy up the subframe to tank area and make it flow better. Yet to be painted and fitted exactly but you get the idea.

Harris rearsets.


Fairing mount spun up on my lathe.

And fitted.

My finished piece that hopefully will tidy up the subframe to tank area and make it flow better. Yet to be painted and fitted exactly but you get the idea.

Harris rearsets.
