Well you asked for another Ducati build
Re: Well you asked for another Ducati build
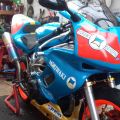
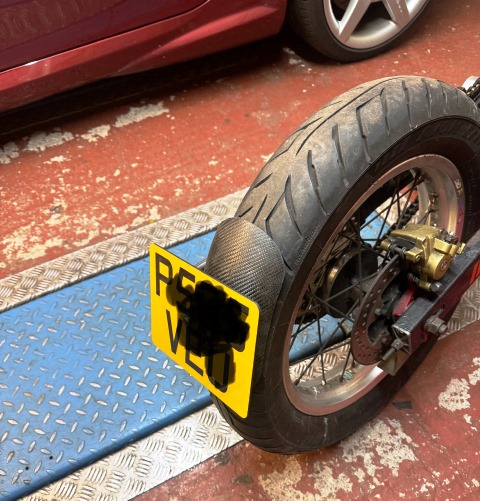
Cheers tony thats good to know. the bike had passed the last few years with the same speedo on it 
the older i get,the faster i was 
Re: Well you asked for another Ducati build
Sitting pretty, I like that
Very interesting Tony, thanks for taking the time to postbuzzer wrote: ↑Fri Feb 02, 2024 12:57 pm
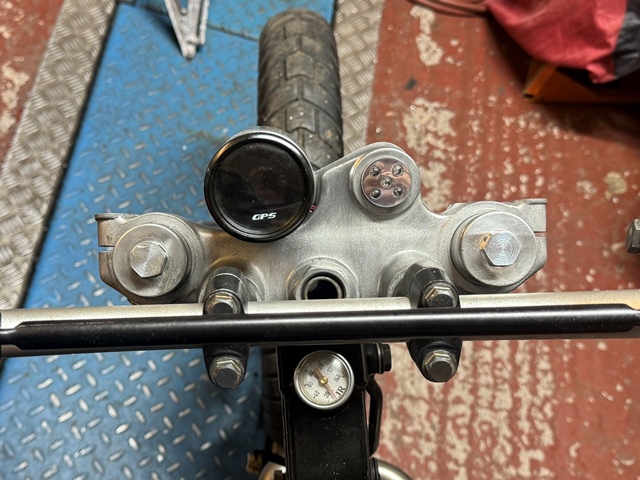
Next time ask him where in the testers manual it says a GPS speedo is a reason for failure... indeed the speedometer is not part of the motorcycle test. you don't even need a mileometer! If he argues, just ask for form VT17 which they are obliged to carry... this is the DVSA "Appeal an MOT test result" form and has the effect of shitting up any MOT tester
I did it a few years ago after a mates wife took her car in for MOT at a well known chain. I had serviced it a few weeks previous for her so I was surprised that it failed on exhaust, brakes and suspension I sent the form in for her and a few days later took the car back to the garage at a set time to be greeted by the tester and the Ministry guy. The tester and branch manager were VERY sheepish... The ministry guy did the MOT and passed it!
One of my best mates helped write the latest revision of the car and bike testers manualHe said the test station mention above would be on the list of unannounced inspections for a while where the Ministry guy sits in a car up the street on his laptop and watched for the garage to log a completed MOT... then he pounces!
I sometimes send him pictures of stuff I build and ask if that will pass... his stock answer is "well I couldn't fail it, but it's not in the spirit of the regulations"
Chris.
Re: Well you asked for another Ducati build
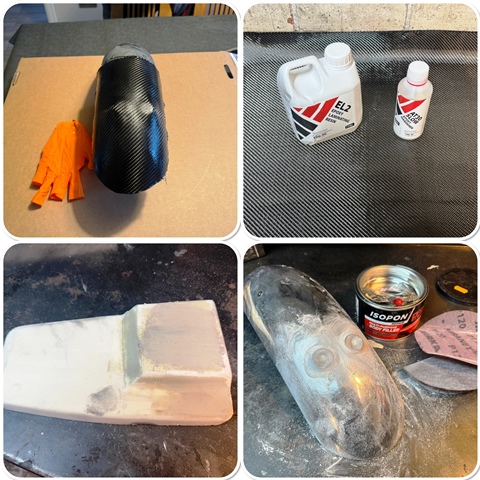
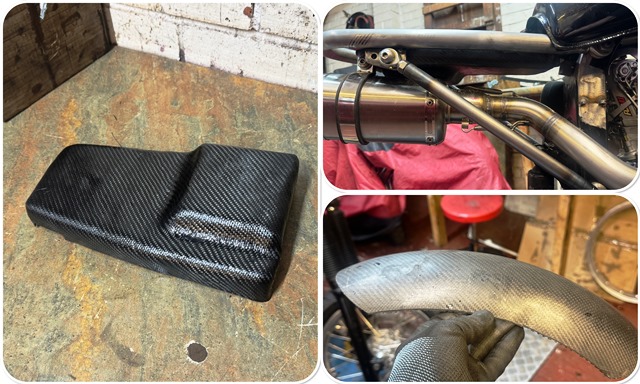
The rear number plate mounting looked OK, but it needed a hugger… I wanted to keep things as light as I could so I decided to try some carbon fibre.. first and probably last time as its a nightmare to work with! I had to buy a meter, so I decided to also make the battery tray as well… That’s currently drying, its nice and light but not that pretty, but its unseen so I will live with it. I used an old mudguard to make the mould and the hugger came out rather well! with what’s left I will probably make a front mudguard, we will see how that turns out, on this one I will try the vacuum bag approach.
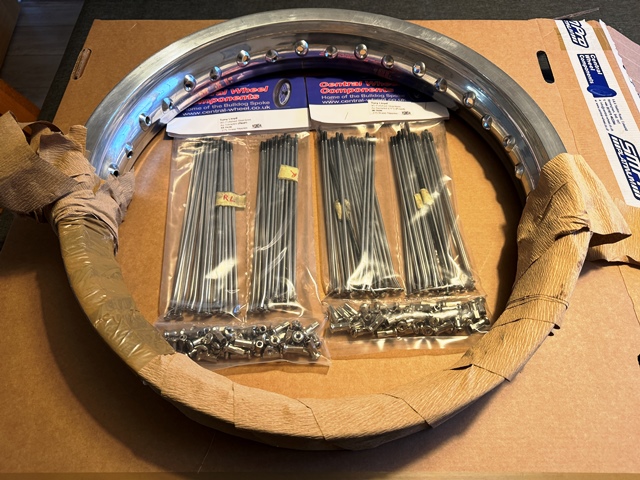
The new 17″ front rim and new stainless spokes have also arrived. Expensive, but you can't have rusty spokes, it spoils a build
there will be a short interlude in updates now as we are off for some sun for three weeks
The new 17″ front rim and new stainless spokes have also arrived. Expensive, but you can't have rusty spokes, it spoils a build
there will be a short interlude in updates now as we are off for some sun for three weeks
Re: Well you asked for another Ducati build
Carbon fibre now, whatever next
Good on you for giving it a go, you did well
Enjoy your time in the sun Tony
Chris.
Good on you for giving it a go, you did well
Enjoy your time in the sun Tony
Chris.
Re: Well you asked for another Ducati build
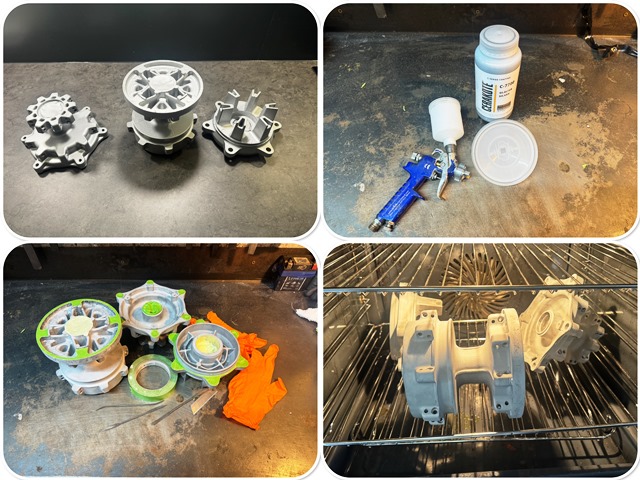
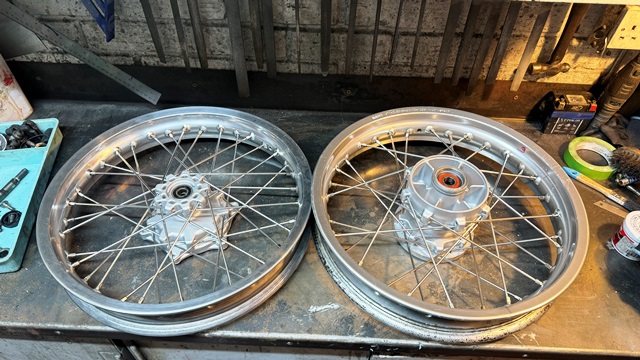
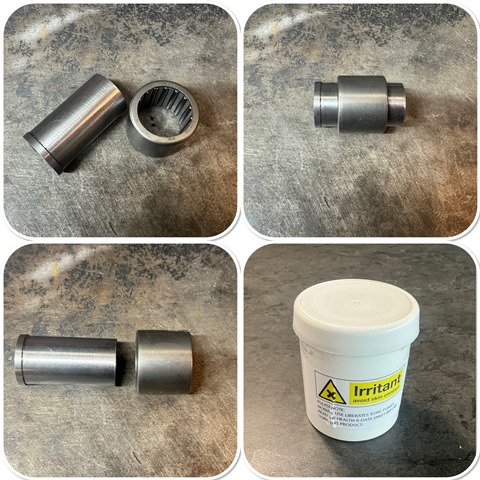
I have wanted to try Cerakote for a while due to the great reports of its durability and finish. So I purchased a pint to see how it went… its not cheap! I read the instructions on their knowledge base and it seemed simple enough so I thought I would start with the wheel hubs.
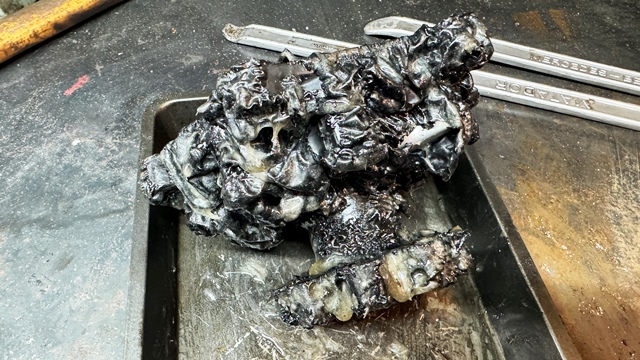
First job was stripping the thick powder coat off, and for this I used some commercial paint stripper. As you can see this makes short work of removing it! the stuff you buy from DIY stores is next to useless for this.
Next prep for the coating. I gave the hubs a good blasting with aluminium oxide grit to give it a key, then cleaned then in hot water with some detergent in. I never use washing up liquid for things like this (or rubbing down paintwork) as it contains silicone, which kind of defeats the object of trying for a clean surface! I then popped them in the warm oven for two reasons…. one is to make sure they are completely dry, and secondly if you mask them while warm, the tape sticks MUCH better. With regard to masking, I put the tape on, and then brush the edges with a riffler file and then you can peel it off perfectly.
Next i gave them a single thin coat of Cerakote. I used a paper strainer as they suggested. Its very thin, but highly pigmented and covers really well. It flash dries in 45 mins, and is handleable in a few hours, but it takes 5 days to fully cure. I was impressed with the ease of application and the finish!
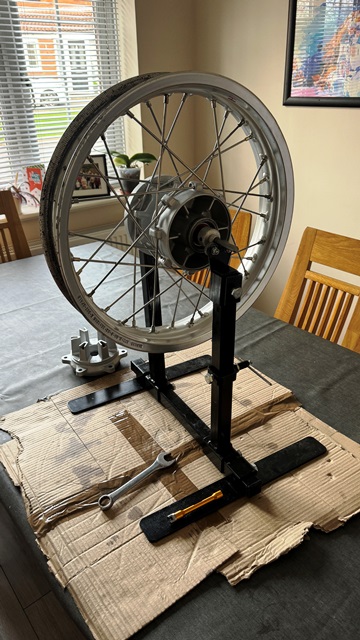
with the hubs now painted it’s time to try something I haven’t done before, and that’s wheel building. I watched a few videos on Youtube and managed to loan a jig off my mate, which actually proved really useful! I got special dispensation to do it on the dining room table as I knew it would take a while and I wanted to be able to sit down!
I was actually surprised how easy it was! I managed to get the correct offset, and up and down and side to side within half a mm.. here they are complete with new bearings and seals.
First job was stripping the thick powder coat off, and for this I used some commercial paint stripper. As you can see this makes short work of removing it! the stuff you buy from DIY stores is next to useless for this.
Next prep for the coating. I gave the hubs a good blasting with aluminium oxide grit to give it a key, then cleaned then in hot water with some detergent in. I never use washing up liquid for things like this (or rubbing down paintwork) as it contains silicone, which kind of defeats the object of trying for a clean surface! I then popped them in the warm oven for two reasons…. one is to make sure they are completely dry, and secondly if you mask them while warm, the tape sticks MUCH better. With regard to masking, I put the tape on, and then brush the edges with a riffler file and then you can peel it off perfectly.
Next i gave them a single thin coat of Cerakote. I used a paper strainer as they suggested. Its very thin, but highly pigmented and covers really well. It flash dries in 45 mins, and is handleable in a few hours, but it takes 5 days to fully cure. I was impressed with the ease of application and the finish!
with the hubs now painted it’s time to try something I haven’t done before, and that’s wheel building. I watched a few videos on Youtube and managed to loan a jig off my mate, which actually proved really useful! I got special dispensation to do it on the dining room table as I knew it would take a while and I wanted to be able to sit down!
I was actually surprised how easy it was! I managed to get the correct offset, and up and down and side to side within half a mm.. here they are complete with new bearings and seals.
Re: Well you asked for another Ducati build
Tony, just in case you don't see this, you have been voted winner of one of the categories in the "Forum Awards 2023" here: https://www.vtr1000.org/phpBB3/viewtopi ... 32#p506532
You must be a natural when it comes to wheel building good man, well done
Also many thanks for posting up about using Cerakote, may be that could be an alternative to powder coating
The wheels and hubs look amazing
Chris.
You must be a natural when it comes to wheel building
Also many thanks for posting up about using Cerakote, may be that could be an alternative to powder coating
The wheels and hubs look amazing
Chris.
Re: Well you asked for another Ducati build
thanks for the award! I do love a bit of tinkering!
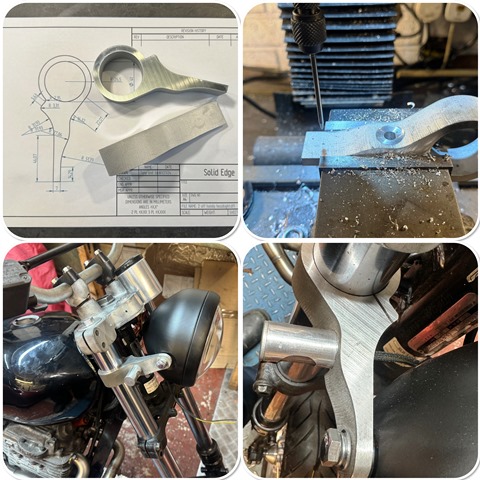
headlight brackets took some thinking about, but I had plenty of time to do it lying in the sun! thank goodness for the Ipad and Ipencil!. I sent the drawing off to the water jet cutters and they cut them out of some nice 25mm plate, they came out well. I also designed them so i could mount the custom made indicators. it will all be polished later as I like to do all the polishing over a few days, horrible and filthy job!
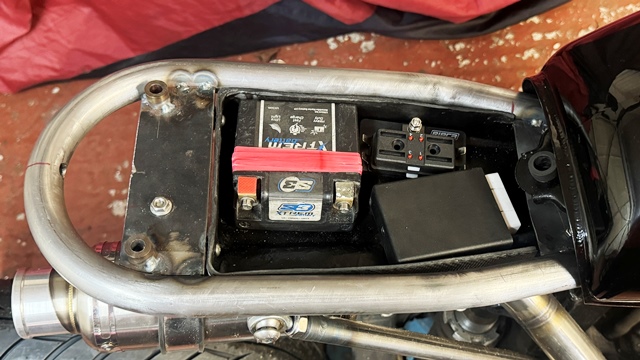
the carbon battery tray came out OK, I initially made an alloy one, but it hung down too low and spoiled the lines, so I made the carbon one stepped so the battery can sit in a recess to the side. its going to be tight with the electrics!
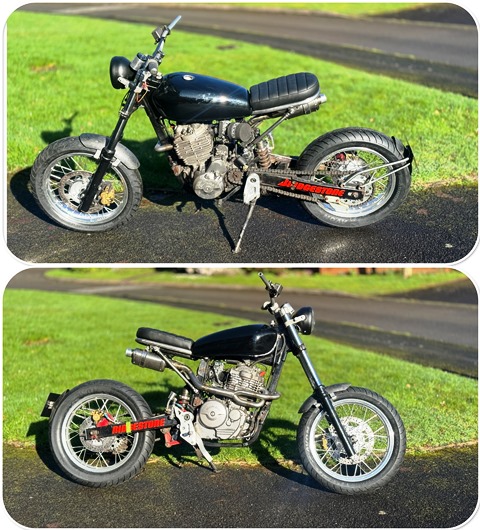
Here it is in profile, not long before i can take it all apart for painting! At this stage its really important to try to mount everything... you don't want to get it all painted/ powder coated and then find you are missing a bracket for say a horn! I also wheeled it around and found that the forks hit the tank... the lock stops are not adjustable on this so I am gong to have to extend them before painting...
I played around for hours on photoshop trying to decide on high, low, beak type mudguard, but decided in the end to go low with a carbon one... with the advantage of a nice fork brace as well. Just ordered some orange fork gaiters, will see what that looks like!
headlight brackets took some thinking about, but I had plenty of time to do it lying in the sun! thank goodness for the Ipad and Ipencil!. I sent the drawing off to the water jet cutters and they cut them out of some nice 25mm plate, they came out well. I also designed them so i could mount the custom made indicators. it will all be polished later as I like to do all the polishing over a few days, horrible and filthy job!
the carbon battery tray came out OK, I initially made an alloy one, but it hung down too low and spoiled the lines, so I made the carbon one stepped so the battery can sit in a recess to the side. its going to be tight with the electrics!
Here it is in profile, not long before i can take it all apart for painting! At this stage its really important to try to mount everything... you don't want to get it all painted/ powder coated and then find you are missing a bracket for say a horn! I also wheeled it around and found that the forks hit the tank... the lock stops are not adjustable on this so I am gong to have to extend them before painting...
I played around for hours on photoshop trying to decide on high, low, beak type mudguard, but decided in the end to go low with a carbon one... with the advantage of a nice fork brace as well. Just ordered some orange fork gaiters, will see what that looks like!
Re: Well you asked for another Ducati build
I’m sorry to say it Tony, but looking at the photos only there looks to be too big of a gap between the rear wheel/tyre and the rest of the bike making the swingarm look really long. It’s like there needs to be something to fill that gap may be? It’s only my opinion, and may look different in reality, in which case please ignore my comments. Of course it may look different again once it’s painted,
Chris.
Chris.
Re: Well you asked for another Ducati build
I guess it's the look I wanted Chris... I wanted something radical looking, sort of supermotosirch345 wrote: ↑Tue Feb 27, 2024 3:31 pm I’m sorry to say it Tony, but looking at the photos only there looks to be too big of a gap between the rear wheel/tyre and the rest of the bike making the swingarm look really long. It’s like there needs to be something to fill that gap may be? It’s only my opinion, and may look different in reality, in which case please ignore my comments. Of course it may look different again once it’s painted,
Chris.
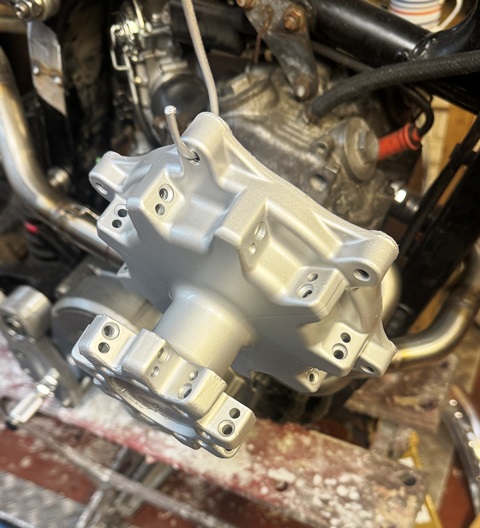
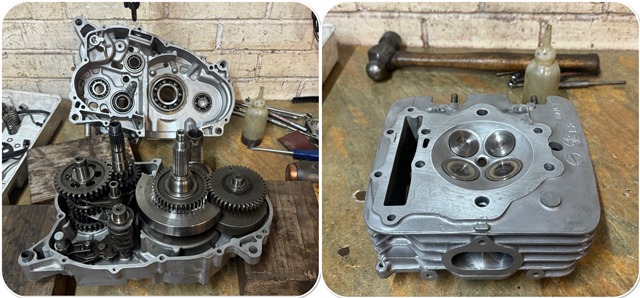
On another note, its years since I worked on a Honda engine... its all stripped down and I am pleased to say there is minimal wear and it can just go back together. its a nice designed, simple engine, I can see why they do high miles!
-
integerspin
- Posts: 33
- Joined: Sun Jan 15, 2023 2:55 am
- Location: Reigate
Re: Well you asked for another Ducati build
If that's the look you are after Tony, then you have it rightbuzzer wrote: ↑Wed Feb 28, 2024 5:20 pmI guess it's the look I wanted Chris... I wanted something radical looking, sort of supermotosirch345 wrote: ↑Tue Feb 27, 2024 3:31 pm I’m sorry to say it Tony, but looking at the photos only there looks to be too big of a gap between the rear wheel/tyre and the rest of the bike making the swingarm look really long. It’s like there needs to be something to fill that gap may be? It’s only my opinion, and may look different in reality, in which case please ignore my comments. Of course it may look different again once it’s painted,
Chris.
On another note, its years since I worked on a Honda engine... its all stripped down and I am pleased to say there is minimal wear and it can just go back together. its a nice designed, simple engine, I can see why they do high miles!
Good news on the internal condition of the engine
Chris.
-
haynesjones66
- Posts: 412
- Joined: Wed Jul 18, 2018 9:44 pm
- Location: sunny west wales
Re: Well you asked for another Ducati build
kind of looks like those CCM spitfire things, but a damn sight cheaper. looking forward to the finished article
Re: Well you asked for another Ducati build
Thats kind of the look I wanted!haynesjones66 wrote: ↑Fri Mar 01, 2024 9:43 pm kind of looks like those CCM spitfire things, but a damn sight cheaper. looking forward to the finished article
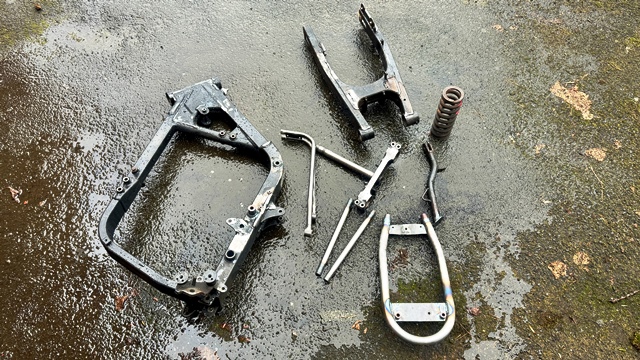
one of the few items on the bike that needed real attention was the swinging arm bush and needle roller bearing. it was badly rusted and seized… I checked and the bush is no longer available. I made one out of good quality steel, and case hardened it several times to build up the depth of the hardened layer. I also did a test piece and was pleased that I could not touch it with a file! I have not done case hardening for a LONG time!
I finished welding up the frame and parts. Where I had modified the frame tubes I put an internal tube so it didn’t crush it when I tightened the bolts, then I welded the support bushes on. Then it was off to the powder coaters, along with a big box pf parts to be plated.
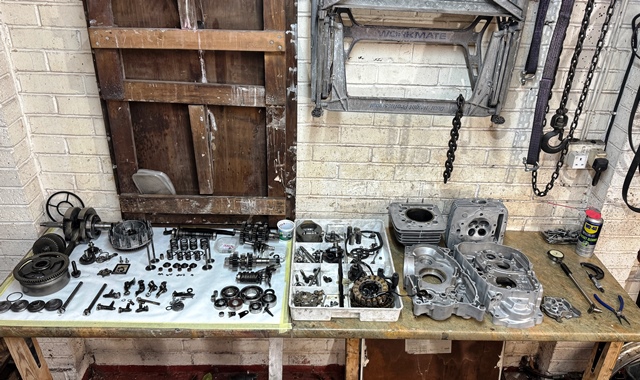
Its always stressful pulling an engine apart… you never know what you are going to find! I was really pleased as it came apart. there is no discernable wear on the bore, all bearings are nice and smooth, so its just gaskets, seals, and a new cam chain. I can see why these engines do mega miles, it’s VERY well built!
Re: Well you asked for another Ducati build
You are certainly getting on with this build. Interesting to read about how you have made your own (now no longer available) swingarm bush and the case hardening of it
Chris.
Chris.
Re: Well you asked for another Ducati build
They are great motors those... i had a chuckle when i seen the engine apart.... you pulled the motor apart . if i take the cam covers of i say pulled the motor apart
the older i get,the faster i was