buzzer wrote:been taking a few days off and getting about a bit on the bike and in the car. I have to say Covid and the restrictions to normal life have got to me a bit!
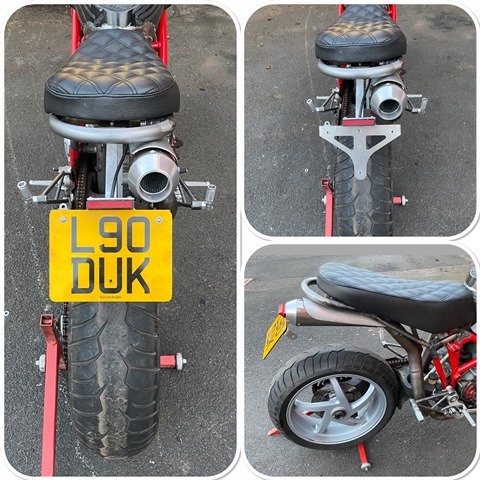
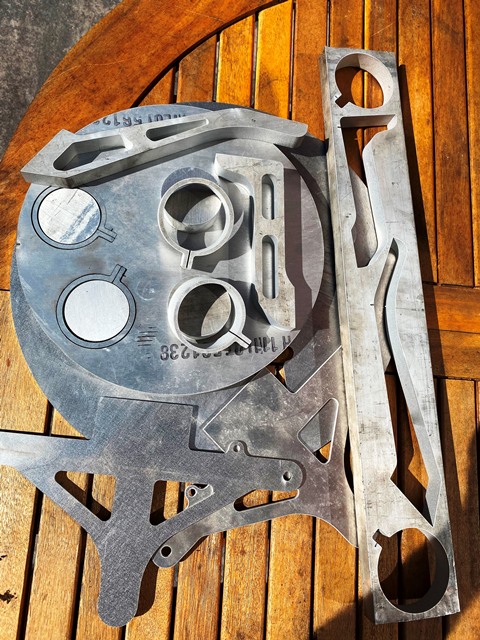
I got my parts back from the water jet cutter, another superb job! while I was there he was cutting through a 150mm block of exotic alloy, its fantastic how it just cuts through such thick metal. I designed the number plate bracket, the headlight brackets, and the number plate backing on CAD and sent it to him… a few days later I picked this up. I could have cut it by hand but this is so easy. I was going to sell the number plate, but I have decided to keep it… L90 fits the engine configuration! below is a short video of him cutting the plates
buzzer wrote: ↑Tue Sep 07, 2021 9:15 pm
been taking a few days off and getting about a bit on the bike and in the car. I have to say Covid and the restrictions to normal life have got to me a bit!
I got my parts back from the water jet cutter, another superb job! while I was there he was cutting through a 150mm block of exotic alloy, its fantastic how it just cuts through such thick metal. I designed the number plate bracket, the headlight brackets, and the number plate backing on CAD and sent it to him… a few days later I picked this up. I could have cut it by hand but this is so easy. I was going to sell the number plate, but I have decided to keep it… L90 fits the engine configuration! below is a short video of him cutting the plates
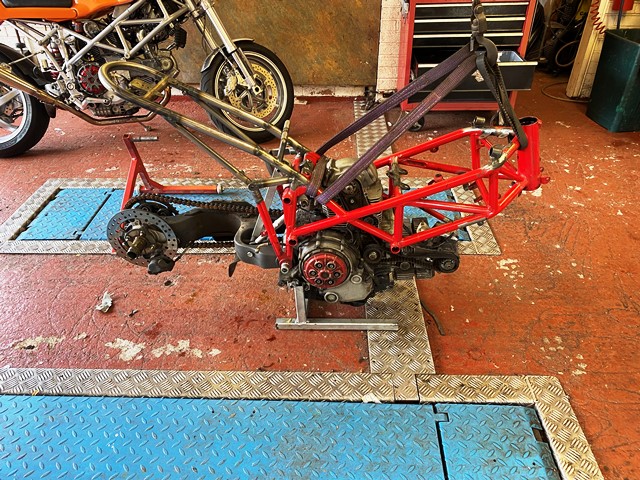
Strip down begins… the bike is now all in pieces and the frame and wheels are at the powder coaters. The engine is all in pieces as well ready to have the cases vapour blasted. Engine wise its all good apart from the exhaust valve guides which is a common problem on these engines… I need to replace the guides. Its easy to check if they are worn, here is a little video to show how to check them… the valve needs to “just” off its seat.
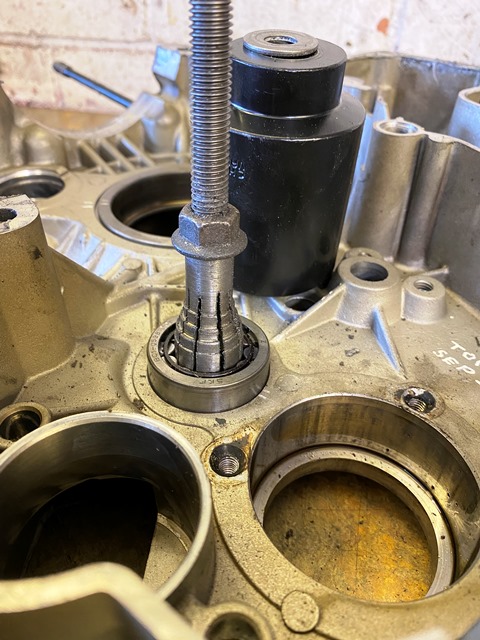
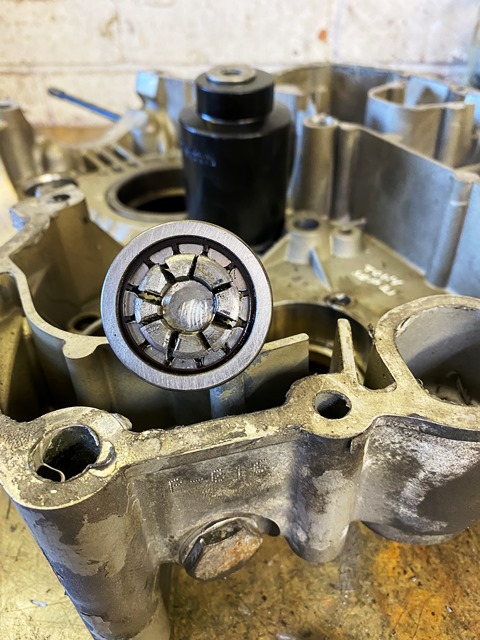
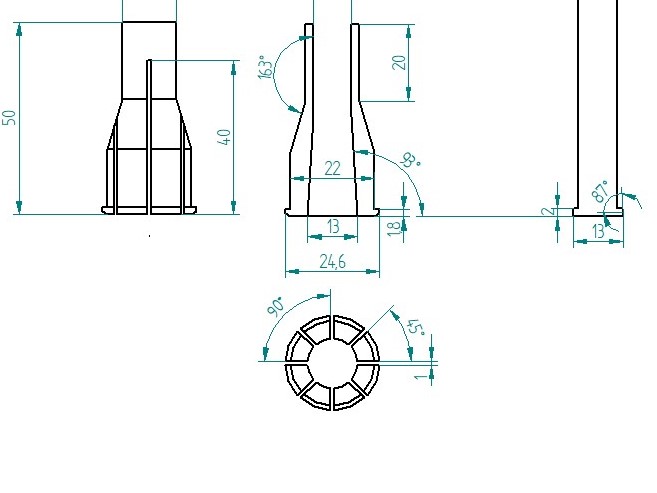
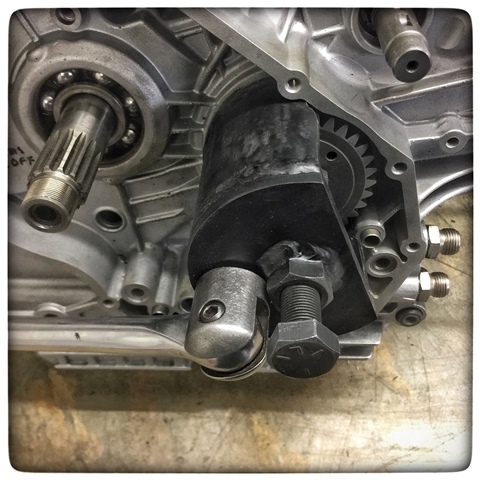
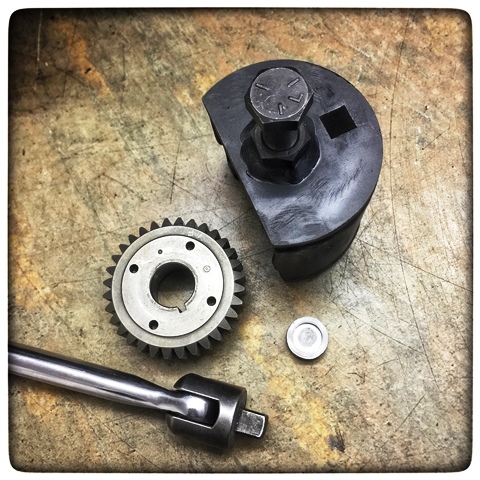
Here is a puller I made to remove the gearbox bearings. I know you can buy blind bearing pullers (I have a set) but for the gearbox bearings on the Ducati engine they don’t work well as there is no inner race to pull on, and you end up pulling the rollers out and breaking the plastic cage! They are also expensive bearings to replace at £60 each…. This puller expands fully into the rollers as the bolt rides up the internal taper. Also a primary gear puller I made a few years ago, along with the dimensions for that. I know you can buy them also (£150… where is the fun in that) but this cost me £20 for the laser cutter to knock me out 5 sets! Happy to share the CAD drawing…
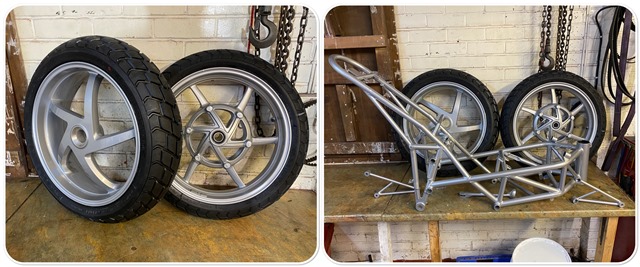
Collected the frame and wheels from Redditch shotblasting… another superb job! its a 50 mile round trip for me, but well worth it for his quality work!
buzzer wrote: ↑Sat Oct 02, 2021 12:52 pm
Collected the frame and wheels from Redditch shotblasting… another superb job! its a 50 mile round trip for me, but well worth it for his quality work!
Looking good
Getting those parts back and being really happy with the results must have given you a boost of enthusiasm
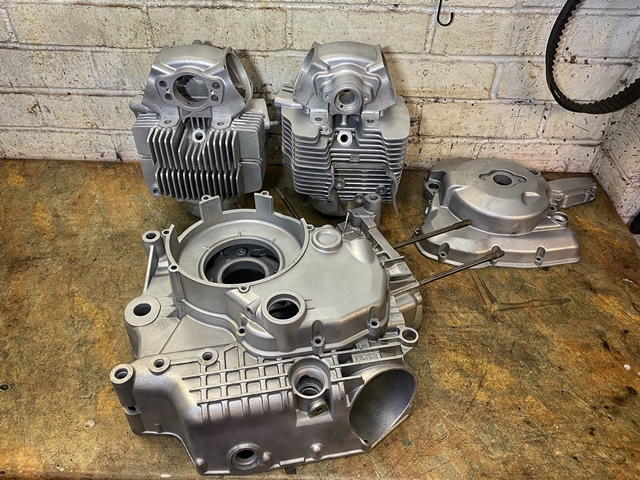
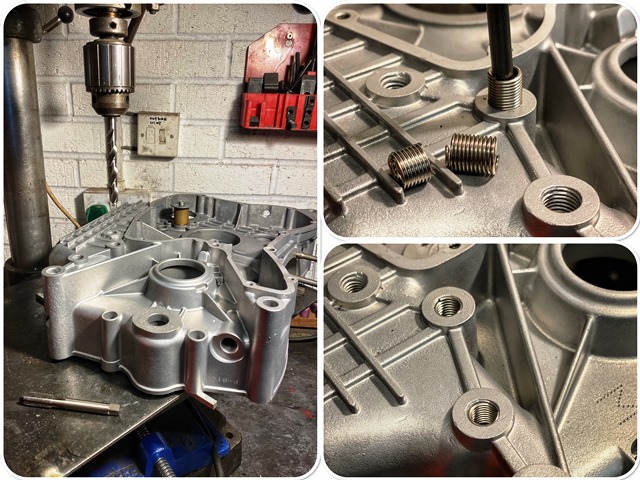
My engine cases are back from the vapour blasters… another superb job from SP Vapour Blasting who are meticulous and I completely trust to do a good job! When I get them back, the first thing I do is clean them of any media that is left from the cleaning process. They were VERY clear of media, but I like to be sure! I then inspect all the threads. No point in building the engine up to find you have suspect threads, as at this stage its easy to rectify any that are poor. As it happens the only two that needed attention were the ones that hold the stand bracket on. This is a common failure point and I have seen a few cases cracked in this area due to lose bolts. I drilled the hole out and used a M10 x 1.5 helicoil. As these are a couple of really stressed bolts I use a double depth helicoil inserts (see picture for comparison) , just to make a good job of it.
i don't bother with any sealant if its a blind hole, you just need to remember to turn the insert so its half to one thread down past the surface.
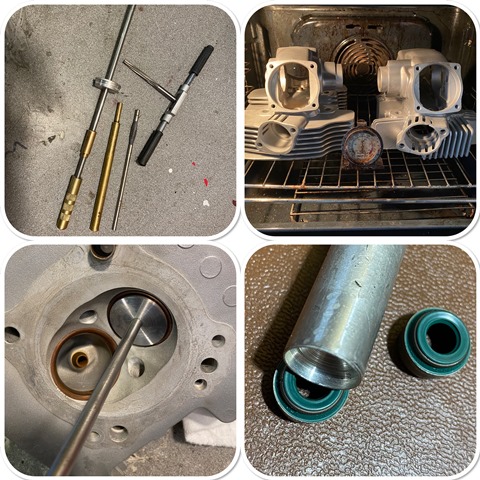
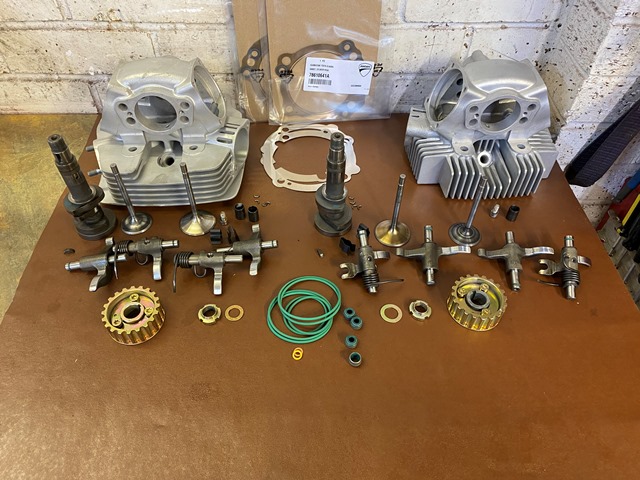
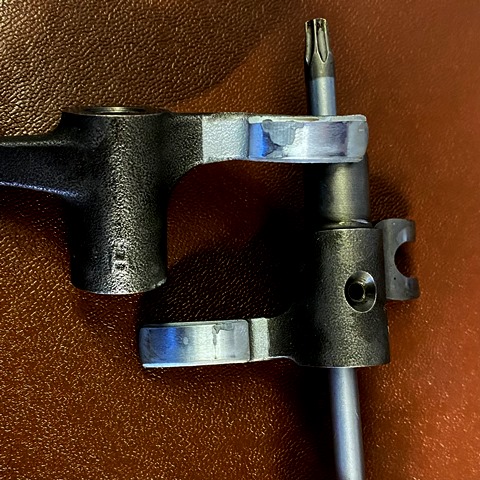
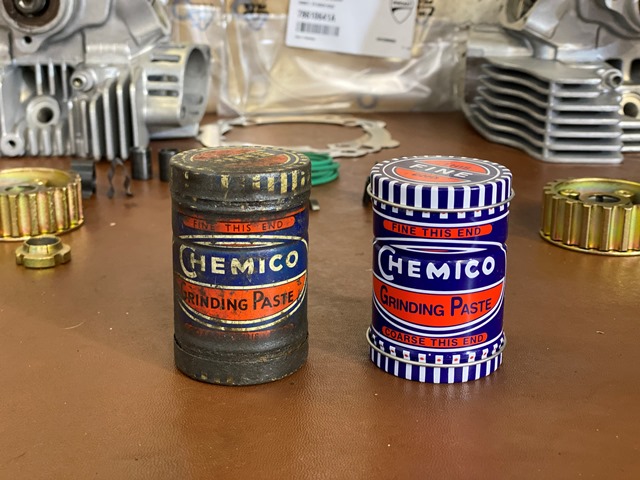
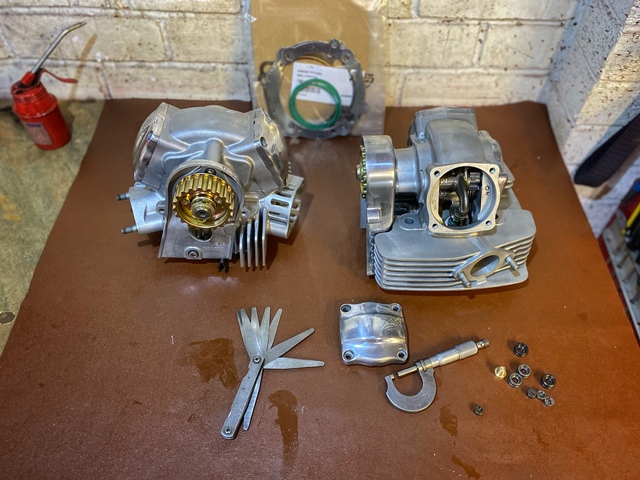
Starting to assemble the heads. New exhaust guides fitted as the originals were badly worn. I heated the heads up to remove and replace the guides, and made a tool to knock them in up to the register. It’s long enough to go through a guide in which is a snug fit in the valve seat so I can ensure it all goes in perfectly straight. Also I have a tool to fit the valve stem oil seals… if you use a socket it damages the rubber on the seal. Two of the rockers had started to peel the hard surface off… I have replaced with good second hand ones. My Dad bought me that tin of grinding paste 50 years ago…. I can vividly remember him sitting in the chair in our back room with a BSA Gold Star cylinder head on his lap grinding the valves in for me…. My mother looking on with disapproval it’s done well, only recently run out!
Even after 50 years they ain’t changed the tin ! If it works why change it lol .
Your doing a great job again . I enjoy reading your thread . Keep it up
yes, working in the garage often brings back memories.... that Micrometre was my Dads...
when people say to me Ducati bikes are expensive to service I ask them if they have ever done the valve clearances! on this engine there are 8 clearances to set, on the 4V there are 16! at £12 a shim and with the time involved no wonder its expensive!