
Chris.
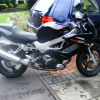
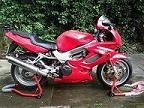
How to remove and refit CCT's on the Firestorm
Re: How to remove and refit CCT's on the firestorm
Glad too hear all went well guy's 
Chris.
Chris.

Re: How to remove and refit CCT's on the firestorm
Without removing cam cover at all:-
The following imo is the quickest and safest way I've found to replace the CCT's
(1) Remove seat
(2) Disconnect block connector on end of wiring from fuel tank (located under-seat in front of battery box)
(3) Unbolt fuel tank, turn fuel tap off with 8mm open end spanner and disconnect all hoses noting where each one goes first (use masking tape and write on it if you won't remember) then lift off tank (easier to do when tank is nearly empty)
(4) Remove air filter box lid and air filter, then remove the two air intake trumpets, (noting where each one goes as they are different lengths) cover the intake holes of each carb with a clean rag so nothing can fall in there, next remove the screws holding the air box to the carbs and disconnect the breather hoses then remove the air box itself
(5) Remove the spark plugs and cover holes with clean rags
(6) Remove the two caps from the alternator housing (left-hand side of bike when sitting on it) be very careful removing the center one as it's made of very soft material
(7) Using a socket and tee bar in the center hole of the alternator cover turn the engine over (anti-clockwise)
At this point, lift the slides in the carb of the cylinder your working on using a screwdriver or other suitable instrument. Looking down the throat of the carb you 'll see the valves open as you turn the engine over. The inlet valves ( on the carb side of the cylinder head) will open, then close. The next time that cylinders piston comes up, its on the compression stroke. Allign the required mark on the rotor and your guarenteed to be TDC on compression stroke. Fit CCT as per original post.
Repeat this on the other cylinder. Sorted.
Cheers
Bigbird
Re: How to remove and refit CCT's on the firestorm
Bigbird,bigbird wrote:Without removing cam cover at all:-
The following imo is the quickest and safest way I've found to replace the CCT's
(1) Remove seat
(2) Disconnect block connector on end of wiring from fuel tank (located under-seat in front of battery box)
(3) Unbolt fuel tank, turn fuel tap off with 8mm open end spanner and disconnect all hoses noting where each one goes first (use masking tape and write on it if you won't remember) then lift off tank (easier to do when tank is nearly empty)
(4) Remove air filter box lid and air filter, then remove the two air intake trumpets, (noting where each one goes as they are different lengths) cover the intake holes of each carb with a clean rag so nothing can fall in there, next remove the screws holding the air box to the carbs and disconnect the breather hoses then remove the air box itself
(5) Remove the spark plugs and cover holes with clean rags
(6) Remove the two caps from the alternator housing (left-hand side of bike when sitting on it) be very careful removing the center one as it's made of very soft material
(7) Using a socket and tee bar in the center hole of the alternator cover turn the engine over (anti-clockwise)
At this point, lift the slides in the carb of the cylinder your working on using a screwdriver or other suitable instrument. Looking down the throat of the carb you 'll see the valves open as you turn the engine over. The inlet valves ( on the carb side of the cylinder head) will open, then close. The next time that cylinders piston comes up, its on the compression stroke. Allign the required mark on the rotor and your guarenteed to be TDC on compression stroke. Fit CCT as per original post.
Repeat this on the other cylinder. Sorted.
Cheers
Bigbird
As I said in my original post "The following imo is the quickest and safest way I've found to replace the CCT's" and I still stand by that
There are quite a few different methods available I agree, but I've tried to keep it as straightforward and as fail safe as possible.
IMHO for the sake of removing the rear cam cover (four bolts only) to gain access to the camshafts is still the safest way. Doing it your way with the carb intake(s) fully open there's too much of a risk of dropping something in there by accident. Remember a lot of these guys who attempt this job will be DIY budding mechanic's, not experts.
Chris.
Re: How to remove and refit CCT's on the firestorm
hi first time visiting the site, i have a 98 storm and have just had the front cct done at a local garage, i had been reading on the net that the cylinder should be at top dead centre, however, i mentioned this to the garage and they assured me that this was not case, the job has been done and i've done 200 miles and had no problems but i'm waiting for something to happen!! any ideas if i should have the bike checked out somewhere else?!
steve
steve
Re: How to remove and refit CCT's on the firestorm
If it's running ok now you've got away with it.
Trust the instructions above, they work every time.
At the end of the day, we put our lives on the line by riding the bike after working on it, the boss of your local bike shop doesn't have to.
Trust the instructions above, they work every time.
At the end of the day, we put our lives on the line by riding the bike after working on it, the boss of your local bike shop doesn't have to.
It's not falling off, it's an upgrade opportunity.
-
Unitedwestand
- Posts: 12
- Joined: Fri Jan 01, 2010 10:33 am
Re: How to remove and refit CCT's on the firestorm
Hi Chris,
Replaced Both my cct's on friday 16th April using your instructions all went well and easy to follow just wanted to say thanks for taking the time to write the information
regards Chris
Replaced Both my cct's on friday 16th April using your instructions all went well and easy to follow just wanted to say thanks for taking the time to write the information
regards Chris
Re: How to remove and refit CCT's on the firestorm
Thanks for the feedback Chris.Unitedwestand wrote:Hi Chris,
Replaced Both my cct's on friday 16th April using your instructions all went well and easy to follow just wanted to say thanks for taking the time to write the information
regards Chris
Glad too hear all went well
Cheers,
Chris.
Re: How to remove and refit CCT's on the firestorm
Hi, did my ccts yesterday, as a precautionary measure, bike has done 9800 miles, and had read many horror stories, so i thought best had. Followed your instructions and all went to plan, although i did press the start button with a little trepidation  . Fired first time and it only took me about 3 hours. How long do the David Silver items last?
Cheers Sirch
Cheers Sirch
Re: How to remove and refit CCT's on the firestorm
Glad too hear all went well FBFatboy wrote:Hi, did my ccts yesterday, as a precautionary measure, bike has done 9800 miles, and had read many horror stories, so i thought best had. Followed your instructions and all went to plan, although i did press the start button with a little trepidation
Cheers Sirch
I'm afraid to say there is no real way to tell how long any of the CCT's will last. That's why some have either fitted fixed type CCT's (such as Ape) or done the stopper mod.
Chris.
Re: How to remove and refit CCT's on the firestorm
Just another thumbs up for this guide!!!!
Did mine a few days ago and its spot on, took no longer than an hour from start to finish!
Give the bike a good raping today and its right as rain!
Thankyou very much!!!!!!!!!!!!!
Did mine a few days ago and its spot on, took no longer than an hour from start to finish!
Give the bike a good raping today and its right as rain!
Thankyou very much!!!!!!!!!!!!!

Re: How to remove and refit CCT's on the firestorm
Did mine today following this guide.
i got manuals from rider on a storm(top bloke!)
all went well,no suprises,gave it a thrashing after and all seems great!
thanks you lot!
i got manuals from rider on a storm(top bloke!)
all went well,no suprises,gave it a thrashing after and all seems great!
thanks you lot!
Re: How to remove and refit CCT's on the firestorm
Glad too hear all went well nora2004 and matinik46 
Chris.
Chris.
-
vtwin
- Posts: 117
- Joined: Fri Jul 16, 2010 11:33 pm
- Location: Ammanford, Carmarthenshire, South Wales
- Contact:
Re: How to remove and refit CCT's on the firestorm
Hi, just ordered my CCT's from ROAS
Reading through the instructions it appears reasonably straigtforward, just one bit I am not sure of.
I am concerned that I will fit the tensioners in but how will I know if the tension is ok before I start the motor? presumably it is possible if they are not tight enough it could jump the cogs? Is there a good way of doing this?

Re: How to remove and refit CCT's on the firestorm
Hence the finger tight (to find and get tension on the cam chain) and then back out a quarter turn. (think of it like adjusting your drive chain - not advised to have it fully tensioned and tight as it's best there is a an inch or two of slack to take into account tight spots etc)
Again turn the engine by hand a couple or three turns to check things out before closing up and pressing the starter. Absolutely make sure the lock-nut is securely fastened and cannot unwind!
Again turn the engine by hand a couple or three turns to check things out before closing up and pressing the starter. Absolutely make sure the lock-nut is securely fastened and cannot unwind!
vtwin wrote:Hi, just ordered my CCT's from ROAS
Reading through the instructions it appears reasonably straigtforward, just one bit I am not sure of.
I am concerned that I will fit the tensioners in but how will I know if the tension is ok before I start the motor? presumably it is possible if they are not tight enough it could jump the cogs? Is there a good way of doing this?
It may be that your whole purpose in life is simply to serve as a warning to others.
 VTR Firestorm and other bikes t-shirts
VTR Firestorm and other bikes t-shirts-
vtwin
- Posts: 117
- Joined: Fri Jul 16, 2010 11:33 pm
- Location: Ammanford, Carmarthenshire, South Wales
- Contact:
Re: How to remove and refit CCT's on the firestorm
Thanks wicky, well fitted them today and following the instructions it went very smoothly. Bike sounds lovely so no further adjustment needed. I found the hardest part getting the breather pipes back on the air box !
One question I have, mine is the later 19ltr tank model and I presume there is no petrol tap ? I couldnt see one. When I pulled the main pipe off petrol started pouring out. Presumably if there is no tap there should be some sort of vacumm set up?
Cheers for all the help!
One question I have, mine is the later 19ltr tank model and I presume there is no petrol tap ? I couldnt see one. When I pulled the main pipe off petrol started pouring out. Presumably if there is no tap there should be some sort of vacumm set up?
Cheers for all the help!