
http://www.superhawkforum.com/forums/kn ... post251758scottyhatchi wrote:that video really doesnt help me in the part i need wicky lol
Firestorm Rebuild
Re: Firestorm Rebuild
It may be that your whole purpose in life is simply to serve as a warning to others.
 VTR Firestorm and other bikes t-shirts
VTR Firestorm and other bikes t-shirts
Re: Firestorm Rebuild
I like that video, very interesting. I was waiting to see the 3D printer printing and it didn't happen 
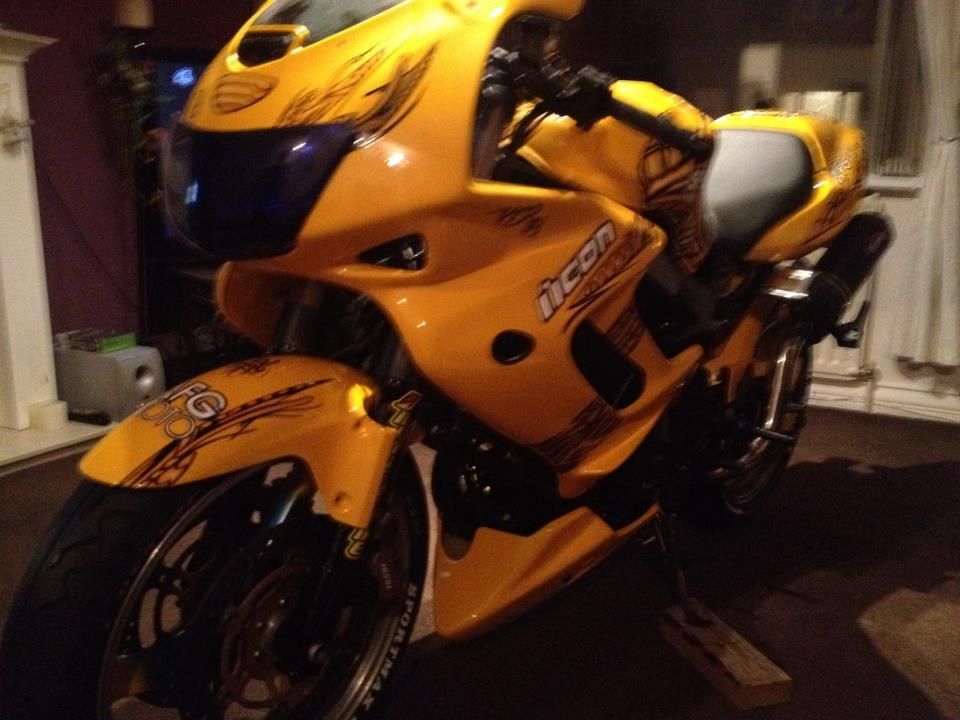
On your panels, I think some Black coachlines around the outside of the White text and stuff will be an Improvement. It should blend it in more rather than looking like it's just been stuck on top.
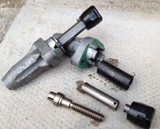
CCT's always make sure your on the compression stroke for whichever cylinder your working on. I suggest you start with the rear. Have a read of these two thread with regards to cam timing marks and cam positions http://www.vtr1000.org/phpBB3/viewtopic ... cam+timing and another useful one http://www.vtr1000.org/phpBB3/viewtopic ... +alignment
When it comes to you getting the adjustment on the CCT's, rather than using feel, I would remove both the rear and front cam covers. Measure more accurately the chain between the two cam sprockets and double check cam positions. It should be 9mm deflection up and down from centre to centre of the chain link. Hope that makes sense! You will have to remove the cam guides to access the centre between the cam sprockets. I think it's held by two 10mm bolts or something. Stick plenty of rags in the gaps in the engine either side of the cam sprockets when undoing anything there. You REALLY DON'T wont to drop anything down inside the engine casings. Just take your time and if you get stuck or are unsure, you have my number.
Silicone or threadlock goes on the main tensioner thread along the length before tightening up. This then seals the gap between the thread where it screws through. It is for two reasons 1st it stops any slight oil leakage that may work it's way through the thread, and 2nd and more importantly, gives the thread some grip as a preventative measure against it working loose with vibrations.
Don't forget either new paper gaskets or some gasket seal where the CCT attaches to the casing. I just used a bit of gasket seal on mine so there was no need to scrape all the old paper gasket off
(:-})
On your panels, I think some Black coachlines around the outside of the White text and stuff will be an Improvement. It should blend it in more rather than looking like it's just been stuck on top.
CCT's always make sure your on the compression stroke for whichever cylinder your working on. I suggest you start with the rear. Have a read of these two thread with regards to cam timing marks and cam positions http://www.vtr1000.org/phpBB3/viewtopic ... cam+timing and another useful one http://www.vtr1000.org/phpBB3/viewtopic ... +alignment
When it comes to you getting the adjustment on the CCT's, rather than using feel, I would remove both the rear and front cam covers. Measure more accurately the chain between the two cam sprockets and double check cam positions. It should be 9mm deflection up and down from centre to centre of the chain link. Hope that makes sense! You will have to remove the cam guides to access the centre between the cam sprockets. I think it's held by two 10mm bolts or something. Stick plenty of rags in the gaps in the engine either side of the cam sprockets when undoing anything there. You REALLY DON'T wont to drop anything down inside the engine casings.
Silicone or threadlock goes on the main tensioner thread along the length before tightening up. This then seals the gap between the thread where it screws through. It is for two reasons 1st it stops any slight oil leakage that may work it's way through the thread, and 2nd and more importantly, gives the thread some grip as a preventative measure against it working loose with vibrations.
Don't forget either new paper gaskets or some gasket seal where the CCT attaches to the casing. I just used a bit of gasket seal on mine so there was no need to scrape all the old paper gasket off
(:-})
==============================Enter the Darkside
-
scottyhatchi
- Posts: 265
- Joined: Wed Nov 23, 2011 5:41 pm
- Location: south shields

-
lloydie

- Posts: 20928
- Joined: Mon Jan 17, 2011 11:16 pm
- Location: In the garage somewhere in Coventry
Re: Firestorm Rebuild
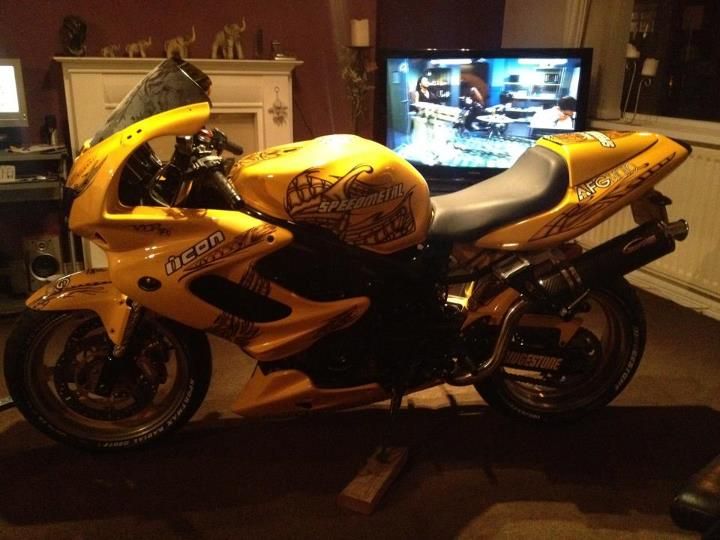
very nice but can you get it out the house to take some good pics in day light
-
agentpineapple

- Posts: 15124
- Joined: Sat Mar 26, 2011 9:16 pm
Re: Firestorm Rebuild
you did a good job there fella, as lloydie said, get some pictures in daylight....
HEY YOU GUYS!!!!!!
-
scottyhatchi
- Posts: 265
- Joined: Wed Nov 23, 2011 5:41 pm
- Location: south shields
Re: Firestorm Rebuild
i dont even think i can get it out the house with the fairings on ha ha and its only put tgther temporary at moment gotta take it bak apart to fit parts wen they arrive once thats done ill attempt to get it out as need to try starting it up 
Re: Firestorm Rebuild
That's coming along very nicely. I see you got the Black outlines around the text In that last pi it looks like the bike is watching tv.
(:-})
(:-})
==============================Enter the Darkside
-
scott02464
- Posts: 796
- Joined: Wed Dec 28, 2011 2:04 pm
- Location: Tadcaster- Near York
Re: Firestorm Rebuild
Looking very nice matey! ;-)

Re: Firestorm Rebuild
Nothing cooler than a bike in yer front room
'98 VTR (Red - the quickest)
'94 KTM LC4 400e
'69 Land Rover S2 Lightweight
Trowbridge & Surrounding Areas Lawn Mower Servicing & Repairs
'94 KTM LC4 400e
'69 Land Rover S2 Lightweight
Trowbridge & Surrounding Areas Lawn Mower Servicing & Repairs


Re: Firestorm Rebuild
LMAO, That is just ridiculous.....
I'd not be happy under that though.. prime candidate for a you've been framed moment.
I'd not be happy under that though.. prime candidate for a you've been framed moment.
Why ask... sometime you just go to do it and find out?
-
agentpineapple
- Posts: 15124
- Joined: Sat Mar 26, 2011 9:16 pm
Re: Firestorm Rebuild
i wouldn't trust that at all
because its a ducati there will be oil dripping and allsorts....
because its a ducati there will be oil dripping and allsorts....
HEY YOU GUYS!!!!!!
Re: Firestorm Rebuild
Nice pussy shot!!!!
Carpe diem, quam minimum credula postero
F3, 954 USD front, K Tech springs, Braced swinger, Ohlins shock, Six spoke Mockesini wheels, Harris rearsets, QaT, Flywheel diet!, A&L stacks, stick coils, K&N, FP Ti jets, Mori pipe's [colour]
F3, 954 USD front, K Tech springs, Braced swinger, Ohlins shock, Six spoke Mockesini wheels, Harris rearsets, QaT, Flywheel diet!, A&L stacks, stick coils, K&N, FP Ti jets, Mori pipe's [colour]
-
scott02464
- Posts: 796
- Joined: Wed Dec 28, 2011 2:04 pm
- Location: Tadcaster- Near York
Re: Firestorm Rebuild
Fook me ha ha is that real......? :lol:
-
scottyhatchi
- Posts: 265
- Joined: Wed Nov 23, 2011 5:41 pm
- Location: south shields
Re: Firestorm Rebuild
is that a real wall ornament ??? i sooooo want 1 like that looks amazing lol