Head stock Bearings
-
carmanbikes

- Posts: 894
- Joined: Sat Dec 22, 2012 11:09 am
- Location: Wigan
Head stock Bearings
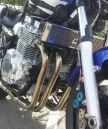
Hi everyone, This has probably been asked before but cant find the answer, I am changing the head bearings for the allballs pin type does anyone know when I put the bottom cup into the frame should it be flush with the bottom of the head stock or should it go in a bit, Hope this makes sence
-
lloydie

- Posts: 20928
- Joined: Mon Jan 17, 2011 11:16 pm
- Location: In the garage somewhere in Coventry
Re: Head stock Bearings
The cups need to be seated all the way in so make sure your putting them in the correct way around
-
mattycoops43
- Posts: 621
- Joined: Sun Apr 07, 2013 12:02 am
- Location: Newport South Wales
Re: Head stock Bearings
I did it recently with Allballs too.
Don't worry about it, just hit it till it makes a reassuring clunk cos it's bottomed out, then hit it a bit more to make sure. As long as it's flush against the seat, it's all good.
Also, don't worry when the top seat sticks out a lot, it's the difference between roller bearing and ball bearing seat, the roller one is much higher, but overlaps the other part so it fits fine.
Also, I had to make a special tool from a bit of old bar to knock out the top seat as it is no smaler than the tube, so there is no edge to hit against, just a small groove on the inside. You will know what I mean when you see it. I ground a bent point onto a length of bar so it would just catch enough to knock the old race out. was a pita!
Budget storm gradually on the road to spangliness.
-
carmanbikes
- Posts: 894
- Joined: Sat Dec 22, 2012 11:09 am
- Location: Wigan
Re: Head stock Bearings
Hi, I have not put the new cups in yet just took the old ones out but was just going to get a block of wood and knock the bottom one in but this would only get it flush so didn't want to hit it with anything else and risk damagemattycoops43 wrote:I did it recently with Allballs too.
Don't worry about it, just hit it till it makes a reassuring clunk cos it's bottomed out, then hit it a bit more to make sure. As long as it's flush against the seat, it's all good.
Also, don't worry when the top seat sticks out a lot, it's the difference between roller bearing and ball bearing seat, the roller one is much higher, but overlaps the other part so it fits fine.
Also, I had to make a special tool from a bit of old bar to knock out the top seat as it is no smaler than the tube, so there is no edge to hit against, just a small groove on the inside. You will know what I mean when you see it. I ground a bent point onto a length of bar so it would just catch enough to knock the old race out. was a pita!

Re: Head stock Bearings
Stick them in the freezer overnight before putting them in the frame. This will shrink them a little and make them easier to tap in squarely. Getting the lower bearing on is the tricky one. A bit of tube the same diameter as the bearing is ideal to tap it down into place, and don't forget the dust seal.
(:-})
(:-})
==============================Enter the Darkside
-
carmanbikes
- Posts: 894
- Joined: Sat Dec 22, 2012 11:09 am
- Location: Wigan
Re: Head stock Bearings
Ok will try it tomorrow after the cup parts have been in the freezer overnight, Thanks Again for all your help don't know where I would be without this site 
Re: Head stock Bearings
Another useful point is to use the old outer race that you cut off to knock the new race in with as you will find it really hard to find a pipe to sleeve over the stem.

Re: Head stock Bearings
to drift the cups back into the head stock, I suggest you take one of the old cups and reduce its outer diameter slightly by spinning it against a grinding wheel. this will then be ideal to use to hammer the new one in and because it is now slightly smaller....it wont get stuck in the headstock.
for the lower inner race fitted to the stem, you will need to grind the old one off, so it will now be split and hence it can be used as the drift to refit the new one without risk of it jamming on the stem [make sure you fit the seal below it first]. you will need a section of steel tube to pass over the stem to act as the drift to strike with the hammer [or put in a press if you have the facilities].
to get this one fully seated takes a bit of force, and even if you heated up the race before using it, you will need to use a big hammer, and dont be tempted to add a bit of wood between hammer and drift, as this will cushion the impact too much and you wont get them seated.
As someone already said, the impact noise changes when they are seated and for the lower stem you can also feel the seal being locked in place when it is full home.
AMcQ
Re: Head stock Bearings
I used a large socket.I suggest you take one of the old cups and reduce its outer diameter slightly by spinning it against a grinding wheel. this will then be ideal to use to hammer the new one in and because it is now slightly smaller....it wont get stuck in the headstock.
As for the bottom bearing it's a pain in the..... I didn't have a sufficient bit of pipe to use as a drift. I dremmeld a little of the inside of the old race so it didn't get stuck and used that to cushion the blow. I then used a very large adjustable wrench that slotted over both side of the bearing and hit that with the hammer, constantly turning it around to get the bearing tapped down squarely. Oh I also heated the new bearing race up with a butane blowtorch first to help it slide on.
If things don't seat fully to begin with then they soon will seat themselves after a few days riding. You will find yourself tweaking the adjustment anyway for the first couple of weeks until your happy they are tightened up right.
(:-})
==============================Enter the Darkside
Re: Head stock Bearings
I found the the upper section of an axle stand was the correct length and diameter to drift the bottom stem bering into place
AMcQ
Re: Head stock Bearings
just buy a bearing installation kit from machine mart,it has alloy adaptors for most bearing cups so it'll fit most if not all of the bearings on the bike but it'll come in handy when replacing the wheel bearings on the car too...
-
rollingthunderx2
- Posts: 506
- Joined: Fri Mar 04, 2011 12:12 am
- Location: Hawick, scottish borders on A7
Re: Head stock Bearings
To get the bottom bearing off the stem, weld a bead round the bearing face, when it cools the bearing will slide off.
Cover the stem with some grease or a bit of cardboard taped on to stop any weld splatters sticking.
When you put the new bearing on, make sure you put the dust seal on first.
Cover the stem with some grease or a bit of cardboard taped on to stop any weld splatters sticking.
When you put the new bearing on, make sure you put the dust seal on first.