This can only be caused by one of two things; sprag clutch rollers flattening or transfer gear failure.
This article addresses transfer gear failure.

http://img9.imageshack.us/img9/7180/e0800.tif
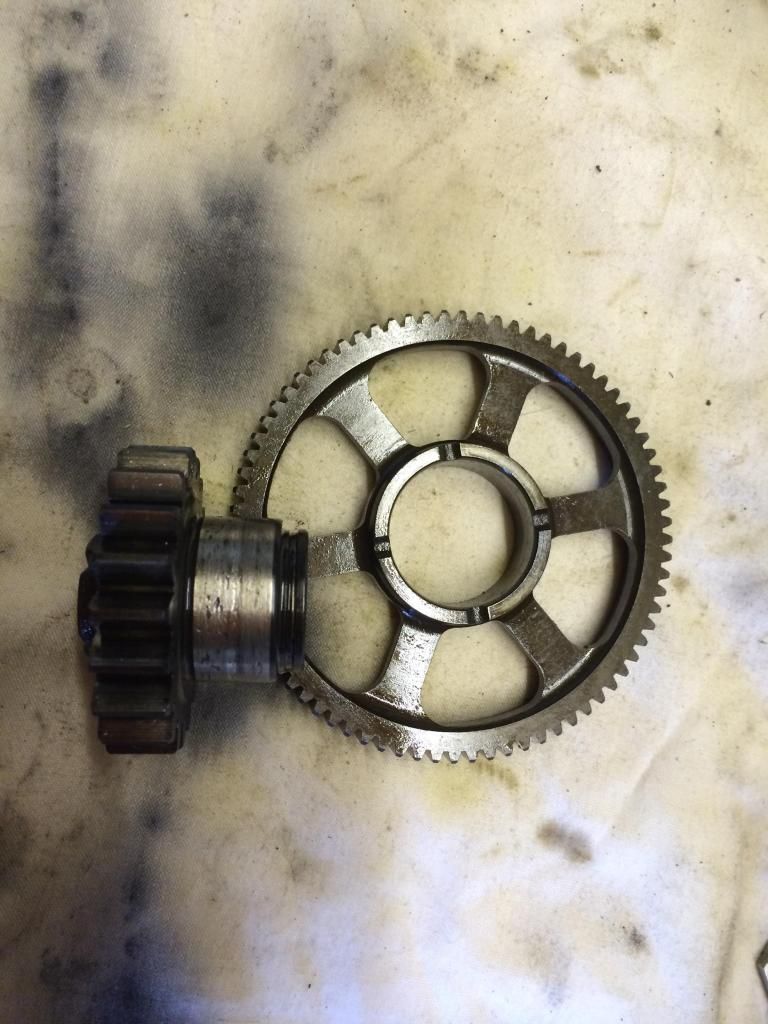
The transfer gear is two steel sprockets on a common shaft, fitted between the starter motor and the sprag clutch (which is behind the alternator rotor).
Its job is to transfer rotary motion form the output shaft on the starter motor to the sprag clutch. Honda have designed this gear in such a way that the two gears are on a common shaft; one gear has a shaft cast integrally and the other gear is pressed onto it with a tight interference fit.
I assume that the design allows the two gears to rotate against each other under extreme stress, such as when the starter motor is turning the gears but the engine "kicks back" and tries to counter-rotate, which would lead to catastrophic failure of the starter motor shaft splines if the torque were not relieved in some way.
Unfortunately, after this has happened a few times, the gears pressed together become worn enough to allow them to rotate against each other under normal starter motor loads.
There is a loud squealing noise when this happens.
In order to repair this, there are three choices:
1. remove the gears and replace them with a new set
2. remove the gears, weld them together and replace, and
3. remove the gears, drill and pin and replace.
Solutions 2 and 3 are easy and cheap, but if one assumes that the gears are meant to allow one to move relative to the other under extreme forces, it might not be the most effective solution, assuming that the situation causing extreme forces may reoccur.
However, the options are quite simple, either weld the two gears firmly together, or drill at an oblique angle and fit a roll pin which again will effectively lock the gears together.
In order to remove the gears it looks at first as though a large amount of disassembly is necessary, but it can be done fairly easily.
Firstly, set the engine to front top dead centre in the position (front cam lobes facing upwards and away from each other- see Sirch's excellent thread to set this) ( tip: set the engine to the rear position first, then rotate the engine one and a quarter turns anti clockwise to get to the front position needed) then remove the front CCT.
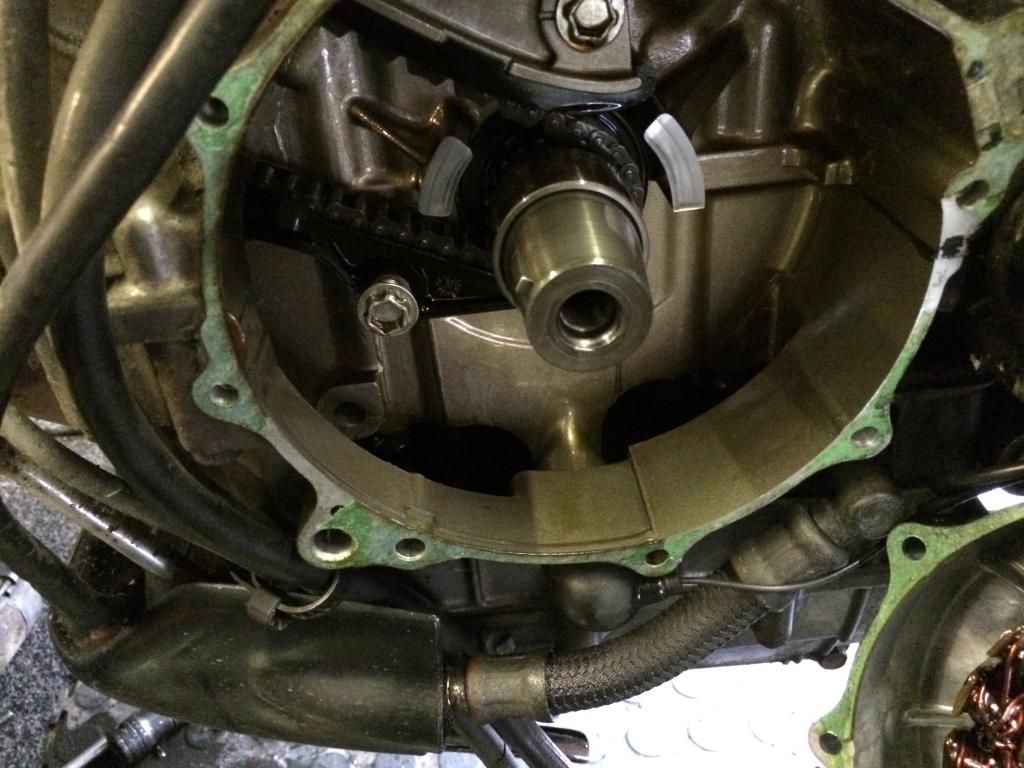
Now remove the alternator cover, and the alternator coils, around the rotor.
You can now see the rotor. Remove the rotor (you'll need a puller, or a rotor removing tool- (Benny Hedges has the specs to make one- search in Workshop threads) and remove the rotor, and the sprag clutch behind it.
Once that's out of the way you will be able to see the lower fixing bolt of the front cam chain tensioner, held on by a star drive bolt.
Then, using the correct star drive socket, remove the lower tensioner blade bolt.
The gears themselves are mounted onto an axle pushed into the crankcases; this can be simply pulled out using a magnet. Removing the starter motor, if not already done, makes this easier.
Now, by careful use of a couple of large screwdrivers, the two gears can just about be squeezed past the lower end of the tensioner blade, and removed.
Replacement is the opposite of removal.
Check for any flat spots or wear on the sprag clutch rollers, if there is any visible wear they must be replaced.
Don't forget to carefully re-check that the cam timing is correct before reinstalling the tensioner itself.
Now, assuming that you're completely confident, press the starter button-
and the engine will start.