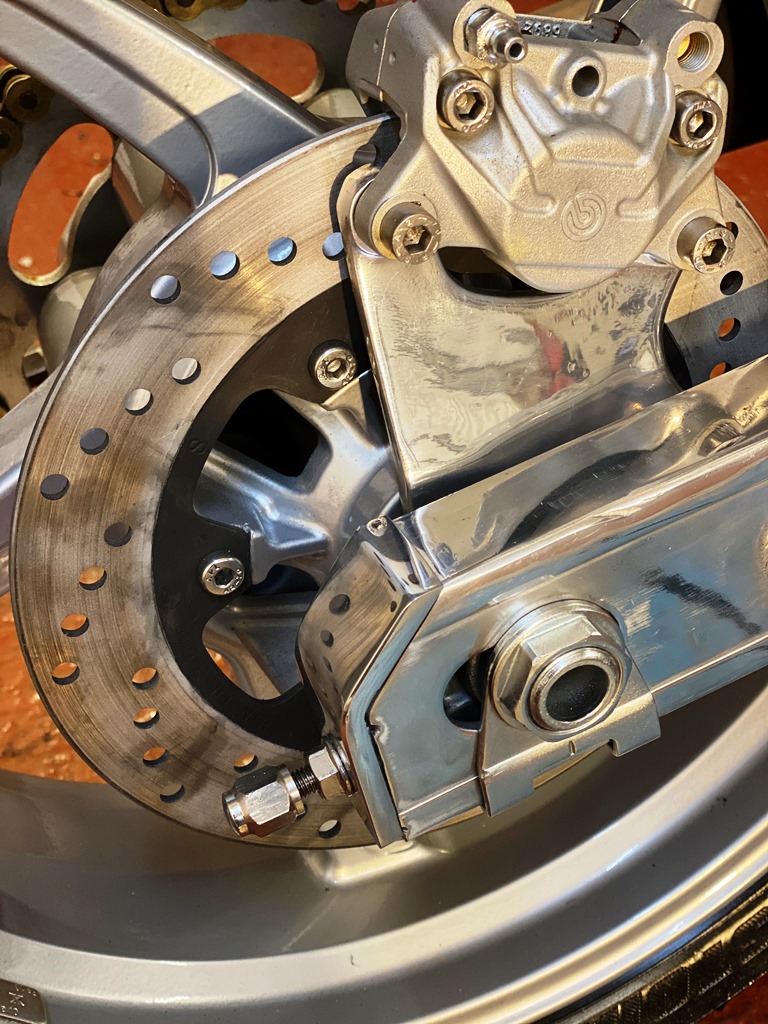
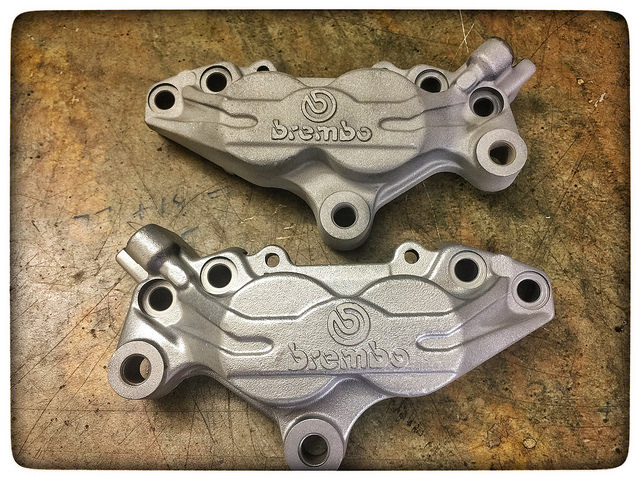
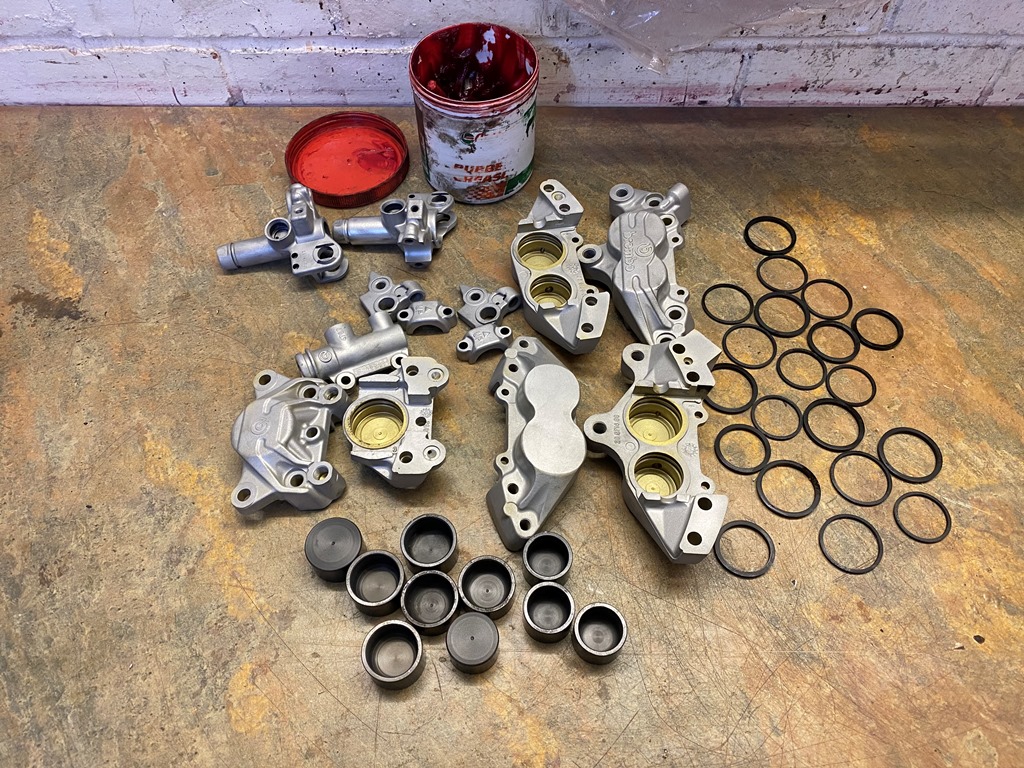
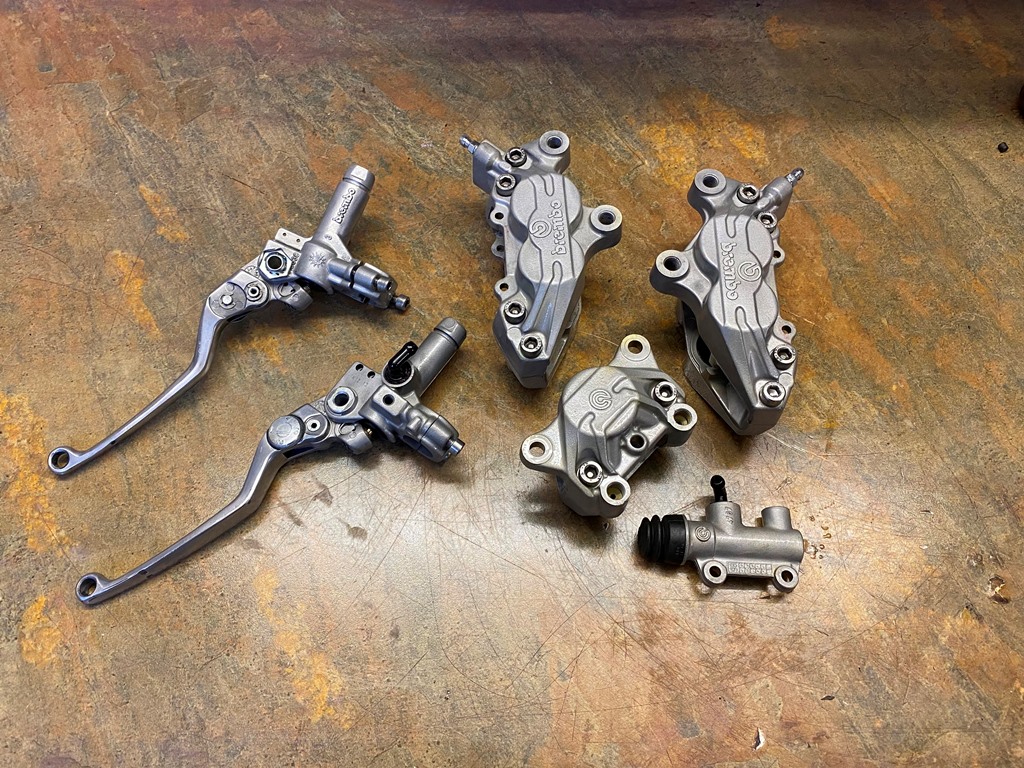
Yesterday I rebuilt all the hydraulics. I replaced the seals on the rear caliper as this was seized solid and I had to use some penetrating oil to free the pistons.
The calipers came out nice... My bead blaster now gives a really nice finish, that with a coat of ACF-50 keeps its shine. I was never happy with the finish until I picked up a tip from the guy who blasts my big bits... he said my problem was I was working at too high a pressure, and that was shattering the tiny glass beads! sure enough, I turned the pressure right down and the difference is clear!
I may try an anodising kit in the future after the success of the zinc plating!
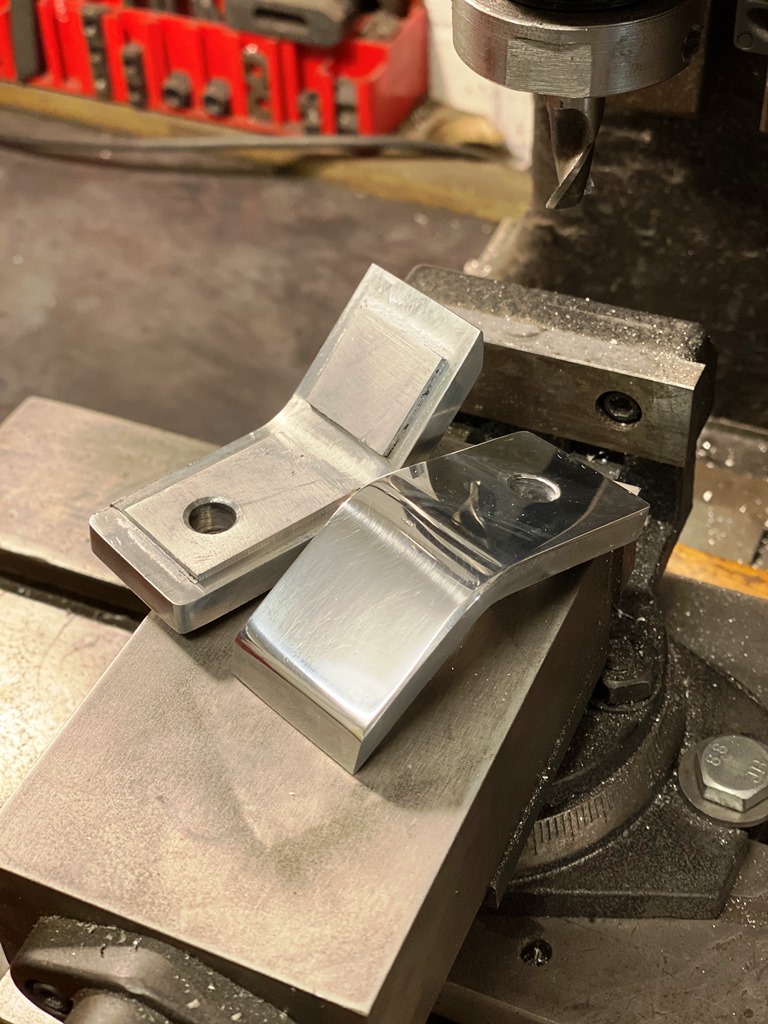
Also made a wheel spacer to replace the speedo drive which I am not going to use.
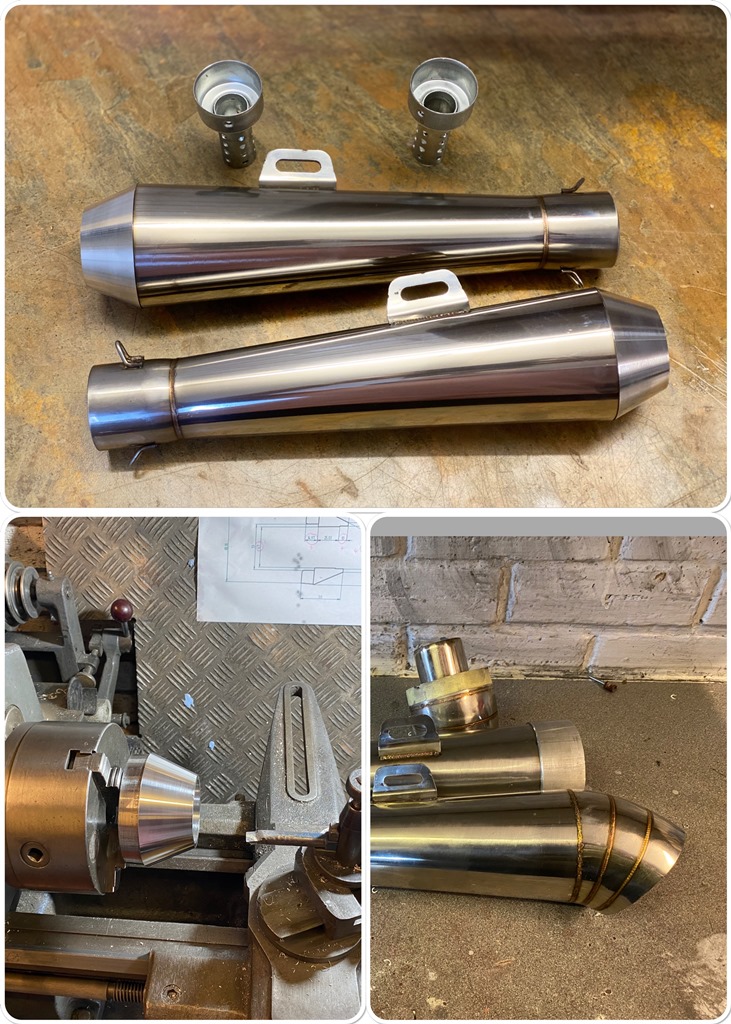
I know its a bit old school… just like me but I love the look of a mega on a bike… plan was to make a pair but I had trouble finding anyone here who could roll a cone, so I ended up modifying a couple of cheap stainless silencers I bought off Ebay. the removable baffles will satisfy the MOT man and they are now re-packable
sirch345 wrote: ↑Tue Dec 10, 2019 8:45 pm
Reverse Cone Mega's take me back, I still have a soft spot for them
Good work
buzzer wrote: ↑Sat Dec 07, 2019 11:16 am
Yesterday I rebuilt all the hydraulics. I replaced the seals on the rear caliper as this was seized solid and I had to use some penetrating oil to free the pistons.
The calipers came out nice... My bead blaster now gives a really nice finish, that with a coat of ACF-50 keeps its shine. I was never happy with the finish until I picked up a tip from the guy who blasts my big bits... he said my problem was I was working at too high a pressure, and that was shattering the tiny glass beads! sure enough, I turned the pressure right down and the difference is clear!
I may try an anodising kit in the future after the success of the zinc plating!
Also made a wheel spacer to replace the speedo drive which I am not going to use.
Thanks for the tip
Who would have thought having the pressure too high would have made such a difference. Now you've passed on the advice from your blaster guy it certainly makes sense, the calipers look fantastic,
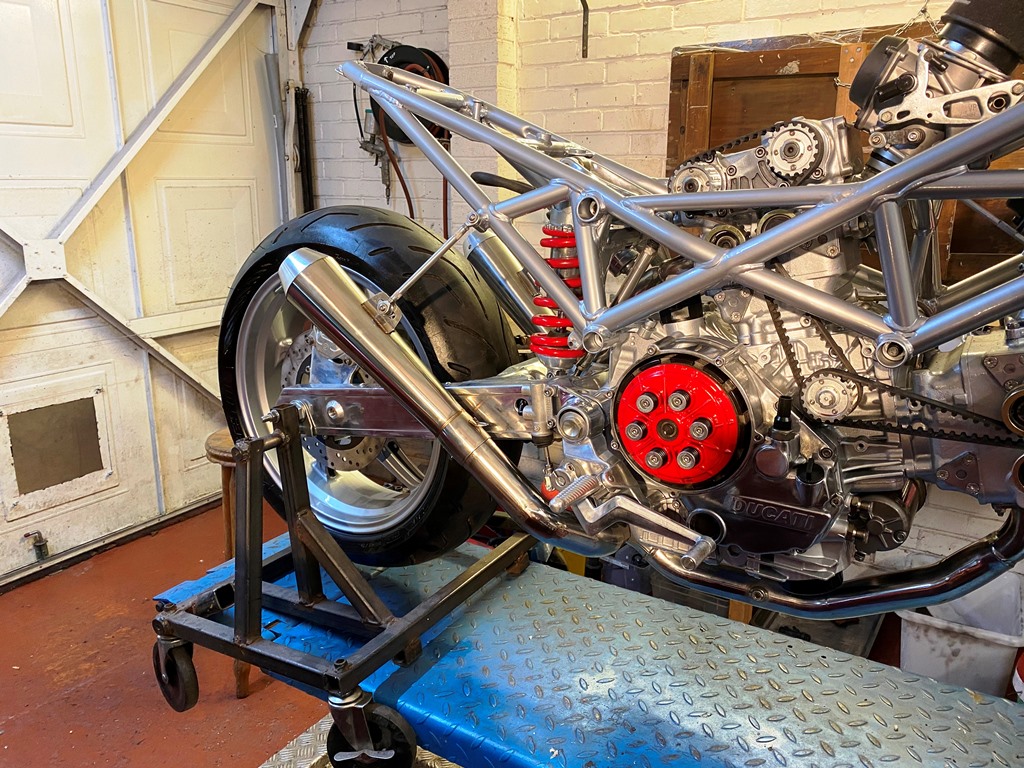
the weather has been crap for a few days, so some garage time made some ends for the swinging arm as I didn't like the originals and they were marked... also made some new stainless bolts. may wheel it out the garage tomorrow
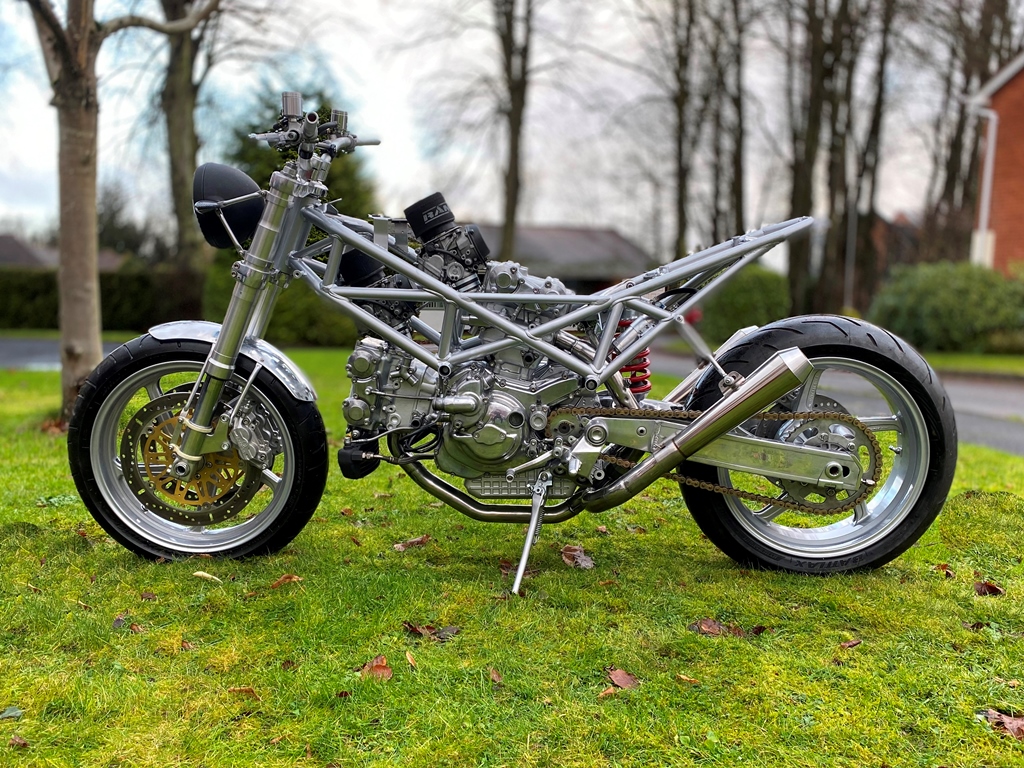
Got the bike out today into the daylight for the first time in months... Have to say my Iphone takes great pictures! Next job is to start the wiring... its a job I actually love doing, making a loom from scratch. here is my collection of wire from meany years! there is some new stuff in there as well that I got from some newish cars in the vehicle dismantlers last year. Its just too expensive to buy all the colours you need new, its a great source of wire!
buzzer wrote: ↑Fri Dec 13, 2019 2:38 pm
Got the bike out today into the daylight for the first time in months... Have to say my Iphone takes great pictures! Next job is to start the wiring... its a job I actually love doing, making a loom from scratch. here is my collection of wire from meany years! there is some new stuff in there as well that I got from some newish cars in the vehicle dismantlers last year. Its just too expensive to buy all the colours you need new, its a great source of wire!
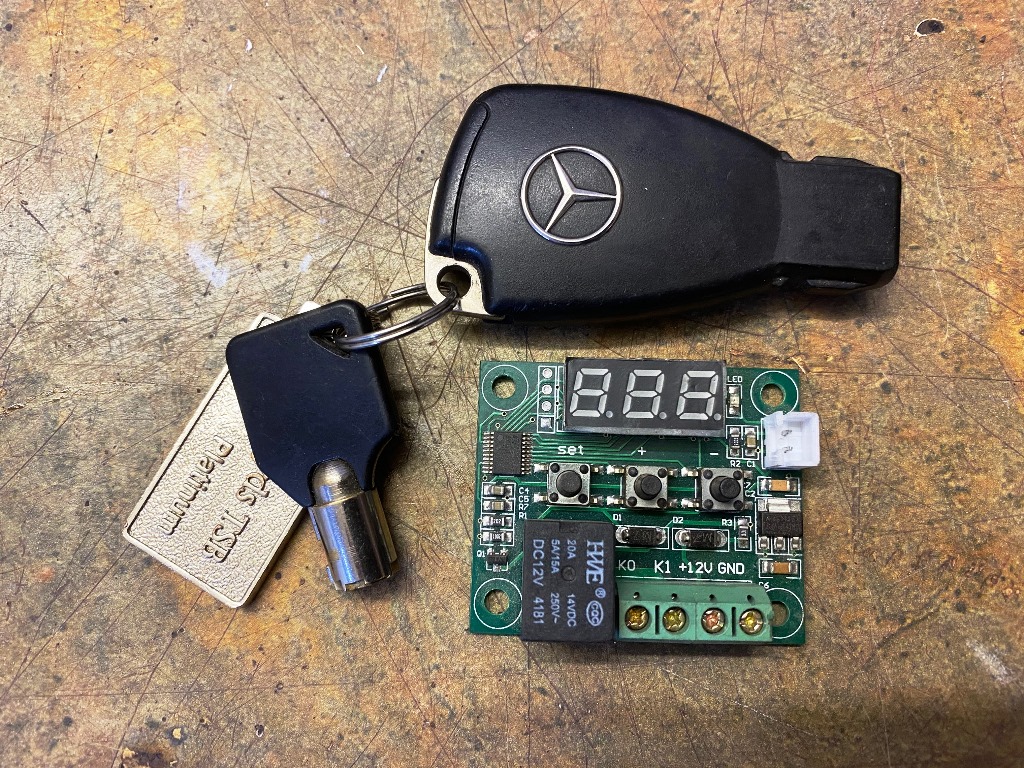
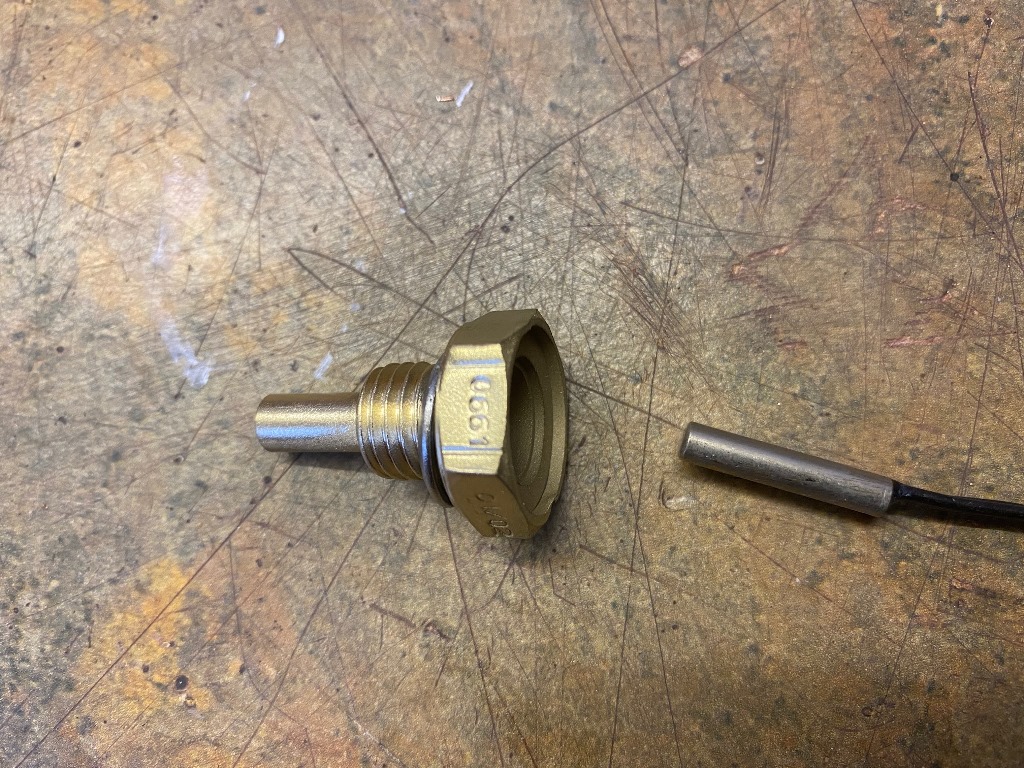
I have been pondering how to switch the radiator fan on and off as I am no longer running with an ECU... I popped around to my mate yesterday and he suggested using one of these units which is adjustable for temperature. he uses them on factory machinery. I have put the thermocouple in the original sensor (snug fit, but used some heat sink Grease used on computer CPU's) and some Araldite to hold it in place. Its 12V, you can adjust the temperature and it has a 20 amp relay on the board which is more than enough for the fan... tested it today in some boiling water and it works well! The unit is very cheap at around £5!
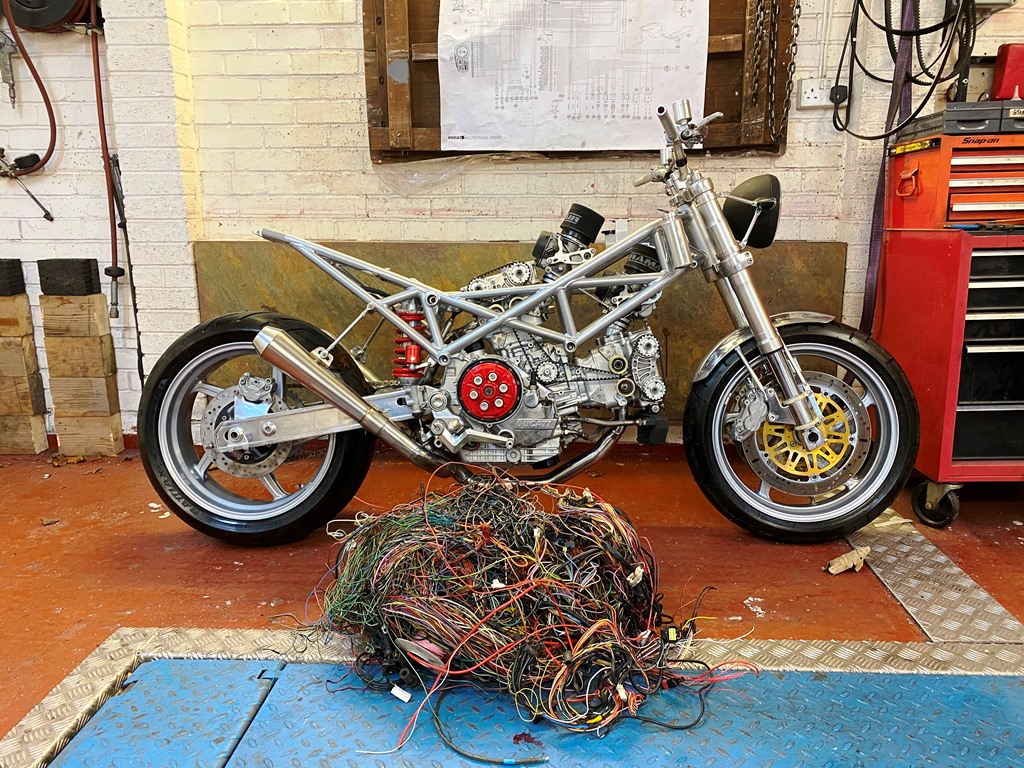
Also made a good start on the wiring.. I know a lot of people struggle with this but I find it easy, enjoyable and quite therapeutic! Sad I know! I start by making a drawing of each circuit on a page, and wire that circuit on the bike. As I go along I write the wire colours on the diagram for future reference. Use pipe cleaners to hold the wire bundles together till all the circuits are in place. then run them through sheathing , and then crimp/solder the ends on!
buzzer wrote: ↑Sat Dec 21, 2019 2:23 pm
I have been pondering how to switch the radiator fan on and off as I am no longer running with an ECU... I popped around to my mate yesterday and he suggested using one of these units which is adjustable for temperature. he uses them on factory machinery. I have put the thermocouple in the original sensor (snug fit, but used some heat sink Grease used on computer CPU's) and some Araldite to hold it in place. Its 12V, you can adjust the temperature and it has a 20 amp relay on the board which is more than enough for the fan... tested it today in some boiling water and it works well! The unit is very cheap at around £5!
Also made a good start on the wiring.. I know a lot of people struggle with this but I find it easy, enjoyable and quite therapeutic! Sad I know! I start by making a drawing of each circuit on a page, and wire that circuit on the bike. As I go along I write the wire colours on the diagram for future reference. Use pipe cleaners to hold the wire bundles together till all the circuits are in place. then run them through sheathing , and then crimp/solder the ends on!
That's an interesting idea for switching the radiator fan on and off, very handy having a mate like that
You're making this wiring job sound all too easy
Keep up the good work, just remember to stop for Christmas
 but I love the look of a mega on a bike… plan was to make a pair but I had trouble finding anyone here who could roll a cone, so I ended up modifying a couple of cheap stainless silencers I bought off Ebay. the removable baffles will satisfy the MOT man
  and they are now re-packable