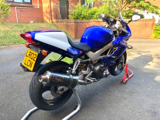

First impressions are good, not much to say, so lets get to running a cable!

I alread fitted a trickle charger port so I decided to tap into this so I didn’t have to add more battery terminal connectors.
First, disconnect the battery!

I added a mini fuse holder to the cable I will be running. Always use protection kids!
My electrical box identifies as a tool box


I didn’t have the correct size heat shrink so I used electrical tape to secure the fuse holder to the negative and covered the crimps.

I decided to leave a lot of slack near the battery so the fuse sits up in the tail.

At first I thought I would run the wire along the top spa of the main frame, around the airbox and through the head stock, but on inspection there was no existing wires doing this that I could secure it to, so I decided to head down and towards the clutch slave. There were a few pipes/wires this way so it was the best option, you can see my new wire heading in behind the cable stay wire.

From there I followed it through the frame with all the existing wires and secured it to the clutch line with zip ties.

This view is from the left of the tank near the forks, continuing to run the wire with the clutch line. You can see in the centre of the photo there is a wiring loom securing wire that bolts to the frame that is keeping that thick mass of wires in position, I loosened this and poked my new cable through.

At this point I cut the cable with a fair bit of slack and crimped some bullet connectors (both female) the reason why I went with bullet connects was because I wanted to add a switch and a volt meter, I didn’t have the switch yet but with I can just whip the bullets apart and add it in later. I then fitted the phone cradle (forgot to take a photo, sorry!)

Male bullet connectors on the wires coming from the phone mount. These can the be tucked in somewhere, I tucked mine in to the wires that head to the speedo.

Back to the fuse, popped in a 10amp and then reconnected the battery. Then just tucked it in so it look a little neater.

And boom! All done and looking pretty smart.
I went out today for 4 hour ride,(god I’m aching now) and the mount was perfect. Some vibrations at a certain rev (about 2k) but wow I’m impressed at the overall stability of it. I though this thumper of a bike would shake my phone to death but it was dead still for 99% of my ride. I created a route the other night and have never ridden most of these roads so I was looking at directions a lot and it was perfect! It came with two rubber nets that act as a back up from loosing your phone. Use one! (Although I didn’t fit it for the photo here)

I hope this helps anyone looking into phone mounts for their bike and how/ where to run a cable, when I was looking online I couldn’t find this info so hopefully this filled that hole (puns, puns everywhere)