I had been looking out for a new hugger for quite sometime, but trying to find one in matching colour for my bike just wasn't happening. So I got this one in Yellow at a good price instead, then set about respraying it to match my bike in Red. This is how it went:-
First of all I fitted it to my bike to see what sort of fit it would be, I also wanted to check whether any alterations IMHO were necessary. I found that I did alter it slightly for a better fit IMO, so was glad I checked it, as less likely to scratch the new paint work by doing this first.
Next I rubbed down the Yellow paint work using a Scotch Brite pan scrubber. Once all the shine had been removed I then went over it with white spirit on a lint free cloth to remove any dust and grease left behind. I then sprayed it with Red primer from a spray can.
I then flattened off the Red primer with 2000 grit wet and dry paper, I also used some washing up liquid in the warm water which helps.
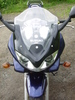
Once that was done and fully dryed off (that is very important!) I wiped it over again with white spirits as I did above, because a certain amount of grease comes off your hands/fingers. I then applied the Red top coat that I purchased from Halfords in a spray can. The photo below shows it ready for flattening off, you don't need to have a perfect shiny finish at this stage.
 Viewed 2970 times")
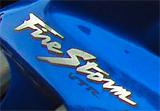
Out with the 2000 grit wet and dry paper again, because I did have some imperfections, it's quite hard not to using a spray can. So don't worry if yours is not perfect either. Once fully dried off next wipe over again with the white spirits as before. Next I applied the lacquer, I applied it in thin coats allowing each coat time to dry before applying the next one, building up a good cover gradually. It's very easy to get a run with the lacquer so go carefully. Once the lacquer has been applied and left to harden off, I then got the 2000 grit paper out again. That was followed by T cut and polish. It takes a reasonable amount of time to get a good finish, but I hope you think it was worth it. I'm very pleased with the final results as seen below.
 Viewed 2970 times")
You can use a coarser grit wet and dry paper than I used to start with if you wish, but you need to be careful (especially on edges) that you don't rub through the coat you are flattening off, that's why I stuck with the fine 2000 grit. If you do rub through a coat you'll have to re-apply it again.
Chris.