The aim is to try and build a bike with the least amount of parts as I can, to make it light as I can with as many bespoke parts as I can.. it should stay functional and do the job it's meant to do.. but most of all this build is to make it as special as I can to me and me alone.
With that in mind I am more than happy to accept criticism and advice on this build, as I would like to make it one of the better things I have done... I also know we all have ideas as to what is right and wrong and I am open to these ideas, in fact please give me any advice should you see something that could be better or improved... I may or may not change things according to the suggestions put forward but please give a good valid reason as to why something needs to be improved so I can understand why I am doing it rather than just telling me " I would have done it that way" with no real reason.
Anyways... here we go!
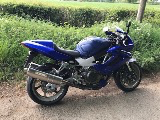
Starting point is the engine... this one:
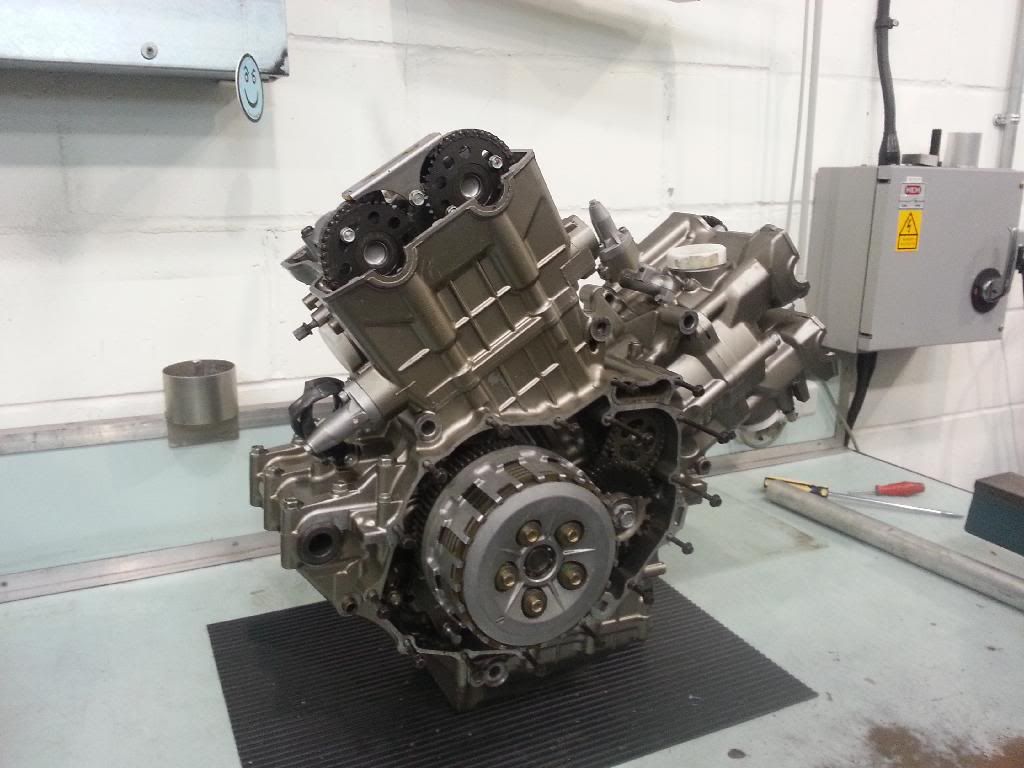
and this is the spec of said engine, built by Roger at Revolution, the casings are missing as they have now just gone away for painting.
Will add more pictures when they come back and it's gets assembled and looks complete but thought I'd make a start on it all as it's been sitting around far too long doing nothing while I finished the road bike.
New main bearings
New big end bearing
New piston rings
Newly honed bores
New valve guide oil seals
New oil seals, all engine gaskets and oil filter
New CCTs
New oil pump
New gearbox selector forks, selector fork shafts & gearbox bearings
New Moriwaki Stage1 camshafts c/w Kent slotted camshaft wheels
Ported & Gas flowed cylinder heads.
Balanced Crankshaft
Polished OEM valves
11.6 : 1 Racing Hi Comp Pistons
Lightened flywheel
Modified crankcases.
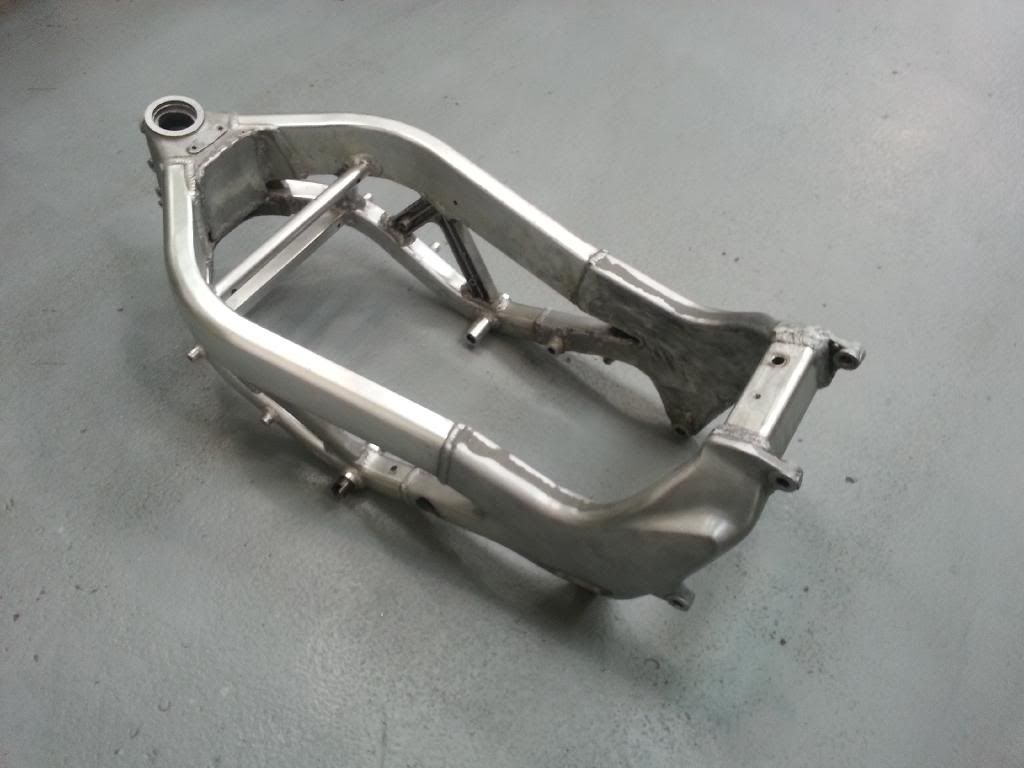
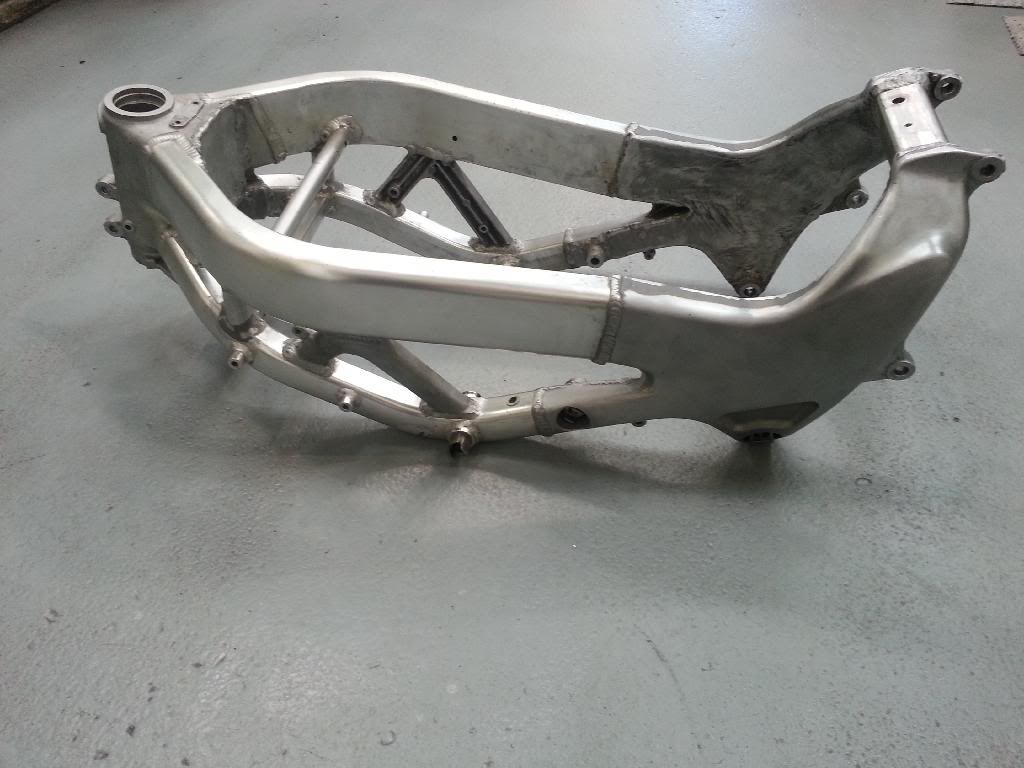
It will be going into this frame I have here... as you can see it has had the extra spar put in at the front and the bits reinforced where it needs it according again to Roger's recommendations along the headstock and the two side cast parts. Again it will not remain in this state as it will soon go to paint when I have done the few fitting things I need to and check they fit and work correctly.
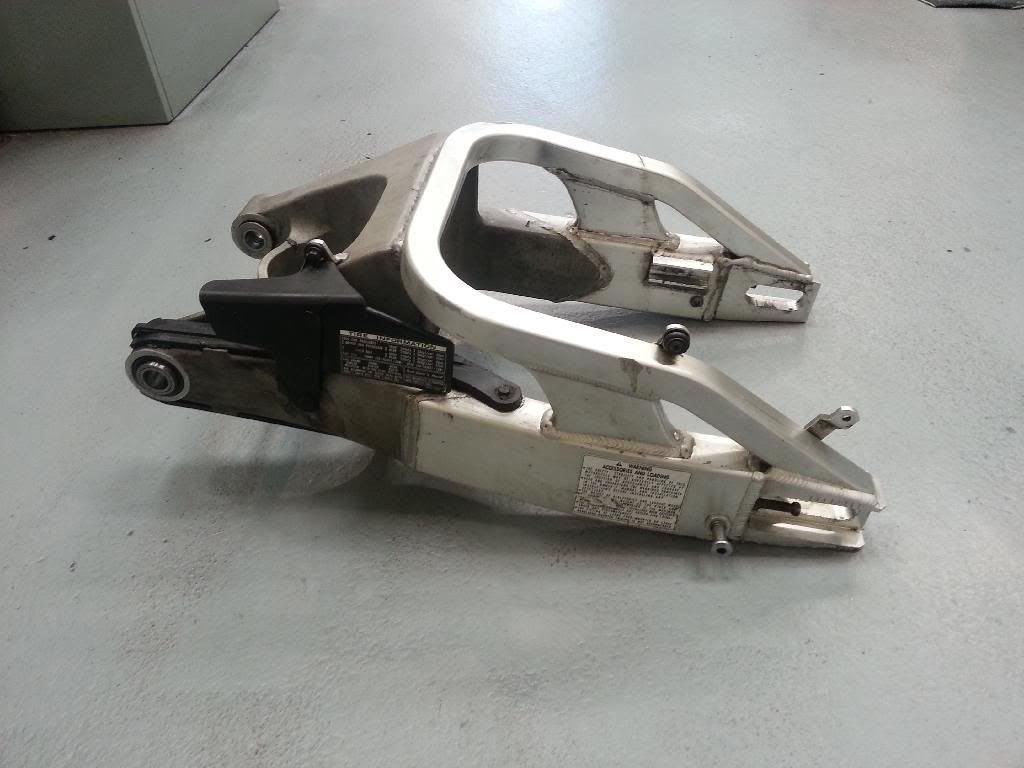
This is the swing arm I will be fitting and doing this for a few reasons..
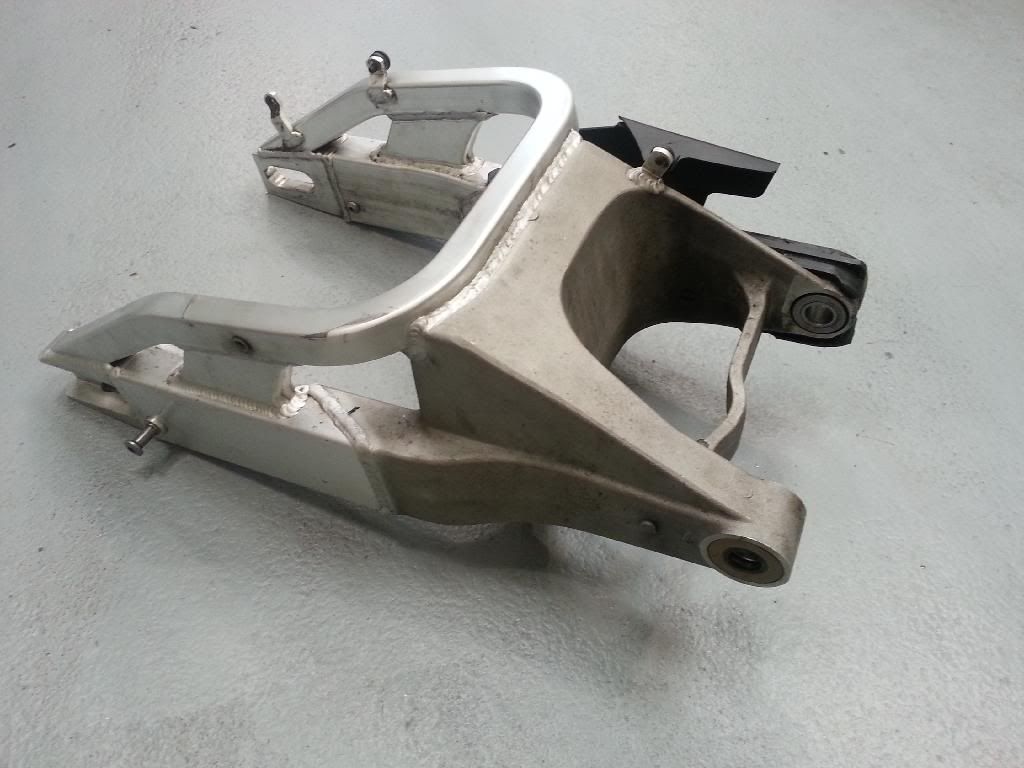
First reason is that it should be lighter than the original one that has been braced and secondly it is also a little bit longer in the arm itself. The longer wheelbase I am hoping will put more weight on the front and help stop the front wheel climbing skywards with the extra horsies I will get from the engine. I know this will change the bike geometry etc but have plans for that so not worried too much at the moment and will come to that a little later in the thread.
To make the arm fit I have changed the bearing, spacers and other associated parts so a 20mmm spindle will still be the spindle of choice and not the 25mm standard. I know the rear wheel spindle will be 25mm at the moment and that may limit wheel choice but I am not worried about that either as I have plans for that as well should I need to run a 20mm spindle and again that will be later in the thread, just want to make sure the bits I have made work together and fit as they should. Hence the next bit....
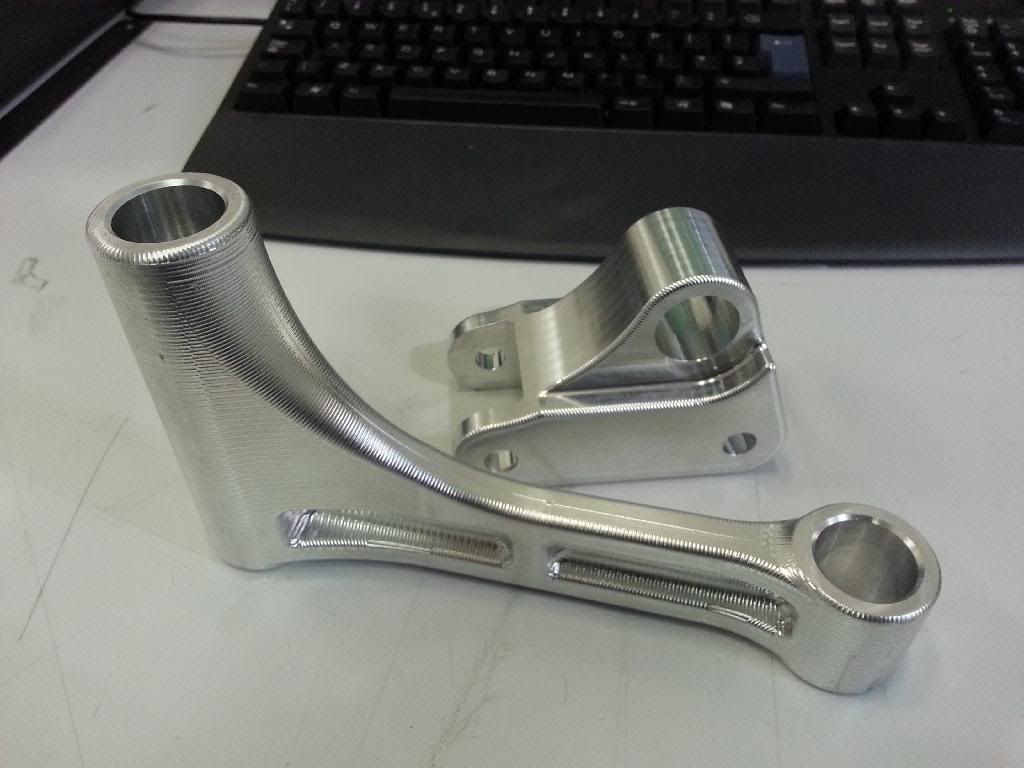
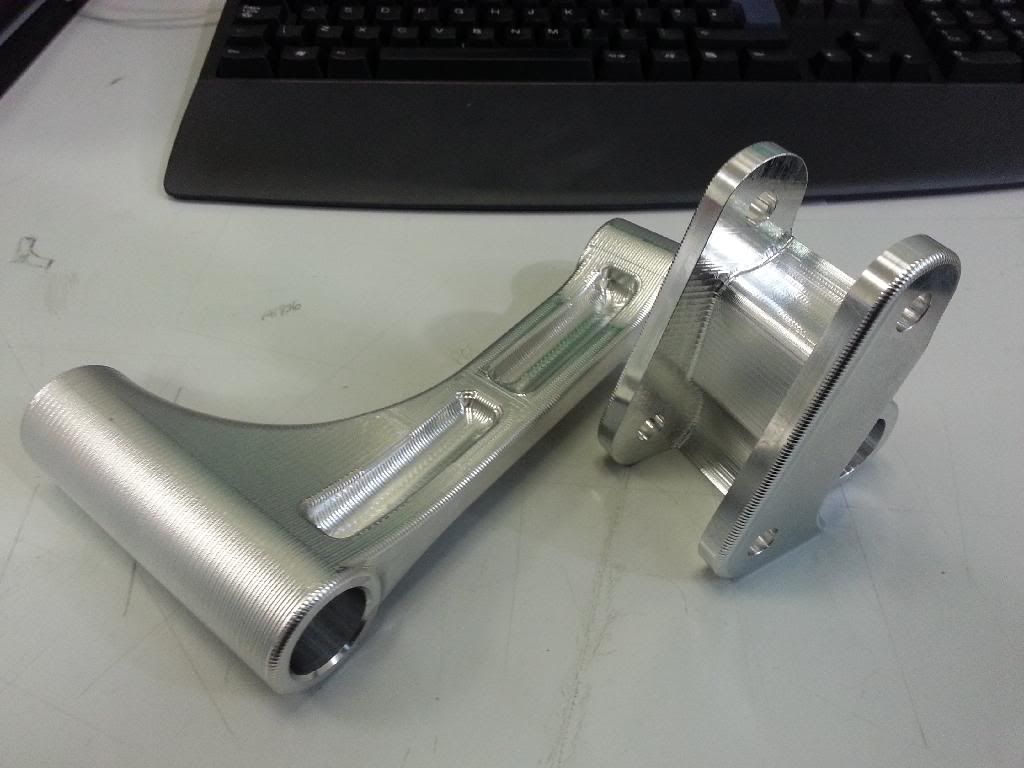
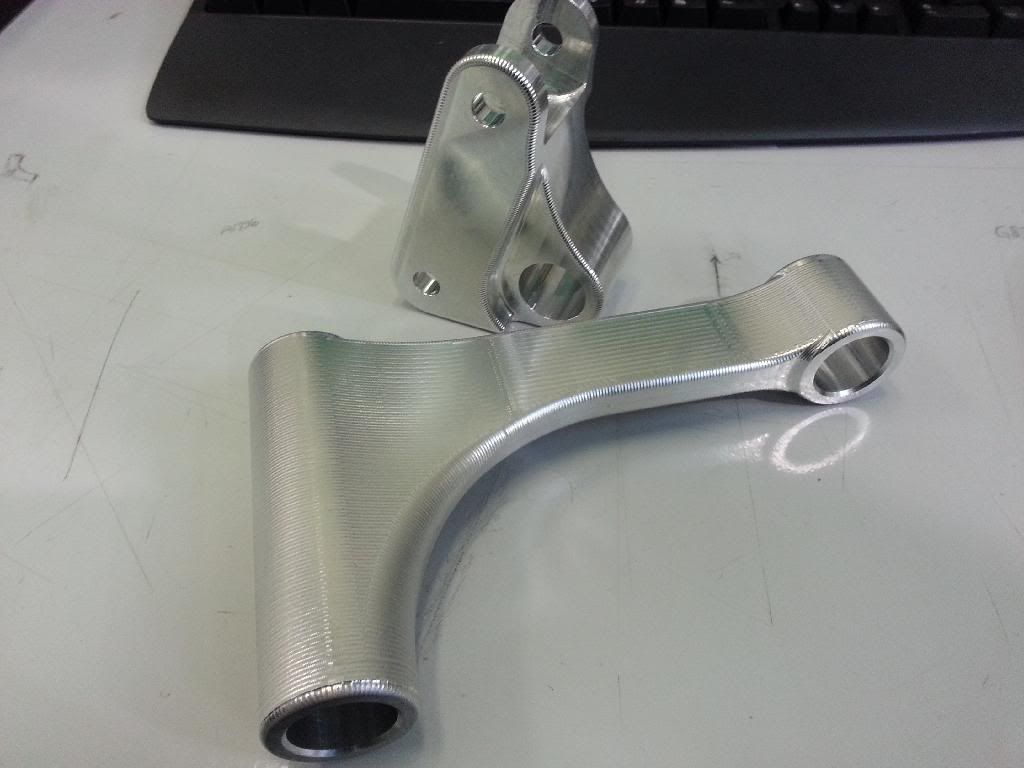
As the swinger is longer and to retain the correct placing of the shock and bits I have had to make a new dog bone and linkage to make sure it will be where it needs to be. This is also to make sure it clears all the bits on the swing arm it needs to and the shock is in the correct place to work. They have been made out of solid billet so should be fine for the job and I machined it coarsely so you can see it's been machined (I know it's vain).
These are now going to be hard black anodised. Sadly they will be fitted in the future with all the other anodised tat yet to be made at later dates
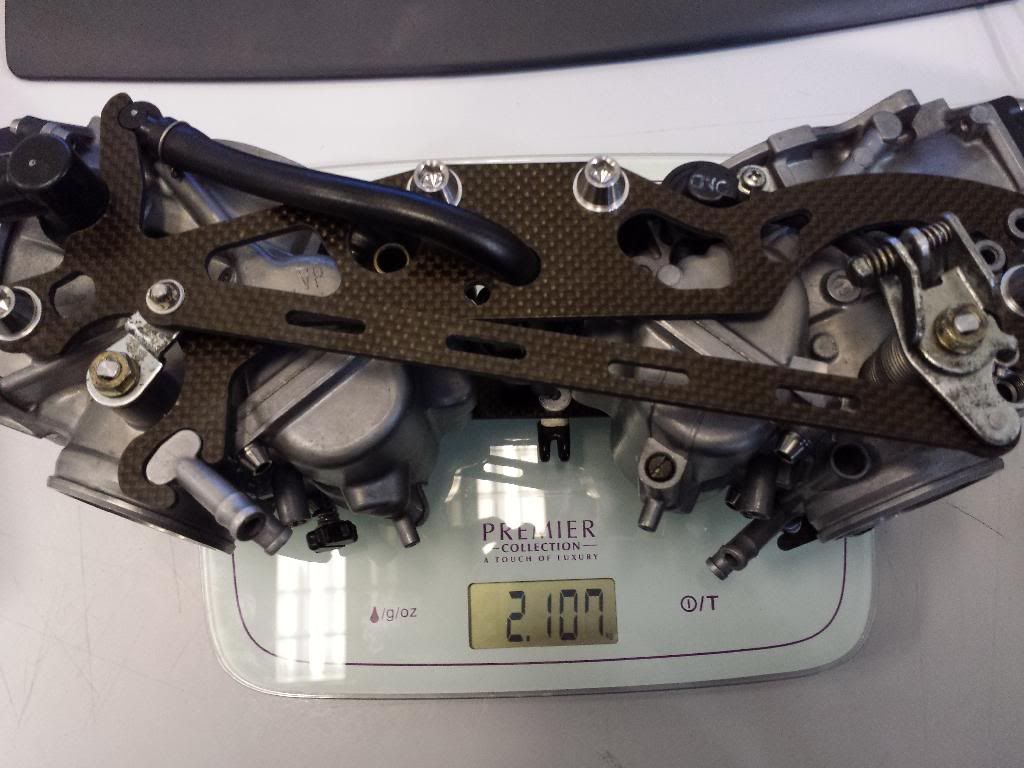
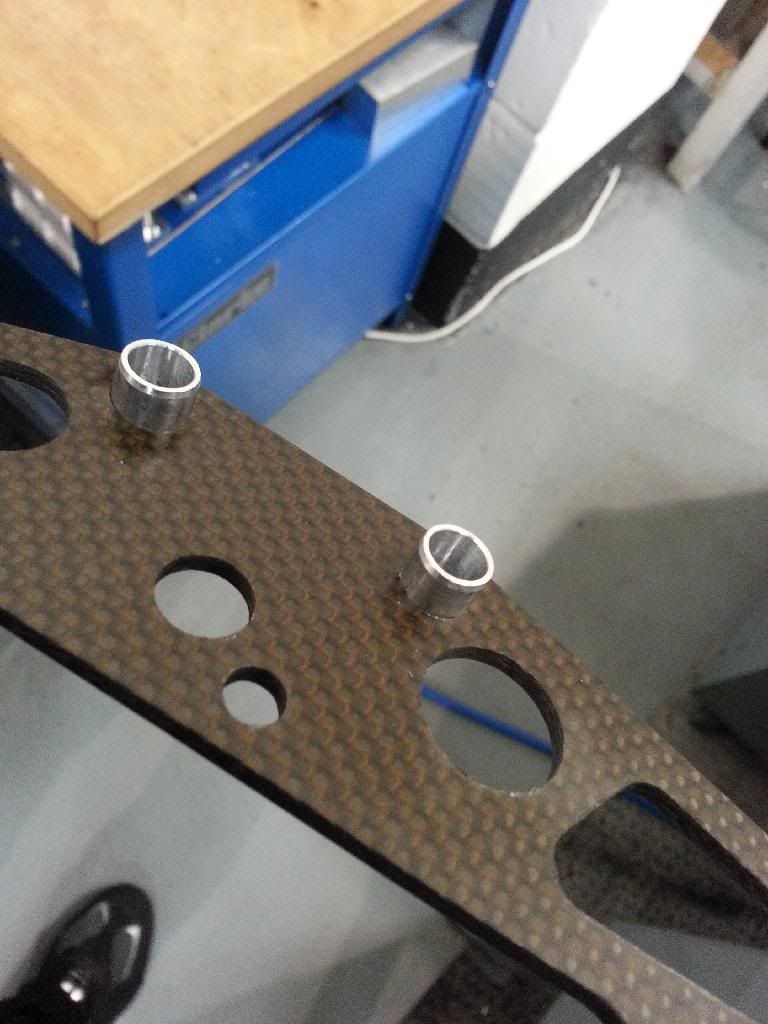
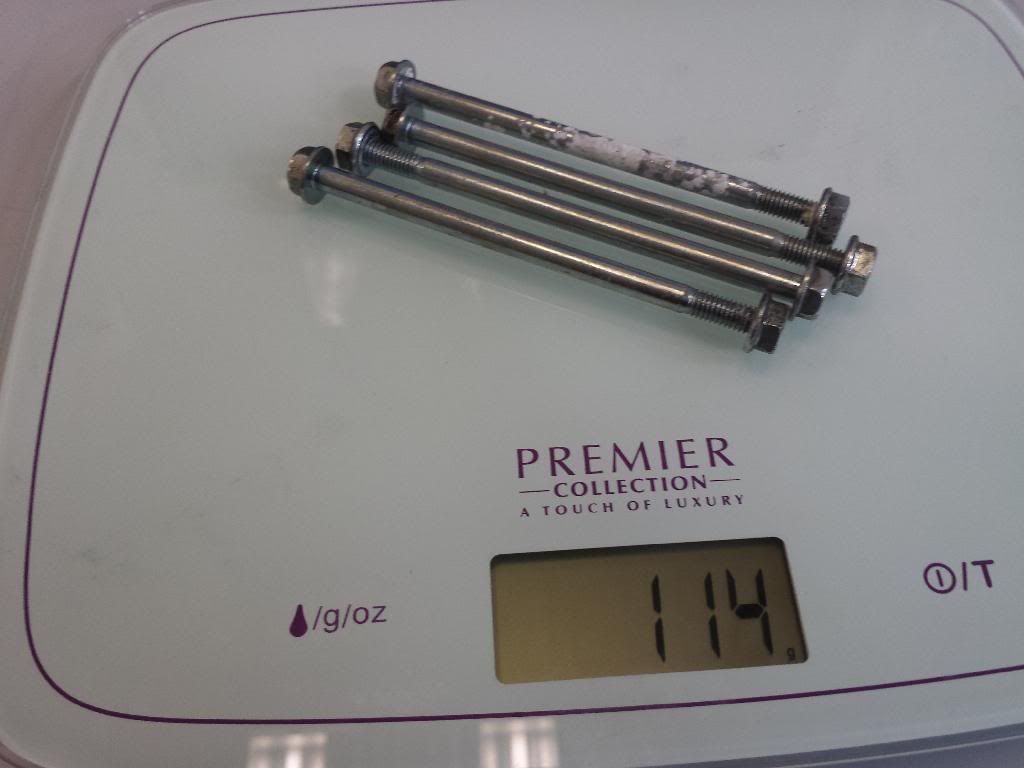
While waiting for the bits to come back and to just press on with a few bits I wanted to get the carbs all set up ready for the lidless airbox or ram air system... So took them apart and started looking at them. First question was to see if I could make them lighter and do a few mods to help. I don't think there is a huge amount to be done with them but thought I'd do something. The idea was to take weight out of the steel bits where possible so the four bolts that go from one side to the other will have to go and the same with the linkage and side plates.
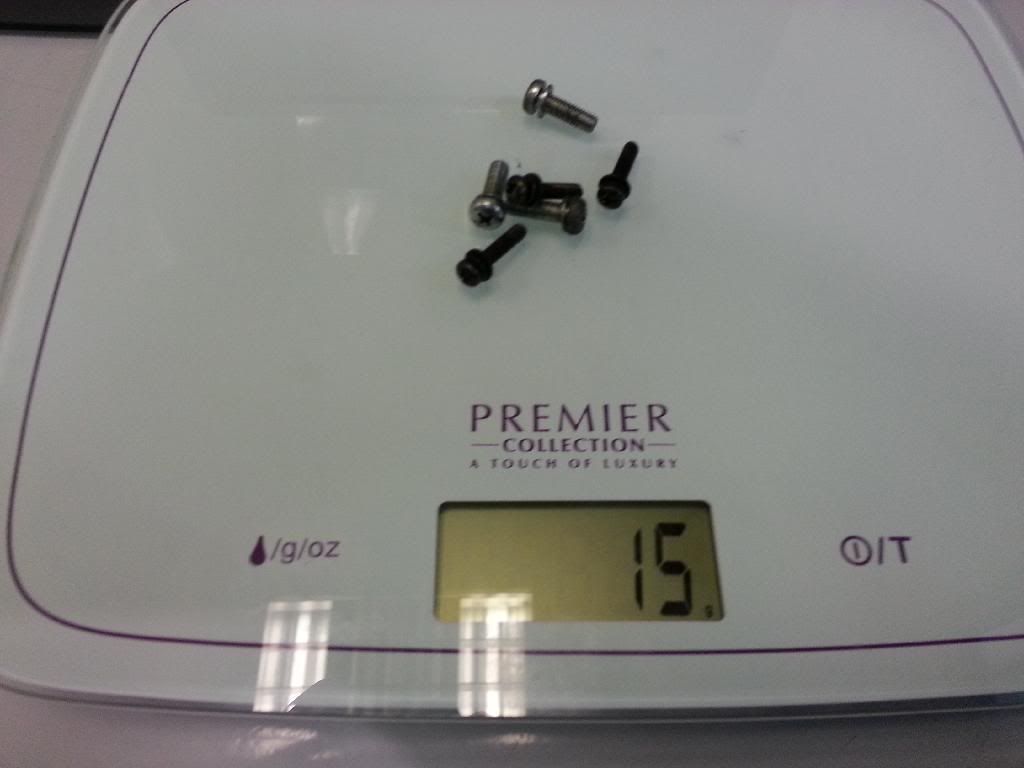
The first thing I did was to machine out a dowel location hole in each of the old location points and put a M8 thread down each hole so I can get rid of the four bolts and put in shorter M8 titanium bolts. This will put them into the right position by a positive location on the combination washer-dowels in the side plates. I put the plate to it and see if the dowels and carbs lined up right, which they did.
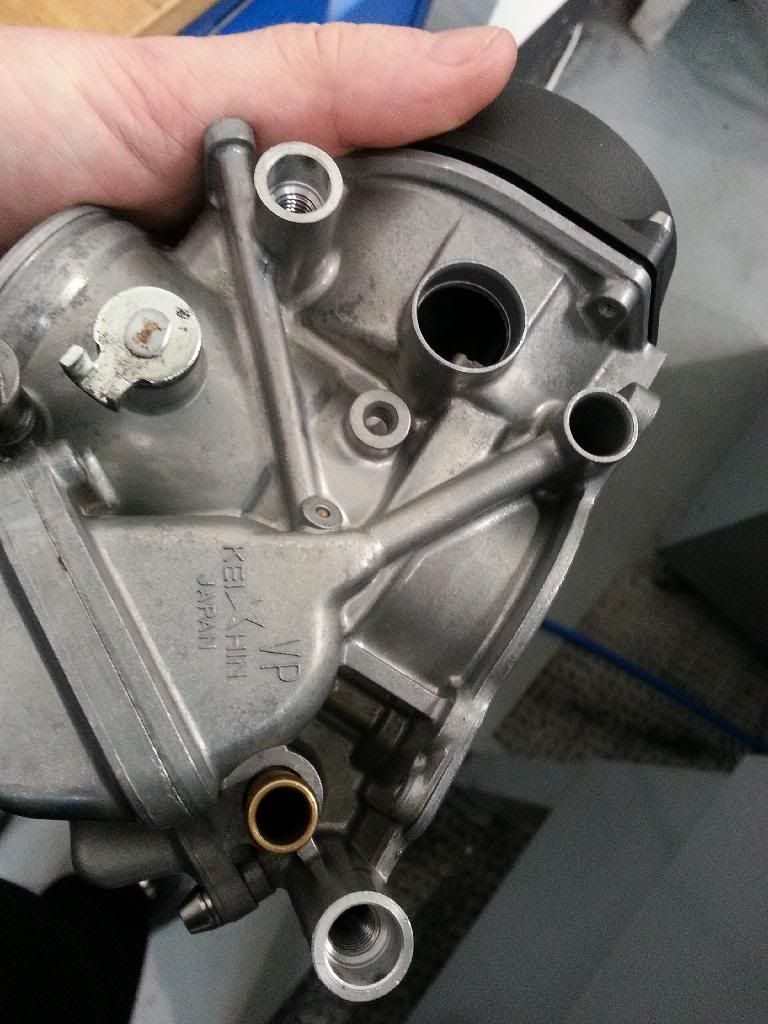
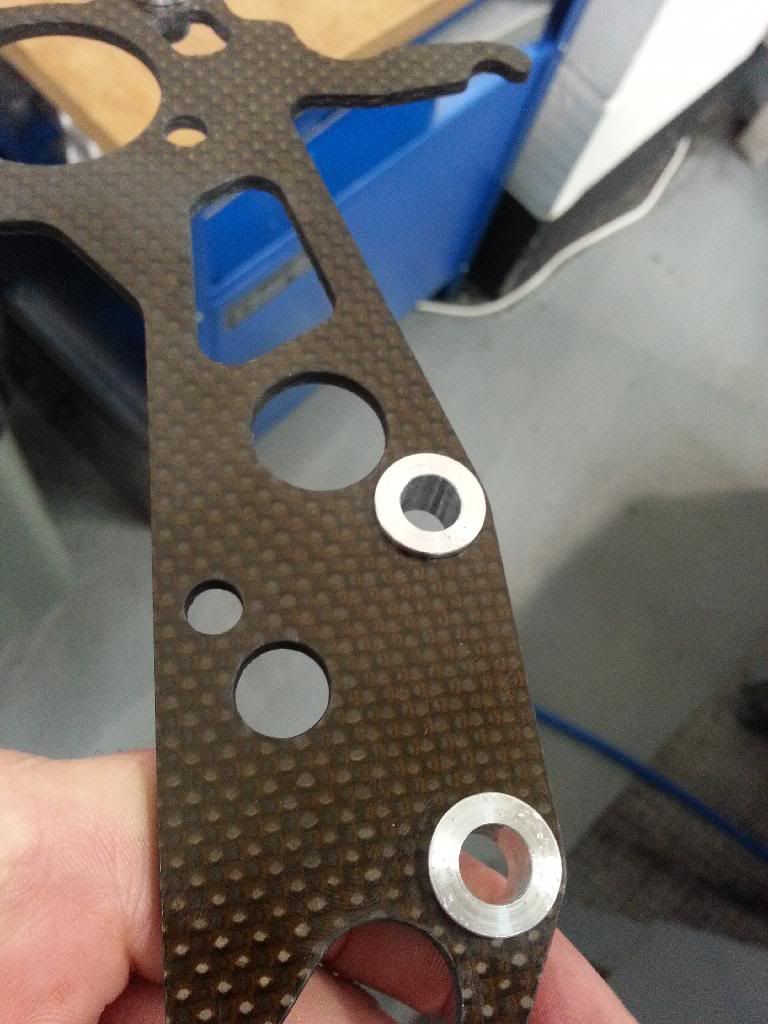
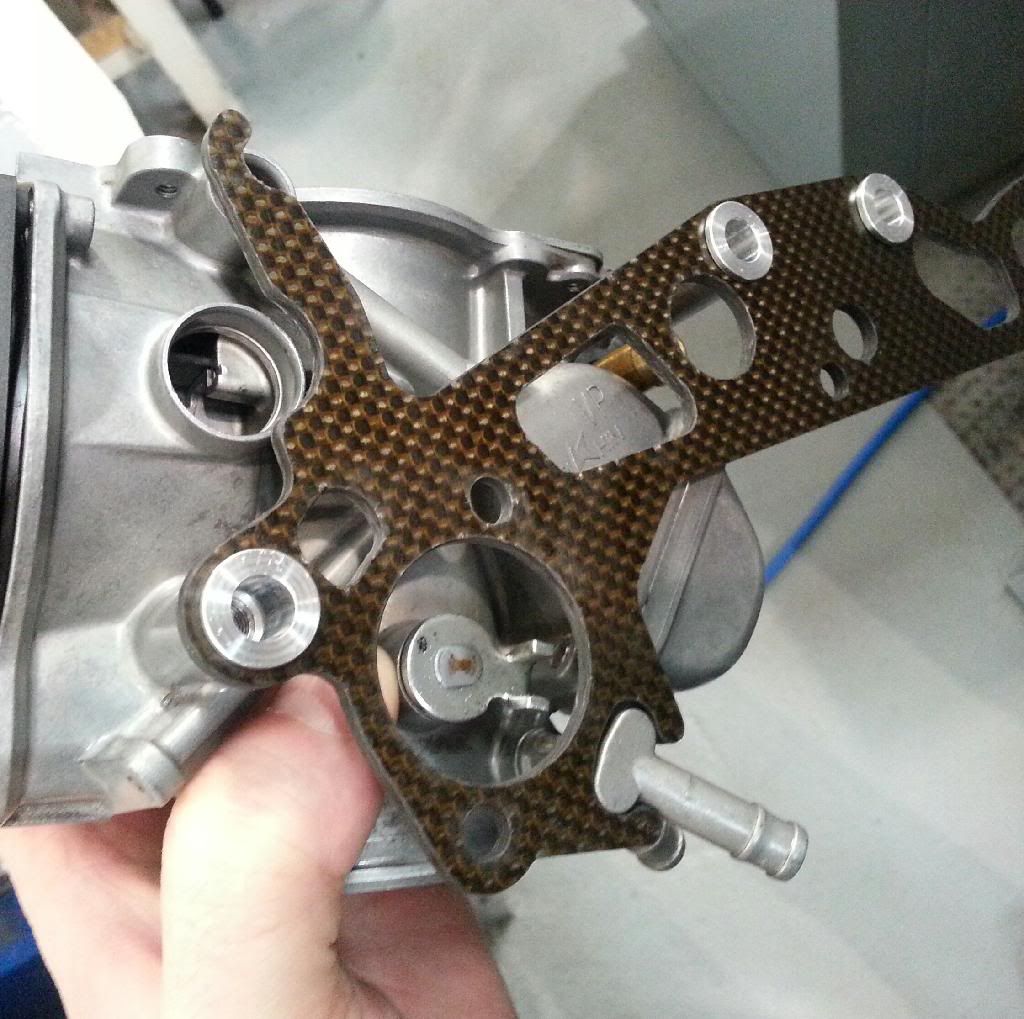
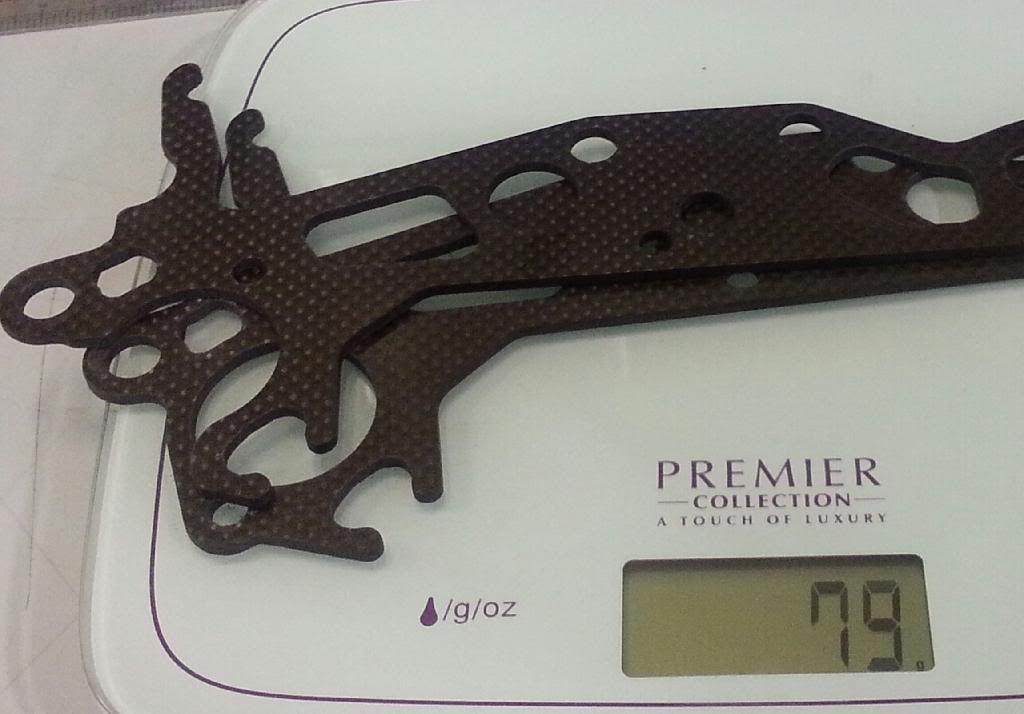
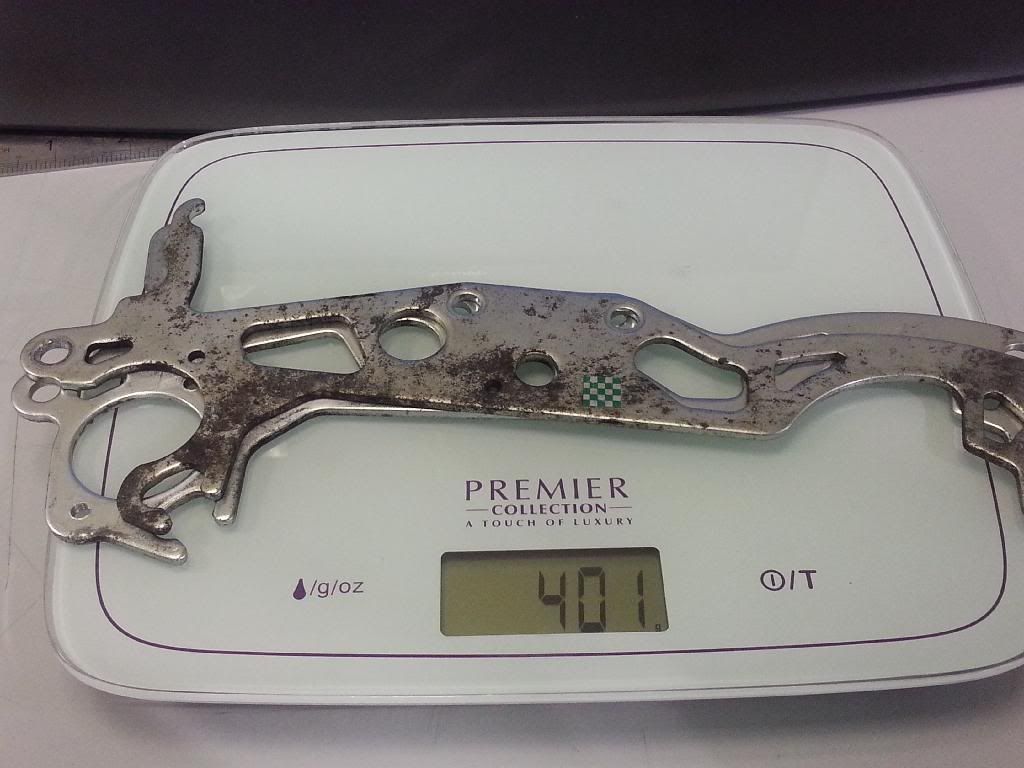
Then I changed all the small screws for titanium bolts... seems to be half the weight and also weighed the side plates compared to the new ones.
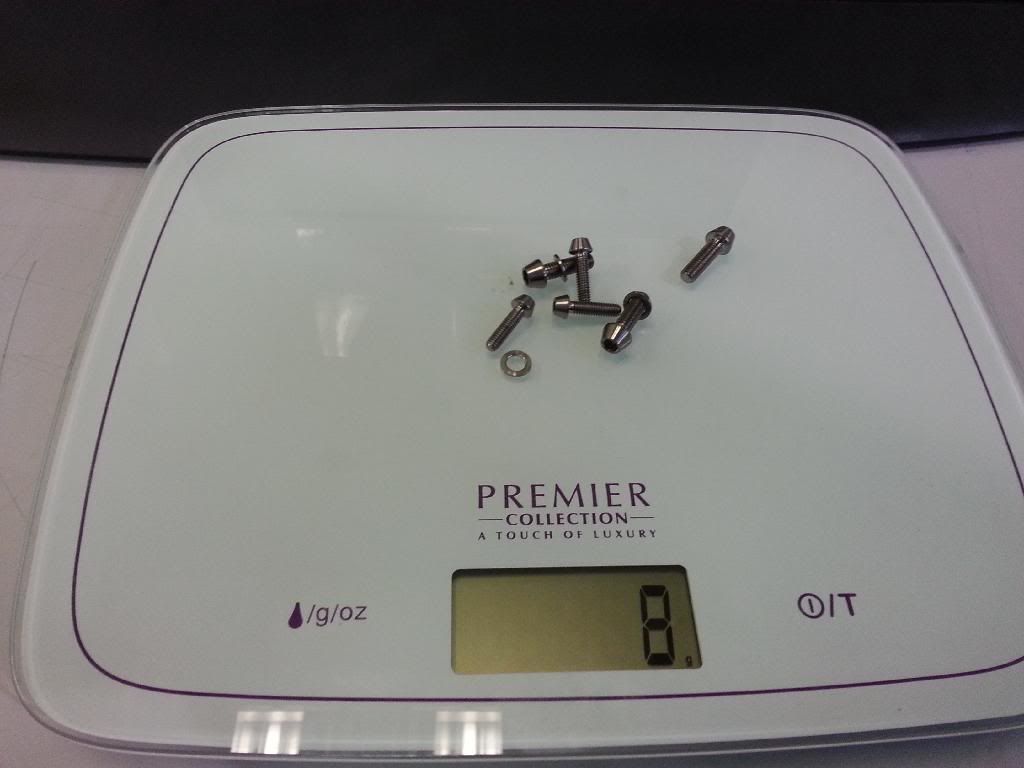
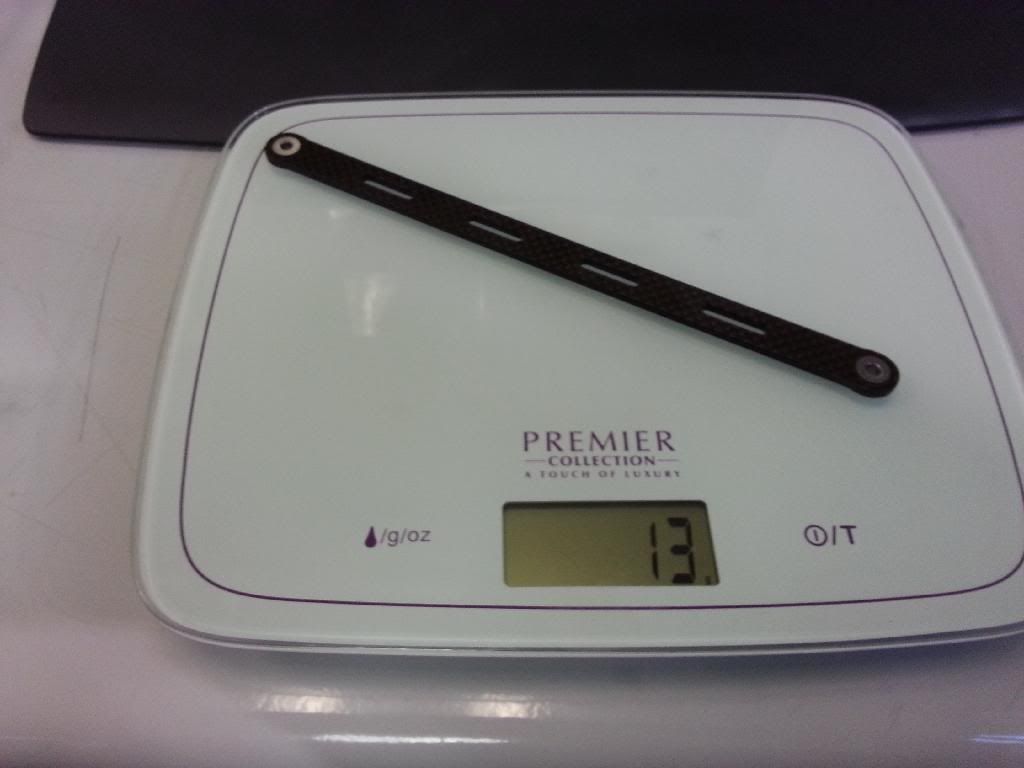
I also made a new linkage with titanium bushes and that proved to be a lot lighter as well...

So far saved around 300 grammes without weighing the four long bolts compared to the 8 titanium bolts I will be using so if I can get a another 100 grammes it will be close to a pound in weight I may have lost from the carbs?
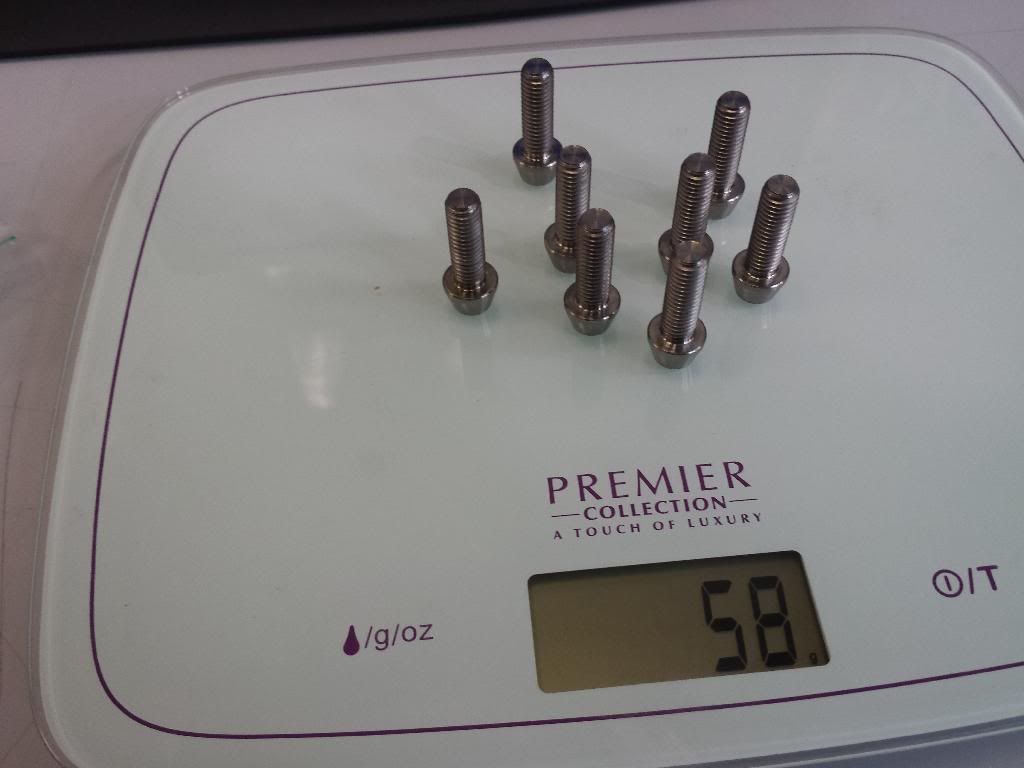
and again half the weight of the bolts saved
Time will tell if this is a good mod or not... although I know others have done the carbon side plates I just wanted to change the way they are held to the carbs and save weight with the bolts and linkage as well.
Here is a finished pic and final weight of the carbs... against a standard set it appears I may have saved around few hundred grammes or so... or at least a lb in weight in old money. Wished I remembered to weigh them before I started