Well you asked for another Ducati build
Re: Well you asked for another Ducati build
Good work with the return cables, they look as if they have always been there
A good plan of yours to get some miles in on your favourite bike while you can
There will be plenty of wet days for getting on with your latest build come winter.
Some of our forum members are happy to run just the opening throttle cable on our Firestorms/Superhawks, but I am a little unhappy to do that having had a throttle stick open many years ago. It was a scary moment, one which I have never forgotten. Fortunately a second blip of the throttle released it,
Chris.
Re: Well you asked for another Ducati build
Sometimes I just sit for a while and look at the silhouette of a build in the garage with the lights out… I did this the other night (my wife thinks I am mad! ) and I kept coming to the conclusion that the tank is not what I want… So off to the bike breaker who lets me wonder around his BIG unit. I took a cardboard cut out of the shape I wanted with me, and some measurements… of the hundreds of tanks I looked at (surprising how many are now plastic!) , none were suitable, mainly due to the angle of the frame.
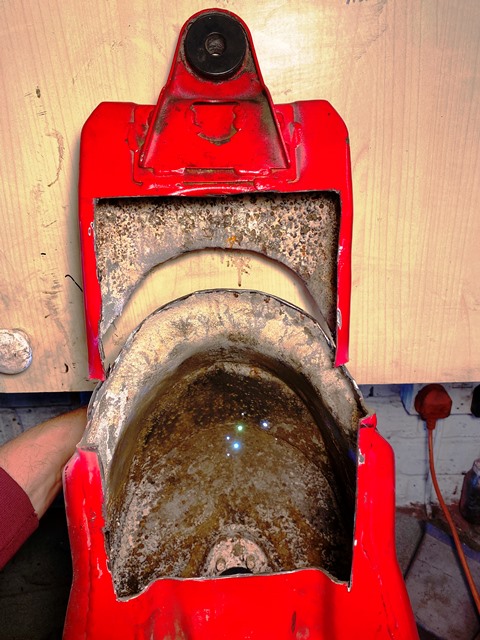
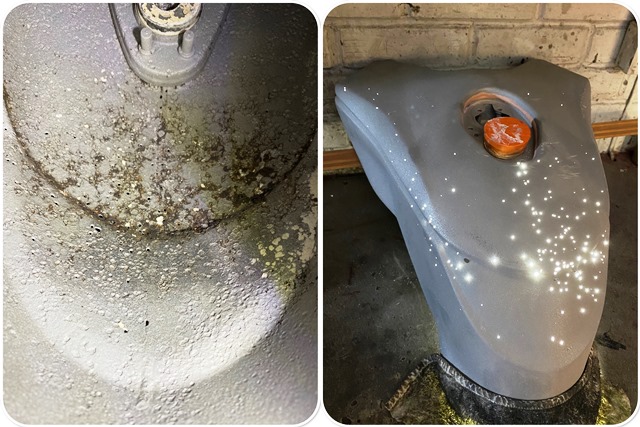
On the last build I used a 999 tank which worked well, so I decided to try a shortened version on this build. I didn’t feel bad cutting this up as its so badly corroded, and it just goes to show what leaving a bike for a long period with ethanol based fuel in it does inside the tank. you can see from the light I am holding behind it that its actually perforated on the top! So its off to the blasters with it to see what state its in when it comes back…. I have a fall back, but its a perfect 999 tank, be a shame to cut it up... If the one comes back from the blasters and its too bad, I will probably use it to mock up, and see if I can find a dented one.
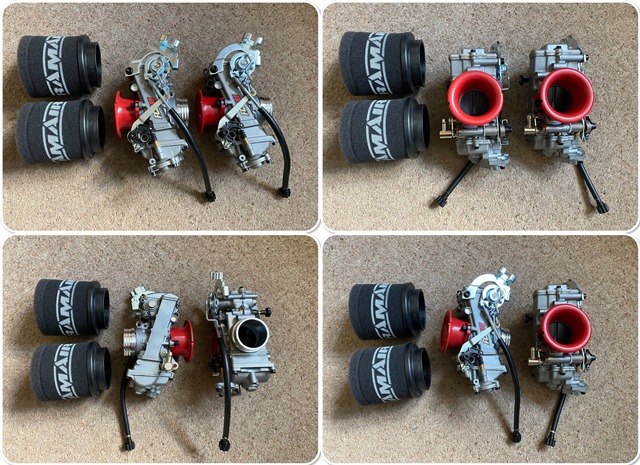
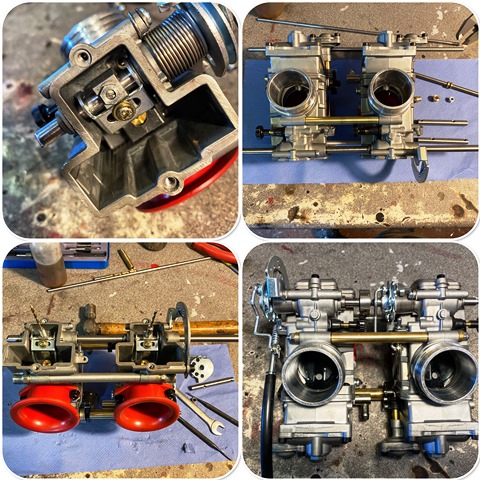
My FCR 41's came this morning
Re: Well you asked for another Ducati build
What a state that tank is in, that is dreadful
Love the new carbs
Chris.
Love the new carbs
Chris.
Re: Well you asked for another Ducati build
well the tank came back from the blasters… as you can see its full of pin holes, and for the first time in over 40 years of repairing tanks I feel I have been beaten! there is no point in trying to repair this! I put a light inside to shop the extent of the corrosion. look after your tanks guys!
Re: Well you asked for another Ducati build
That is bad.buzzer wrote: ↑Sat Jul 10, 2021 11:21 am well the tank came back from the blasters… as you can see its full of pin holes, and for the first time in over 40 years of repairing tanks I feel I have been beaten! there is no point in trying to repair this! I put a light inside to shop the extent of the corrosion. look after your tanks guys!
What surprises me is how the pin holes are at the top of the tank
You would expect them to be at the bottom if anywhere normally going on
Chris.
Re: Well you asked for another Ducati build
Was it found under the workshop dart board?
It's not falling off, it's an upgrade opportunity.
Re: Well you asked for another Ducati build
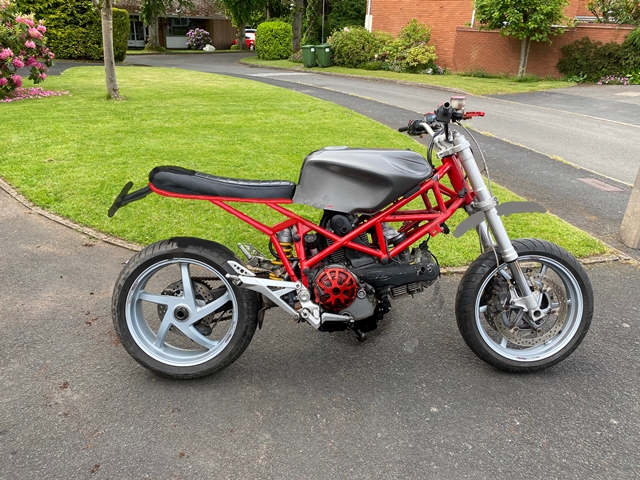
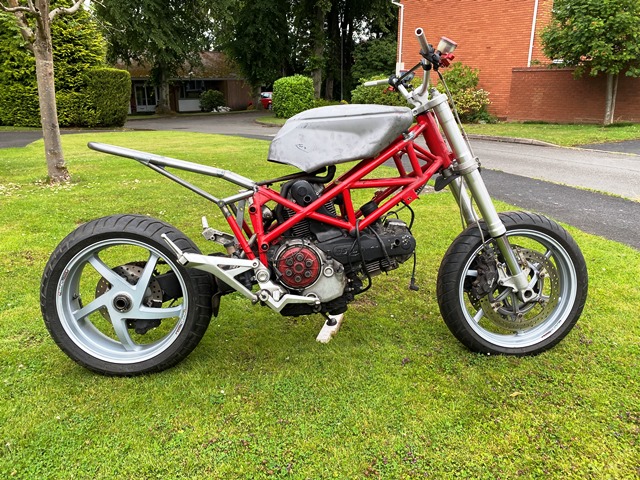
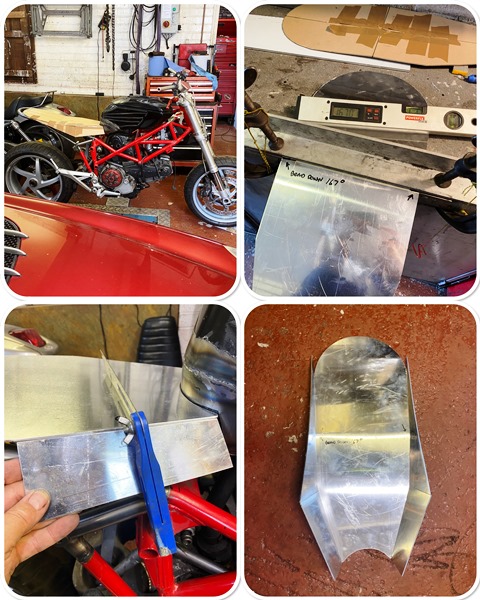
Started the frame modifications, just tacked up at the moment. On this build I want to keep the seat height right for me, but also allow for an under seat exhaust and a seat long enough for a pillion. I have replaced the shocker with a strut at the moment so I can see what things look like at max and min travel.
Re: Well you asked for another Ducati build
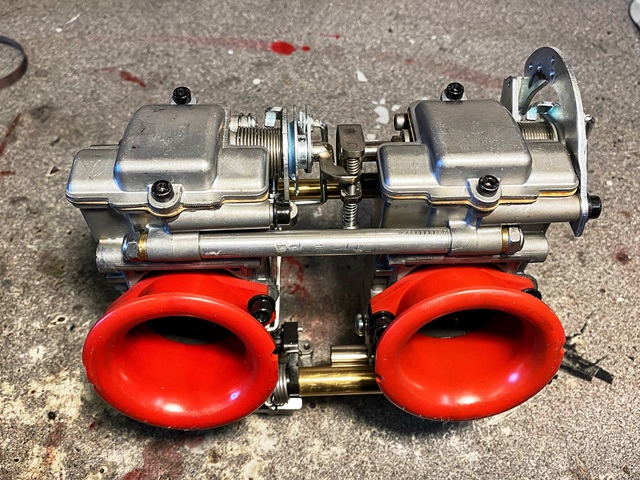
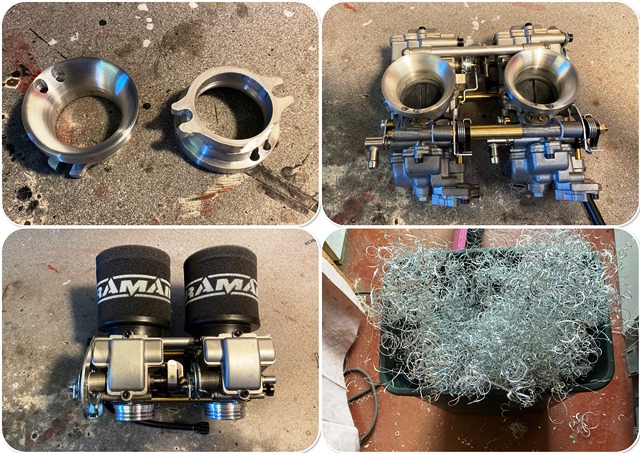
on my last build I run a pair of FCR carbs, it runs really well so for this build I chose the same carbs, but this time decided to bolt them together, and use a common split spindle to control the slides. this means I can use a single pull/ pull throttle arrangement, instead of the 4 cables system I used before. It also means I can run a TPS on the end of the spindle.
I thought it would be easy, I got some 8mm silver steel for the spindle, and a couple of new bearings with seals instead of the closed cup bearings… unfortunately the threads on the locating pins into the spindle is an unusual thread and I couldn’t find a tap… so I had to make some new pins as well… All done now though, including a linkage in the middle so I can balance the carbs .
I have also made some new velocity stacks to accommodate some foam filters… there is a few hours work in those! and a pile of swarf!
Short video to demonstrate how I hand turn the bellmouth on the stacks!
https://www.youtube.com/watch?v=Ot4jIKXcFuI
Re: Well you asked for another Ducati build
thats skilled craftsmanship there but good to see a hammer was used
AMcQ
Re: Well you asked for another Ducati build
Good job
It's funny/strange how the jobs you think won't take long, end up taking taking twice as long or more sometimes
Thanks for adding the video. That could have been me on a wood working lathe
Chris.
It's funny/strange how the jobs you think won't take long, end up taking taking twice as long or more sometimes
Thanks for adding the video. That could have been me on a wood working lathe
Chris.
Re: Well you asked for another Ducati build
yes, when I estimate a job these days I double it
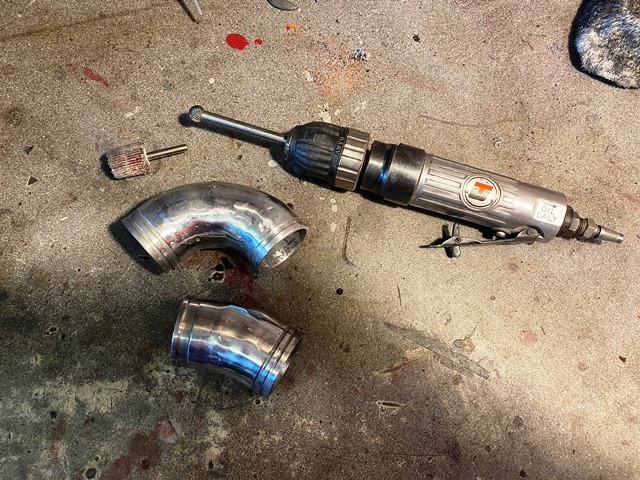
To mount the carbs I needed to make some alloy custom manifolds. I made these using the pie /lobster cut method. I set the chop saw to 7 degrees and cut off a selection of pieces and tape them together until I have the right shape… I then mark the position of each and weld them together, ensuring I have good penetration, which I then grind off inside to make them smooth. the long bur in the picture is a beast to use!
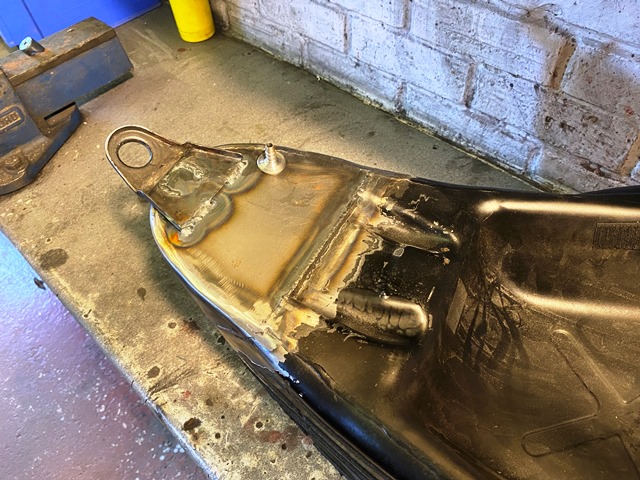
Onto the tank. I managed to source a very clean 999 tank, but of course this is too long for the build… so out came the angle grinder and off came the back! measure twice cut once!. I then fabricated a new back end and welded it into place. When welding stuff like this, everything needs to be clean for a good half inch either side of the weld, so I clean both sides with emery paper, and use to carb cleaner to ensure there is no grease… also wipe the welding rod with some as well…
Once the back/side piece was in place I planished the sides so the new piece had the same radius as the tank. then I welded the bottom in. to test for leaks I use two methods… some dye penetrant and developer, and if it passes this test, I do a final check with air at just 3 PSI and squirt it with soapy water.
To mount the carbs I needed to make some alloy custom manifolds. I made these using the pie /lobster cut method. I set the chop saw to 7 degrees and cut off a selection of pieces and tape them together until I have the right shape… I then mark the position of each and weld them together, ensuring I have good penetration, which I then grind off inside to make them smooth. the long bur in the picture is a beast to use!
Onto the tank. I managed to source a very clean 999 tank, but of course this is too long for the build… so out came the angle grinder and off came the back! measure twice cut once!. I then fabricated a new back end and welded it into place. When welding stuff like this, everything needs to be clean for a good half inch either side of the weld, so I clean both sides with emery paper, and use to carb cleaner to ensure there is no grease… also wipe the welding rod with some as well…
Once the back/side piece was in place I planished the sides so the new piece had the same radius as the tank. then I welded the bottom in. to test for leaks I use two methods… some dye penetrant and developer, and if it passes this test, I do a final check with air at just 3 PSI and squirt it with soapy water.
- lloydie
- Posts: 20927
- Joined: Mon Jan 17, 2011 11:16 pm
- Location: In the garage somewhere in Coventry
Re: Well you asked for another Ducati build
You have skills
Re: Well you asked for another Ducati build
Some great fabrication and welding skills gone into both of those jobs, a lot of hours put in I'm sure
Good to see what you have achieved
Chris.
Good to see what you have achieved
Chris.
Re: Well you asked for another Ducati build
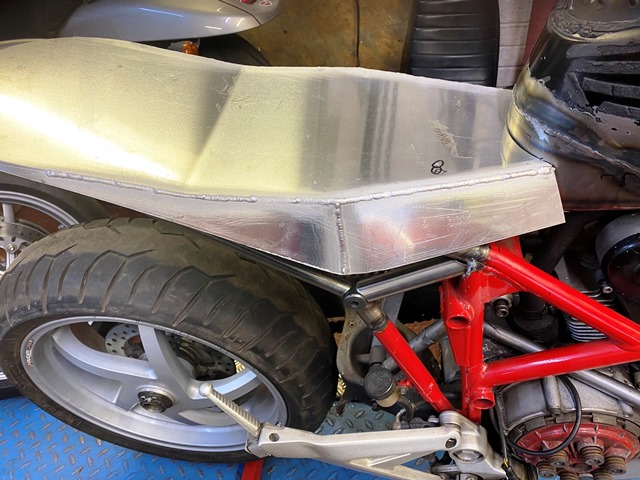
One of the most difficult things I find to make on a bike is the seat… this one i have used a different approach as (a) its a dual seat and (b) I am making the base out of aluminium. I mocked up what I wanted in cardboard first, and then transferred the patterns onto some 3mm aluminium. Then I seam welded it… It came out ok, be interesting to see what its like once its to the final shape and the foam and cover is on!
Re: Well you asked for another Ducati build
Your welding looks good
Chris.
Chris.